Summer Veggies…in a Jar?

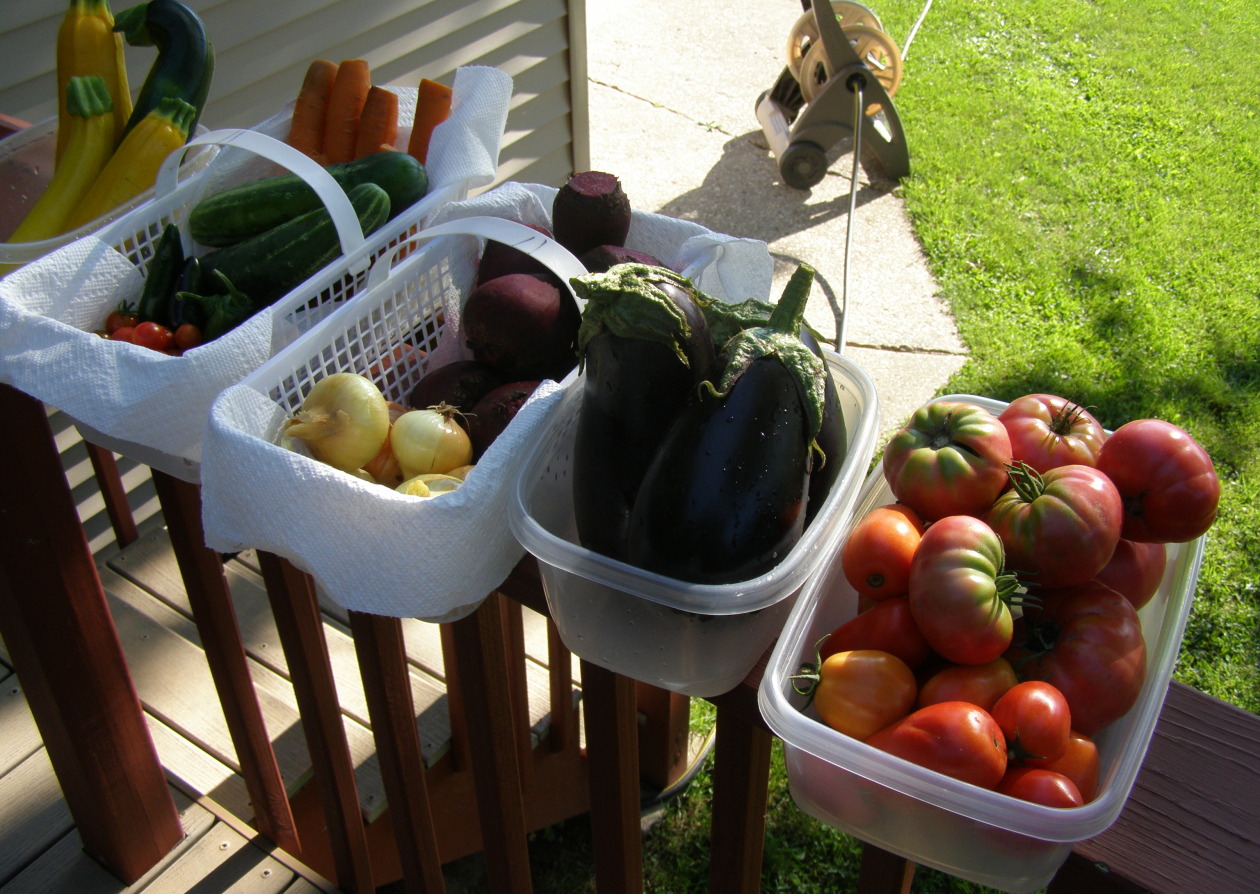
If winters are harsh and brutal here in Wisconsin than the summers are a delicious slice of heaven. When the fruits and vegetables begin to show up at the farmer’s market and my garden, I get very excited, and at the same time, a little overwhelmed.  So many vegetables…which do I choose, what do I make? I try not to go too crazy and stick with ingredients for recipes I know I will make. If you know me, I’m an intense cook on the weekends and not-so-much of one on the weekdays: What doesn’t get done this weekend will have to wait until the next.  This isn’t the best philosophy, but with all of the OT at work and my exercise schedule at night, it doesn’t leave a whole lot of time for weekday cooking marathons. Remembering my “weekend only” habit helps me from over-buying. This weekend at the farmer’s market I just purchased the essentials for a good, early summer salad. Boy, I was not disappointed!

Have you been noticing salads in a mason jar.  I’ve been spotting it on Pinterest and the internet, but I didn’t get the purpose. I looked into it more closely, and it’s actually kind of neat for taking a salad to work. You put the dressing on the bottom, layer the harder vegetables from the bottom to the lettuce on top(I used a quart jar–it was plenty big enough). It makes for a “neat” salad experience; especially when you eat lunch at your desk.  You dump the jar into a bowl or onto a plate and you are all set to munch.

The first is dressing, carrots, cucumbers, roasted beets, avocado, asparagus, lettuce, kale and sprouts. 
That’s a salad in a jar
May I mention here, how easy it is to make your own salad dressing. I don’t buy salad dressings, and I haven’t for quite a while. I take 1/4 cup pickle or olive juice, another 1/4 cup apple cider vinegar, a dash of olive oil, a tablespoon of mustard, and a sprinkle of Bragg’s Sea Kelp seasoning, and I shake it up. Or add whatever you want in whatever quantities but be creative and healthy. 

Quick, Homemade Marinara, Roasted Veggies and Farro

I love marinara sauce.  My pasta, pizza, and eggplant parmesan usually have more sauce than anything else. When I received the news how good lycopene is for us and how it’s nutritionally better when the tomatoes are cooked, I became an even bigger marinara fan; lay it on and lay it on thick!

When we started growing tomatoes in the garden, I had the great idea of making my own pasta sauce. I painstakingly peeled, seeded and cooked-down the tomatoes. I thought it was going to be heavenly, but it was not.  Compared to the jars of pasta I was pulling off of the grocery store shelf, it was bland and tasteless. I didn’t make my own sauce for years after that episode but eventually I realized my disappointing sauce lacked the tablespoons of sugar and salt the commercial jars contained. Fast forward a “few” years, and here I am in my “abhorrence of anything salty” stage, and my DIY kitchen movement, and I wasn’t even making my own marinara. I rectified that with a recipe of marinara made with canned tomatoes in a slow cooker. It was darn good and a helluva a lot better than what I could buy in the store.  To be honest, the DIY came about from needing more control of what goes into my food.  Most everything made outside of my kitchen is too salty, too over-cooked(veggies)and just not as good as what I can make. The marinara is another example of this. I seek out the tastiest, healthiest, organic canned tomatoes along with other organic ingredients, and I have pasta sauce or pizza sauce quickly available either by whipping up a batch or pulling extras out of the freezer. With a good marinara in your fridge or freezer, you’ll have an array of options for dinner or lunch.

Chop large: 3 carrots and 1 large onion. Peel 6 cloves of garlic. 1 can 28 ozs of crushed tomatoes and 1.5 Tbls of olive oil. Throw the carrots, onions and garlic into the food processor and pulse until finely minced. Add oil to pressure cooker and heat on medium heat
Add the minced vegetables. Saute for four minutes. Add in the crushed tomatoes, mix and put on the pressure cooker lid.  Once it reaches pressure, cook for 45 minutes. 


Seriously, all it took was 15-20 minutes to prep and another 45 minutes to cook. Doesn’t that look good?

Marinara Sauce

I pulled this out of  the Vegetarian Times, January/February 2013 issue. This is the marinara used in the microwaved Eggplant Parmesan recipe from the Mod Squad Cooking Lab. I made a double batch so do not use the photos as a guide.

Ingredients:
1 large yellow onion, cut into large dice(2 cups)
3 medium carrots, cut into medium dice(1 cup)
6 garlic cloves, peeled
1.5 Tbls of olive oil
1 28-oz can crushed tomatoes, such as San Marzano or other high quality tomatoes

Directions:
1) Place onion, carrots, and garlic in bowl of food processor; pulse until finely minced.
2) Heat oil in pressure cooker over medium heat. Add minced vegetable mixture, and saute 4 minutes or until translucent.
3) Stir in crushed tomatoes, close pressure cooker, and bring to 15 psi over medium-high heat. Cook sauce 45 minutes in pressure cooker.
4) Depressurize cooker, and season sauce with salt, pepper, and additional olive oil(optional).

Roasted Vegetables

Position the oven racks top and bottom and heat the oven to 400 degrees F.

Chop vegetables of choice like-sized and coat with olive oil and whatever other seasoning you prefer.
Place veggies on a jelly-roll pan, lined with aluminum foil and spayed with olive oil. Do not crowd and keep harder veggies on one pan and softer veggies on another.

Roast veggies for 10 minutes then switch racks and shake the pans a little. roast for another 7 to 10 minutes until preferred doneness.

Farro

A grain loved by Italians and often found in many Tuscan dishes. The texture is firm, nutty and very different.

1 cup dry Farro/medium
4 quarts water

Bring water to a boil and add the Farro.  Boil for 15-20 minutes.  This is the pasta cooking method and works very well with this grain.

Marinara and roasted veggies on a bed of Farro. 

I Brought Hummus!

It’s what I offer to bring when I don’t want to worry if there will be any vegetarian offerings.  And, may I add, a lack of vegetarian options happens quite often here in WI.  I often take the chance of my healthy but delicious hummus having only but one or two spoonfuls taken out while the sour cream with bacon dip dish  is licked clean. Oh well,  so is the life of a vegetarian stuck in the land of brats.

I may take a large amount of my hummus back home, but the other guests have no idea what they missed.  I make a spicy black bean hummus that tastes so good with a good quality tortilla chip, but it looks a little nasty. Or my favorite is black eyed pea hummus that is so creamy and rich, I eat it by the spoonfuls. One of the many reasons I love hummus is because of it’s versatility: add any legume with tahini and you have a different hummus.

Why does my hummus taste so much better(yes, this is subjective) than the store-bought or your nearest deli?  Well, I am about to disclose my hummus making secrets to you.  So if you are a veg-head like me, or you are watching the calories you consume even at a party, follow my lead.  Surround the hummus with quality pita chips, chunks of pita bread, or vegetables, and you have yourself a delicious mini-meal in case your healthy or vegetarian/vegan options aren’t looking too promising.

I make hummus from organic dried beans(1 cup dry equals 2 1/2 Cups cooked).  It’s cost effective, and I control the sodium. Save yourself some time and soak the beans overnight or for eight hours. I soak them in filtered water in a large mixing bowl(don’t forget the beans expand) and the picture above are the beans post-soak. For convenience or time constraints, use canned but remember to rinse well.

This is where the pressure cooker comes in handy.  Chickpeas that would normally take an hour to hour and a half simmering on the stove-top, get done in fourteen minutes with a pressure cooker. Once you do a natural release, strain the beans, but be sure to save a cup of the cooking liquid. Set aside beans and liquid to cool.

Okay, you can’t use my pictures as a guide–I made a double recipe of hummus.  I always freeze the other recipe just in case I need hummus in a pinch.  Pull out the food processor and chop a clove of garlic.

Add the rest of the ingredients: 2.5 Cups chickpeas, 4 ozs roasted red peppers, 1.5 Tbls Tahini(ground sesame seeds), three Tbls lemon juice, 1 clove of garlic, 1/2 tsp ground cumin, 1/2 tsp cayenne pepper, 1/4 tsp salt.  Process for a minute, and here is where my secret comes in, slowly add a Tbls or two or three of the cooking liquid. Process until desired consistency and move the hummus to the fridge. While the hummus is chillin, work on the pita chips.

Buy a pack of good pita bread; this is whole wheat pita. Cut into eighths and separate the thin and thicker sides of the bread.

Spray a lined cookie sheet with olive oil and sprinkle with salt.  Lay the bread down in a single layer and spray and salt the top.  Add a few twists of ground pepper here.  Bake at 400 F for 6-8 minutes. Watch them closely–they burn fast.  Leave them on the cookie sheets until cool and crisp. Bake the thin sides first and the thicker in the next batch.  The thicker sides will need  a minute more.

Spicy Roasted Red Pepper Hummus

Ingredients

 1  Cup dry chickpeas, rinsed and soaked overnight. Or a 15 oz can of chickpeas(well-drained)
 1 4 oz jar of roasted peppers
 3 tablespoons lemon juice
 1 1/2 tablespoons tahini
 1 clove garlic
 1/2 teaspoon ground cumin
 1/2 teaspoon cayenne pepper
 1/4 teaspoon salt

Instructions

1.Add the soaked chickpeas to the pressure cooker with 8-10 Cups of water. Pressure cook for 12-14 minutes with a natural release.
2.In an electric blender or food processor, puree the chickpeas, red peppers, lemon juice, tahini, garlic, cumin, cayenne, and salt. Process, using long pulses, until the mixture is fairly smooth, and slightly fluffy. Make sure to scrape the mixture off the sides of the food processor or blender in between pulses. Transfer to a serving bowl and refrigerate for at least 1 hour. (The hummus can be made up to 3 days ahead and refrigerated. Return to room temperature before serving.)

Pita Chips

INGREDIENTS:

4-8 pita bread pockets
olive oil spray
salt 

pepper

DIRECTIONS:
1. Preheat oven to 400 degrees F (200 degrees C).
2. Cut each pita bread into 8 triangles. Place triangles on lined cookie sheet.
3.Spray pan and sprinkle with salt. Add bread to the pan and spray with olive oil. Sprinkle more salt and pepper on top.
4. Bake in the preheated oven for about 7 minutes, or until lightly browned and crispy. Watch carefully, as they tend to burn easily!

I brought hummus!

It’s Rhubarb Time!!

A pathetic looking perennial growing underneath our dryer vent(a duh moment when we planted it years and years ago), and now accessible to vacuums with feathers, it looks even worse than previous years. Rhubarb grows like a weed here in WI, and it is for this very reason, I refuse to pay for it.  Someone must have some stalks they would be grateful to part with. t Within three days, my father-in-law dropped off trimmed, gorgeous stalks of rhubarb weighing in around 5 lbs. I couldn’t thank him enough.

Rhubarb is certainly a sign spring has sprung.  It was green and growing while there was still snow on the ground, so it’s a very tough plant.  It’s used like a fruit in pies and cobblers, but interestingly, it’s a vegetable.
I can honestly say it’s the only vegetable I add sugar to; one cup sugar for every 1.5 lbs of diced rhubarb(adjust the sugar if a sweet fruit is added). It reminds me of a cross between celery, because of the strands, and cranberries, due to the tartness and needing sugar. So if you are lucky enough, and a neighbor bestows you with a bunch of rhubarb, strip the stalks of their poisonous leaves, and cook or bake it  into something delicious! The simplicity of this “vegetable” is perfect for busy spring.

Dicing the 5 lbs of rhubarb. Yes, I’ll be freezing some of the compote.

Diced stalks with sprinkled sugar. I used cane sugar so it’s a little brown.

The rhubarb cooked down.

Some of my fresh yogurt, rhubarb compote, and dark chocolate.  I am seeing adding this to waffles, pancakes, biscuits, and sponge cake.

Rhubarb Compote

Ingredients:

-1.5 to 1.75 lbs of rhubarb, cleaned and diced to 3/4 inch pieces(about six cups).
-1 cup sugar

Instructions:

Trim ends of stalks and cut into 3/4 inch pieces. Peel away any tough skins.  Stir together rhubarb and sugar in a large saucepan (off heat); let stand until rhubarb releases some liquid, about 10-20 minutes.

Bring rhubarb mixture to a boil over medium-high heat, stirring occasionally. Reduce heat; simmer, stirring occasionally, until rhubarb has broken down but some whole pieces remain, about 5 minutes. Remove from heat.

Cool thoroughly.

Travel Sustenance

Travel is tough for a healthy foodie like myself.  I can usually find something I’ll eat in the airport, but once I’m on the plane, not so much.  The latest airline we booked with didn’t even ask if there were any diet restrictions. This doesn’t bode well for this sworn health-nut, veg-head.

To prepare for my, “turn the nose up and give the tray back to the airline attendant,” I’m going to bring TSA friendly snacks on board with me.  No, I am not buying those over-priced, fructose laden snacks they have on the concourse;rather, I’m making myself some healthy snacks. So if I get hungry on the first leg of our flight(8.5 hours), I’ll be ready with healthy alternatives.  I have been thinking and planning these snacks since I purchased tickets last summer from a cut-rate airline. I’ll have my bagged snacks, a couple of bananas, and a large bottle of water. With my Kindle Fire in one hand and ear plugs jammed into my ears, I’m ready for a smooth flight across the Atlantic.

From left to right: Dehydrated Chickpeas, Deviled Chex Mix, No-Bake Peanut Butter Granola Bars, and No-Bake Energy Balls.

Dehydrated Chickpeas

I did a search for various directions and recipes, and I came up with my own concoction.  I re-hydrated chickpeas in the pressure cooker, and while they were still warm, I sprinkled with apple cider vinegar, sea salt, and cracked pepper.  I then dried them in the dehydrator for 12-14 hours. This will be the protein I am sorely lacking with my snacks.

Deviled Chex Mix

I pulled this recipe off of one of the Chex boxes. Interestingly enough, when I checked this recipe on the Betty Crocker website, they upped the oil from three tablespoons to a 1/3 of a cup(whaaat?).  I’m sticking with the three tablespoons. I reduced the sugar down to one tablespoon to keep the mess at a minimum.

Ingredients

3
tablespoon sugar(I used just one tablespoon)
1
tablespoon paprika
1
teaspoon ground chili powder
1
teaspoon curry powder
1
teaspoon ground cumin
1
teaspoon ground coriander
1
teaspoon ground black pepper
1
teaspoon salt
1/3
cup vegetable oil(I used three tablespoons coconut oil)
1
cup assorted unsalted nuts, such as peanuts, almonds, walnuts, pecans
3
cups Rice Chex® cereal
3
cups Corn Chex® cereal
3
cups Wheat Chex® cereal
1
cup miniature cheese crackers
1
cup miniature pretzels).


  • 1In small bowl, mix sugar, paprika, chili powder, curry powder, cumin, coriander, pepper and salt; set aside.
  • 2In large microwavable bowl, combine oil and nuts. Microwave uncovered on High about 2 minutes or until fragrant. Stir in cereals, crackers and pretzels until evenly coated. Stir in sugar mixture until evenly coated.
  • 3Microwave uncovered on High 2 to 3 minutes, stirring every minute, until mixture is thoroughly heated. Spread on paper towels to cool. Store in airtight container.
5 Ingredient Granola Bars

I pulled these off of another blog, http://minimalistbaker.com/healthy-5-ingredient-granola-bars/  I traded out the honey for maple syrup, and I shall never eat another store bought granola bar again. 

 I had to work in peanut butter since I probably won’t see it for awhile. Europeans love their Nutella, and the hubby and I learned that the hard way in Barcelona.  We were suffering from jet lag, when we woke-up with hunger pains at 1:00 am. We ventured downstairs to the hotel clerk who looked at us like we were…crazy. We asked him for a place to get food, and he informed us, “Just drinks at this hour.”  Hubby and I were not about to give-up.  We walked up and down a few streets until we happened upon a convenience store, of sorts. We collected a loaf of bread, bananas, nuts and Nutella? No, we scoured that place in search of peanut butter and none could be found.  We ate Nutella instead, and it’s not remotely the same.

INGREDIENTS
1 cup packed dates, pitted (deglet nour or medjool)*
1/4 cup honey (or sub maple syrup or agave for vegan option)
1/4 cup creamy salted natural peanut butter or almond butter
1 cup roasted unsalted almonds, loosely chopped
1 1/2 cups rolled oats (gluten free for GF eaters)
optional additions: chocolate chips, dried fruit, nuts, banana chips, vanilla, etc.
INSTRUCTIONS
1. Process dates in a food processor until small bits remain (about 1 minute). It should form a “dough” like consistency. (mine rolled into a ball)
2. Optional step: Toast your oats in a 350 degree oven for 15-ish minutes or until slightly golden brown. Otherwise, leave them raw – I just prefer
the toasted flavor.
3. Place oats, almonds and dates in a bowl – set aside.
4. Warm honey and peanut butter in a small saucepan over low heat. Stir and pour over oat mixture and then mix, breaking up the dates to
disperse throughout.
5. Once thoroughly mixed, transfer to an 8×8 dish or other small pan lined with plastic wrap or parchment paper so they lift out easily. (A loaf
pan might work, but will yield thicker bars.)
6. Press down until uniformly flattened. Cover with parchment or plastic wrap, and let set in fridge or freezer for 15-20 minutes to harden.
7. Remove bars from pan and chop into 10 even bars. Store in an airtight container for up to a few days. I kept mine in the freezer to keep them
extra fresh, but it isn’t necessary.
NOTES
*If your dates don’t feel sticky and moist, soak them in water for 10 minutes then drain before processing. This will ultimately help hold the bars
together better.

No Bake Energy Balls

I pulled these off of Facebook a year ago or more.  Easy to whip-up and great to pop a few before your workout.

Ingredients
1 cup dry oatmeal
2/3 cup toasted coconut flakes
1/2 cup peanut butter
1/2 cup ground flaxseed or wheat germ
1/2 cup chocolate chips (optional)
1/3 cup of honey or maple syrup
1 tablespoon chia seeds (optional)
1 tsp vanilla extract

 
InstructionsMix all together is large bowl. Let chill 1/2 hr in fridge. Then make into 1 inch. balls.
There they are, snacks that are relatively mess free, figure friendly and health friendly.  And all four are easy and take very little time(use canned chickpeas for even less hassle). What doesn’t gets eaten on the plane will be handy for snacks in our hotel rooms.


Italian Breakfast Bread

I know I’m late to post this for Easter so let’s just make this bread in celebration of spring and the new life that blooms all around us.

There are a lot of breads I am excited to make, but this one caught my eye on Pinterest. It wasn’t hot cross buns or the traditional Easter breads with little pockets meant for the dyed eggs. No, this had dried fruit and looked delicious in it’s simplicity.  In case you haven’t noticed, I look for traditions from other cultures, and I do a little testing, complexity, healthy(sometimes), and taste, and I decide from those criteria if it stays or goes.  This is a delicious sweet bread that is very reminiscent of a dressed-down stollen. The eggs make it a tasty egg-bread and the dried fruit gives it sweet/tart flavor. No added fats like butter or oil weigh it down, so I was thrilled with that and didn’t feel guilty when I smeared a little cream cheese on it.

Italian Breakfast Bread

Start out with  one cup of warm water(110-112 Fahrenheit), 2 Tablespoons white sugar and 2 1/2 teaspoons of active yeast. I activated the yeast in a pyrex measuring cup.

While the yeast, sugar and water worked it’s wonders, I got a half cup of yogurt, a teaspoon of vanilla, two eggs and 1 tablespoon of lemon zest, and a teaspoon of salt ready for the mixer.

With the paddle attachment, add all ingredients above(including the yeast) and mix thoroughly. Change over to the dough hook and start adding all-purpose flour, a 1/2 cup at a time, and waiting until fully combined until adding more. Add enough flour to make a non-sticky, solid ball.  It took me around 5 1/2 cups.

Spray a large bowl and place the dough into it, making sure to rub the ball of dough into the oil. Cover with a towel and let rise one hour or more. While the dough is rising, prepare the dried fruit.  I added diced raisins, cranberries and apricots.

Punch it down and roll it onto a floured surface.  Create a loaf with a seam and add some of the dried fruit. Once you combine the fruit into the dough, make another seam and repeat.

Once all of the dried fruit is hiding, place the dough into a pan for baking(a 9×9 cake pan is not large enough-trust me). Place the dough in the fridge for several hours or overnight. My dough rose within three hours. Take it out and let it warm up at room temperature for an hour.  Bake in a 350 Fahrenheit oven for 45 minutes.

This was an easy and wonderful dough to work with.  It’s time consuming(as all yeast breads are) but not labor intensive. The taste was mildly sweet but not overpowering like stollen can be.  I’ll keep this recipe in my recipe box–absolutely.  Now onto Brioche.

Italian Sweet Breakfast Bread
http://www.apricosa.com/2012/03/italian-breakfast-bread.html 
Makes one 10-inch round loaf

2 ½ tsp. active dry yeast
1 cup warm water
2 Tbs. white sugar
2 eggs
½ cup nonfat plain yogurt
1 teaspoon vanilla extract
1 tablespoon grated lemon zest
1 teaspoon salt
4-5 cups unbleached all-purpose flour
¼ cup dried cranberries
¼ cup golden raisins
¼ cup chopped candied lemon peel

In the bowl of a large stand mixer, combine yeast, water and sugar. Cover and let stand 10 minutes, or until foamy.  (If yeast does not foam, discard and begin again with new yeast.)  Add eggs, yogurt, vanilla, lemon zest, and salt. Mix well. With the paddle attachment of the stand mixer, stir in flour ½ cup at a time, scraping sides of bowl down, until dough starts to form (after adding ~3 cups).  Switch to the dough hook and continue adding flour (about 1 more cup) until dough forms a manageable mass.  Continue kneading for 5 to 10 minutes, adding flour as necessary, until dough is soft and pliable, but not sticky (up to 5 cups).
Form dough into a large ball and coat all sides with vegetable oil.  (I like to lift the dough out of the bowl, pour a tablespoon of oil in, then turn the dough around in the oil until the dough, as well as the sides of the bowl, are greased.)  Let dough rise in a warm place until doubled, about 1 hour.
Punch dough down in bowl, transfer to a floured surface, and knead in the dried fruits.  The goal is to get the fruits uniformly throughout the dough without any of them actually bursting out into the exterior of the bread (as they will burn if exposed in the oven).
Form dough into a ball and place in a greased 9-10 inch round pan.  Cover loosely with plastic wrap and cool rise in the refrigerator overnight.
The next morning, remove pan from refrigerator and let come to room temperature (about 1 hour before baking).  Bake in a preheated oven at 350 F  for 45 minutes, or until loaf is golden brown and a toothpick inserted in the center comes out clean.  (If bread browns too quickly on top, cover with a piece of foil.)

Leon and me at the Milwaukee Domes

It is with a heavy heart I announce the passing of my brother, Leon. He passed on April 2nd from pancreatic cancer at the young age of 55. To the man who loved to eat, this blog entry and loaf of bread are dedicated to you.

Whole Wheat Beer & Honey Bread Machine Rolls

Coming back to my blog feels great.  Only the reasons to keep me away this long are: My brother dying of pancreatic cancer, and I have had a killer head/chest cold.

This entry may be interpreted as cheating, and yes, it kind of is.  But sometimes even the DIY queen in the kitchen needs a shortcut. I found this recipe a year ago, and I make a batch every weekend.  I throw the ingredients into the bread maker, and I don’t think about rolls for an hour and a half. Truth be told: I just like opening a beer in the am on a Sunday and drinking the 6ozs of the remaining brew. Oh, and I get a mini panic attack when I don’t have a delicious bun to throw two of my girls’ eggs on.  I toast the bun, slather it with mustard or tapenade, half an avocado and over-easy eggs. The sandwich is open-faced, so I can justify an extra scoop of tapenade or two.

Gather the ingredients: Bread flour, whole wheat flour, instant yeast, beer, water honey, oil, and salt.

Combine 6ozs beer, 1/4 cup water, 1/8 cup honey, two tablespoons of oil(I use canola)and heat for 1 minute in microwave or until 110-115 Fahrenheit. Add salt and add to bread pan.

Add 1 and 1/2 cups of bread and whole wheat flours and two teaspoons of yeast. Start bread machine on roll option.

Take dough out of machine when finished, punch down and knead a few times. I weigh the dough to anticipate the size of the rolls.

Break dough off and form into rolls  I weigh dough to make sure it’s 3-3.25 ozs(I’m making sandwich rolls here). I make 8 for sandwich rolls but for traditional rolls, the yield should be 12. Make sure to grease cake pan or a 13×9 pan.

I put the oven light on for warmth, and I cover with a clean kitchen towel for the final rise. When you are baking with whole wheat flour, it needs the extra heat to rise.

Bake at 350 Fahrenheit for 25 minutes. Remove from pan within a few minutes and place on a wire rack to cool completely. I store the rolls in the fridge and they last about a week.

Here’s a toasted roll with fixings I described above. This makes for a delicious breakfast, lunch or dinner.


Whole Wheat Beer & Honey Bread Machine Rolls

Ingredients: 

1 1/2 cups whole wheat flour
1 1/2 cups bread flour
1 1/2 teaspoons active dry yeast
1/8 cup honey
3/4 teaspoon salt
1/4 cup water
6 ounces beer (flat)
2 tablespoons oil


Directions:

1 Mix honey,salt,water,oil and beer in small mixing bowl , heat in microwave 1 minute, stir until well blended.

2 Place honey mix with remaining ingredients into bread machine according to manufacturers directions.

3 Select dough cycle.

4 When cycle is complete, shape dough into rolls.

5 Place in lightly greased pans. ( I like to use pie pans instead of a baking sheet so rolls are wedged next to each other).

6 Cover rolls with a damp cloth and let rise about 30-40 minute or until doubled in size. When using whole wheat flour I like to set pans on an electric heating pad set on medium. (That makes the whole wheat flour rise faster,If you don’t use the heating pad, not to worry, you might need more rise time.).

7 When rolls have doubled, bake in a preheated 350 degree oven 15-20 min , brush tops with melted butter

Recipe from:
 http://www.food.com/recipe/whole-wheat-beer-honey-bread-machine-rolls-326219

Homemade Whole-Grain Mustard

I’m German…Austrian or something.  I recently found out, after many years of labeling my heritage as German, my ancestors actually hailed from Austria and Luxembourg.  It makes sense since after visiting both Germany and Austria, I resemble more like the Austrian peoples performing at the Mai Fest in Salzburg.

Mai Fest celebration in Salzburg

A delicious meal enjoyed at the Augustiner keller in Salzburg

Ok, so I am indeed Austrian and Irish instead of German and Irish. Let’s just forget the fact that Hitler came from Austria…forgotten. Whatever I am, I love mustard.  I learned two(three)words in German while in Bavaria and they are: bretzeln, senf and spargel. Translated it is: pretzels, mustard and white asparagus. The pretzel and mustard was my go-to food in Bavaria.  Not a lot of choices sometimes for a vegetarian.  Trust me, I never went hungry; the food and the beer were always delicious. Oh, and I learned the German word word for asparagus because it was in season and all of the biergartens featured it.  

Making my own mustard never crossed my mind until I read Cook’s Illustrated DIY cookbook.  I was paging through it, and I stopped at the Stone Ground Mustard recipe.  It was so insanely simple; I wondered why I hadn’t done this years ago.  It has a bold taste and a texture required from my mustards.

Making Whole-Grain Mustard

Combine the apple cider vinegar, yellow mustard seeds, brown mustard seeds, and beer. Stir and cover with plastic wrap. Leave at room temperature for up to two days.

After leaving at room temperature for the desired amount of time, pour the seed mixture into a food processor. Add salt and brown sugar and process for one minute. Transfer mustard to jar and leave sit at room temperature for 1 to 2 days.  This is where the heat of the mustard is decided so do the 1 day if you like it mild.

Here is the finished mustard with some of my homemade pretzel bites(may be a future blog item after a little tweaking).

Recipe for Whole Grain Mustard

Ingredients
1/2 cup cider vinegar
1/4 cup yellow mustard seeds
1/4 cup brown mustard seeds
1/4 cup beer
2 teaspoons packed light brown sugar
3/4 teaspoon salt

Instructions
1) Combine vinegar, mustard seeds, and beer in medium bowl. Cover with plastic wrap and let stand at room temperature for at least 8 hours or up to 2 days.
2) Process soaked mustard seeds with sugar and salt in food processor until coarsely ground and thickened, about 1 minute, scraping down bowl as needed.
3) Transfer mustard to jar with tight-fitting lid and let stand at room temperature until it achieves desired spiciness, 1 to 2 days. Transfer to refrigerator. Mustard can be refrigerated for up to 3 months.

Ok, while this mustard is a breeze to make, dijon–not so much.  I have tried two different recipes and both turned out extremely bitter. If you know of a fail-proof dijon recipe, please share it. 

Happy St. Patrick’s Day-Let’s bake some bread

I wanted to publish an entry in celebration of St. Patrick’s Day coming up soon.  I’m a little Irish but not enough Irish to have grown up with recipes handed down from my mother or grandmother.  I can’t remember my mother cooking or baking anything remotely Irish except for maybe boiled potatoes.  I’ve scoured my cookbooks looking for a recipe resembling Irish fare, and I came up empty handed.  I found some cookies made with whiskey but that’s as close as I came. When I voiced my aggravation out-loud, my husband quickly suggested a bread his mother had made for him.  He was so anxious for me to make it, he forwarded a recipe from the internet to me. Ok, dear, I got the hint. Sometimes it takes a pan to fall off its hook and hit me on head to make something obvious, and this is a perfect example.

Whenever I am unfamiliar with a dish, I consult Cook’s Illustrated for a little direction. And of course, they did not disappoint. I have never had Irish Soda Bread, so I have really no idea what’s good and what is traditional, but after testing this recipe, I’m not sure I care.  So much quicker than a bread with yeast, and the taste was of a hearty wheat; crisp on the inside and moist on the inside. With so few ingredients, I never thought this bread was going to have the complexity of taste I require but here it is.

So the bread takes an hour to make(including baking time), and it tastes great; I guess this means I won’t be baking this bread just for St. Patrick’s Day.

Brown Irish Soda Bread

In a large mixing bowl combine: all-purpose flour, whole wheat flour, cake flour, wheat germ(I used ground flax instead), cream of tartar, baking soda, salt and sugar.

Incorporate the butter into the flour mixture–I used my hands for the heat to help work in the butter.  Make a well in the middle and pour in the buttermilk.  Work the flour and buttermilk(important to use buttermilk and not just regular milk) until fully incorporated. Cook’s recommends a cup and a half of buttermilk, but I added a quarter cup more due to the dryness.

Form into a round loaf and add to the cast iron skillet. Take a sharp knife and cut a shallow “X” on the top(Irish did this to ward of the devil and protect the household).  Bake in a 400 degree oven for 40-45 minutes.

    The bread right out of the oven and drizzled with butter.

   Here’s my dinner: sliced Irish Soda Bread with tapenadeTapenade Blog Entry and eggs from my girls. 


The recipe below is taken from  Cooks Illustrated.

Brown Irish Soda Bread

MAKES 1 LOAF

If you do not have a cast iron pan the bread can be baked on a baking sheet although the crust won’t be quite as crunchy. Soda bread is best eaten on the day it is baked but does keep well covered and stored at room temperature for a couple of days after which time it will become dry.

INGREDIENTS

  • 1 1/2cups all-purpose flour
  • 1/2cup cake flour
  • 1 1/2cups whole-wheat flour
  • 1/2cup toasted wheat germ
  • 1 1/2teaspoons cream of tartar
  • 1 1/2teaspoons baking soda
  • 1 1/2teaspoons salt
  • 3tablespoons sugar
  • 2tablespoons unsalted butter, softened
  • 1 1/2cups low-fat buttermilk
  • 1tablespoon melted butter, optional

INSTRUCTIONS

  1. 1. Heat the oven to 400 degrees and adjust a rack to the center position. Place the flours, wheat germ, cream of tartar, soda, salt, and sugar in a large mixing bowl. Add the butter and rub it into the flour using your fingers until it is completely incorporated and the mixture resembles coarse crumbs. Make a well in the center and add the buttermilk. Work the liquid into the flour mixture using a fork until the dough comes together in large clumps. Turn the dough onto a work surface and knead briefly until the loose flour is just moistened. The dough will be sticky and you may add a small amount of flour as you knead. The dough will still be scrappy and uneven.
    2. Form the dough into a round about 6 to 7 inches in diameter and place in a cast iron skillet. Score a deep cross on top of the loaf and place in the heated oven. Bake until nicely browned and a tester comes out clean when inserted into the center of the loaf, about 40 to 45 minutes. Remove from oven and brush with a tablespoon of melted butter if desired. Cool for at least 30 minutes before slicing. Serve slightly warm or at room temperature.

Choco-Nut Oat Bars

Many, many years ago, when I had first moved out with my then boyfriend and now husband, I had the grand scheme of baking Christmas cookies.  I recruited a gal I worked with at the time to help me.  She was none too happy when she witnessed my scantily-clad-closet for a kitchen. I had no mixing bowls, measuring spoons, or even a gas oven with a working pilot light . I don’t recall what we baked, or if we were able to successfully bake even a batch of anything, but what did get ignited was my love for a certain cookie book.

The cause of my cookie escapade started with buying a recipe book from the grocery store. I was the ripe-old age of 20, and my first cookbook was about cookies.  This all makes sense given who I am now–a self-proclaimed cookie connoisseur. Those little disks of deliciousness call to me; especially if it has peanut butter and chocolate or any combination of chocolate and nuts. The mood will just hit, and I will pull out the necessary baking ingredients and whip up a batch or two. What’s not to love about cookies? They are easy to taste-test compared to a cake or pie and also extremely portable. I’ve made a pact with myself: I can only indulge in cookies if I have made them; no store-bought cookies.  The exception of course is girl scout cookies–I’m only human. The cookbook is simply called, Cookies  by Natalie Hartanov Haughton . I’ve used it to death since buying it in 1984, so I transferred the cookbook to a binder with plastic protectors.  It’s my go-to book when I’m looking to make a cookie or a bar.  But the one recipe I have made(and the stained, wrinkled page proves it)time and time again is a cookie creation called, Choco-Nut Oat Bars.  I have made those bars for countless bake sales, birthdays, and thank you gifts.  They whip up fast, and somehow I always have the ingredients on hand. I cannot stress how easily these come together; and the added bonus, they are delicious and flavorful.

I start out by roasting the nuts for 5-10 minutes on medium heat, stirring frequently. No burning the nuts-yuck.  After they have cooled, chop them.

Chop the unsweetened chocolate. Tip: If you chop nuts or chocolate on wax paper on your cutting board, you can just pick up the wax paper to transport the chopped item to the bowl.

Add the sweetened condensed milk to unsweetened chocolate and microwave on high for 30 seconds. Stir briskly.  Place back in microwave and repeat process.  It should just take a minute and a half or so to melt the chocolate completely.

Add the chopped nuts to chocolate mixture and stir to mix.  Set aside.

Throw 2 cups of flour, a half teaspoon of baking soda and a quarter teaspoon of salt into the flour. Set aside.

Blend 1 cup butter with a cup and a quarter of packed brown sugar. Add two teaspoons of vanilla extract and beat.

Add the flower mixture and combine. Add two and a half cups of old-fashioned oats and blend completely.

Take one half of dough mixture and add to a greased 13×9 pan(don’t go up the sides of the pan–you want a sandwich look). Add chocolate mixture(microwave for another 15-25 seconds if too stiff)and carefully spread evenly.  Pat remaining dough to chocolate layer. Bake for 25-30 minutes at 375F.

Isn’t that pretty? Let cool completely in pan and then cut into bars.

Choco-Nut Oat Bars

Ingredients:
1(14-oz) can sweetened condensed milk
2 oz unsweetened chocolate-chopped
1-1/2 chopped nuts(I roast the nuts before chopping)
1 cup butter, room temperature
1-1/4 cup packed brown sugar
2 teaspoons of vanilla extract
2 cups all-purpose flour
1/4 teaspoon salt
1/2 teaspoon baking soda
2-1/2 cups old-fashioned rolled oats

Directions:
Preheat oven to 375F. Grease a 13 x 9 baking pan.  *In top of a double boiler, combine sweetened condensed milk and chocolate. Heat over hot but not boiling water until melted and smooth, stirring constantly. Remove from heat. Stir in nuts; and set aside. In a medium bowl, beat together butter, brown sugar and vanilla until light and fluffy. Add flour, salt, and baking soda, blending thoroughly. Stir in oats, mixing until crumbly. Press half of oat mixture evenly in bottom of greased baking pan. Spread evenly with chocolate-nut mixture. Sprinkle with remaining oat mixture, pressing into chocolate. Bake 25-30 minutes or until golden brown. Cool in pan. Cut cooled cookies into bars. Makes 54.

*You can also cook the chocolate and sweetened condensed milk in the microwave.  Microwave on high for 30 seconds in a microwave safe bowl and stir. Microwave for another 30 seconds and stir again.  You may need another 15 seconds or so, depending how fine you chopped the chocolate. Be careful–chocolate burns easily.