Category Archives: Uncategorized

No-Bake Peanut Butter and Oat Bars

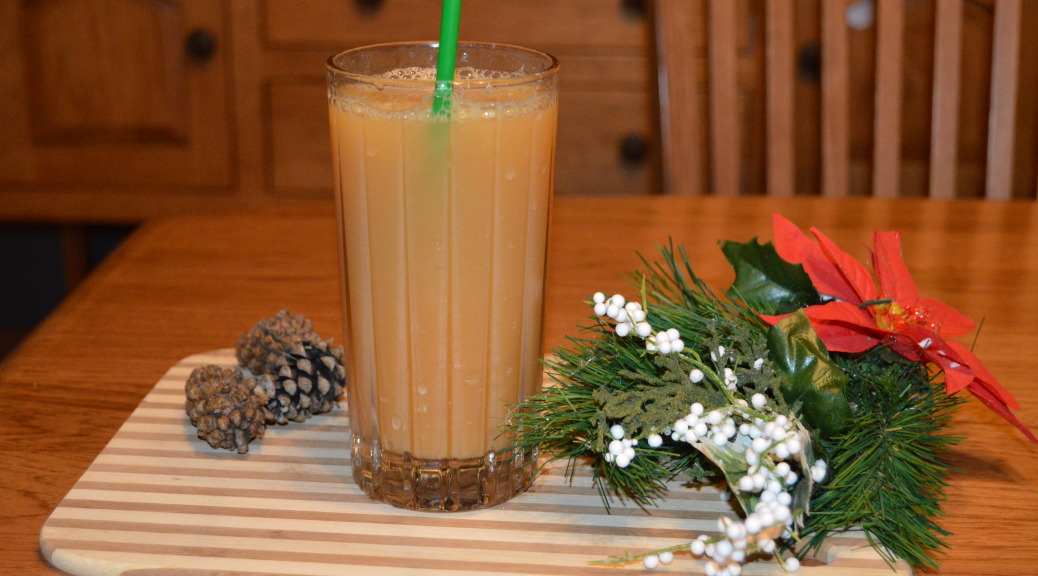
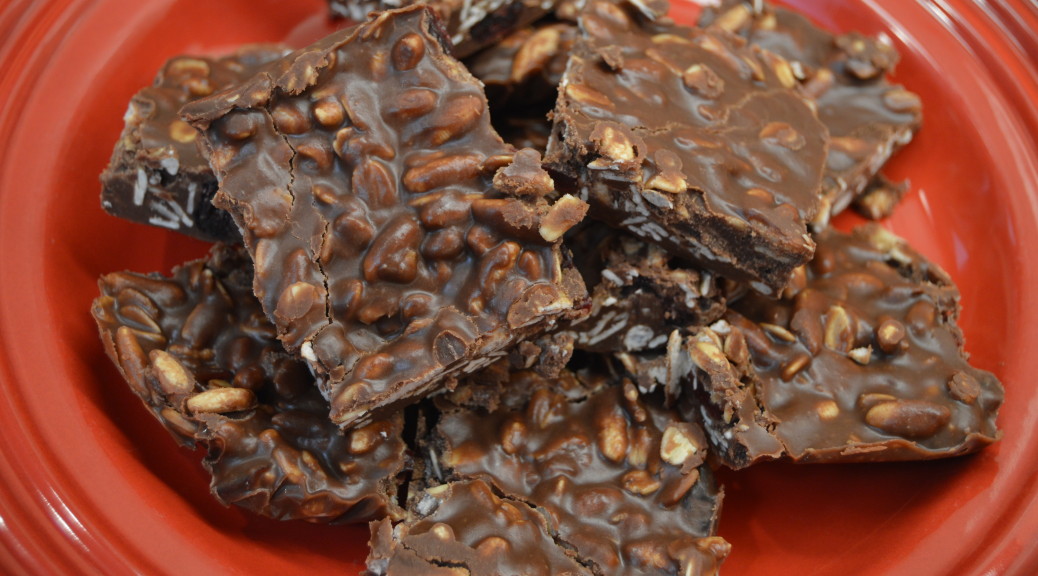
I spotted this recipe on both Facebook and Pinterest.  I rarely see a recipe I must make immediately, but this one I did.  It doesn’t hurt I had all of the ingredients on hand, and I love it is touted as “Clean Eating.” Yeah, maybe to some, but I think limiting your portions to one or two a day is a very good idea for the waistline.  And I definitely feel, anything you make yourself is better than something you had to peel the plastic off of.

There are many versions of this on Pinterest, so I’m going to give you my version.  I switched up a couple of the key ingredients, and  I split the oats with puffed rice.  I use 1/2 C maple syrup and half honey.  And since anything not considered dark chocolate is too sugary, I replaced the mini-chocolate chips with Ghirardelli Bittersweet chips.


IMG_0717

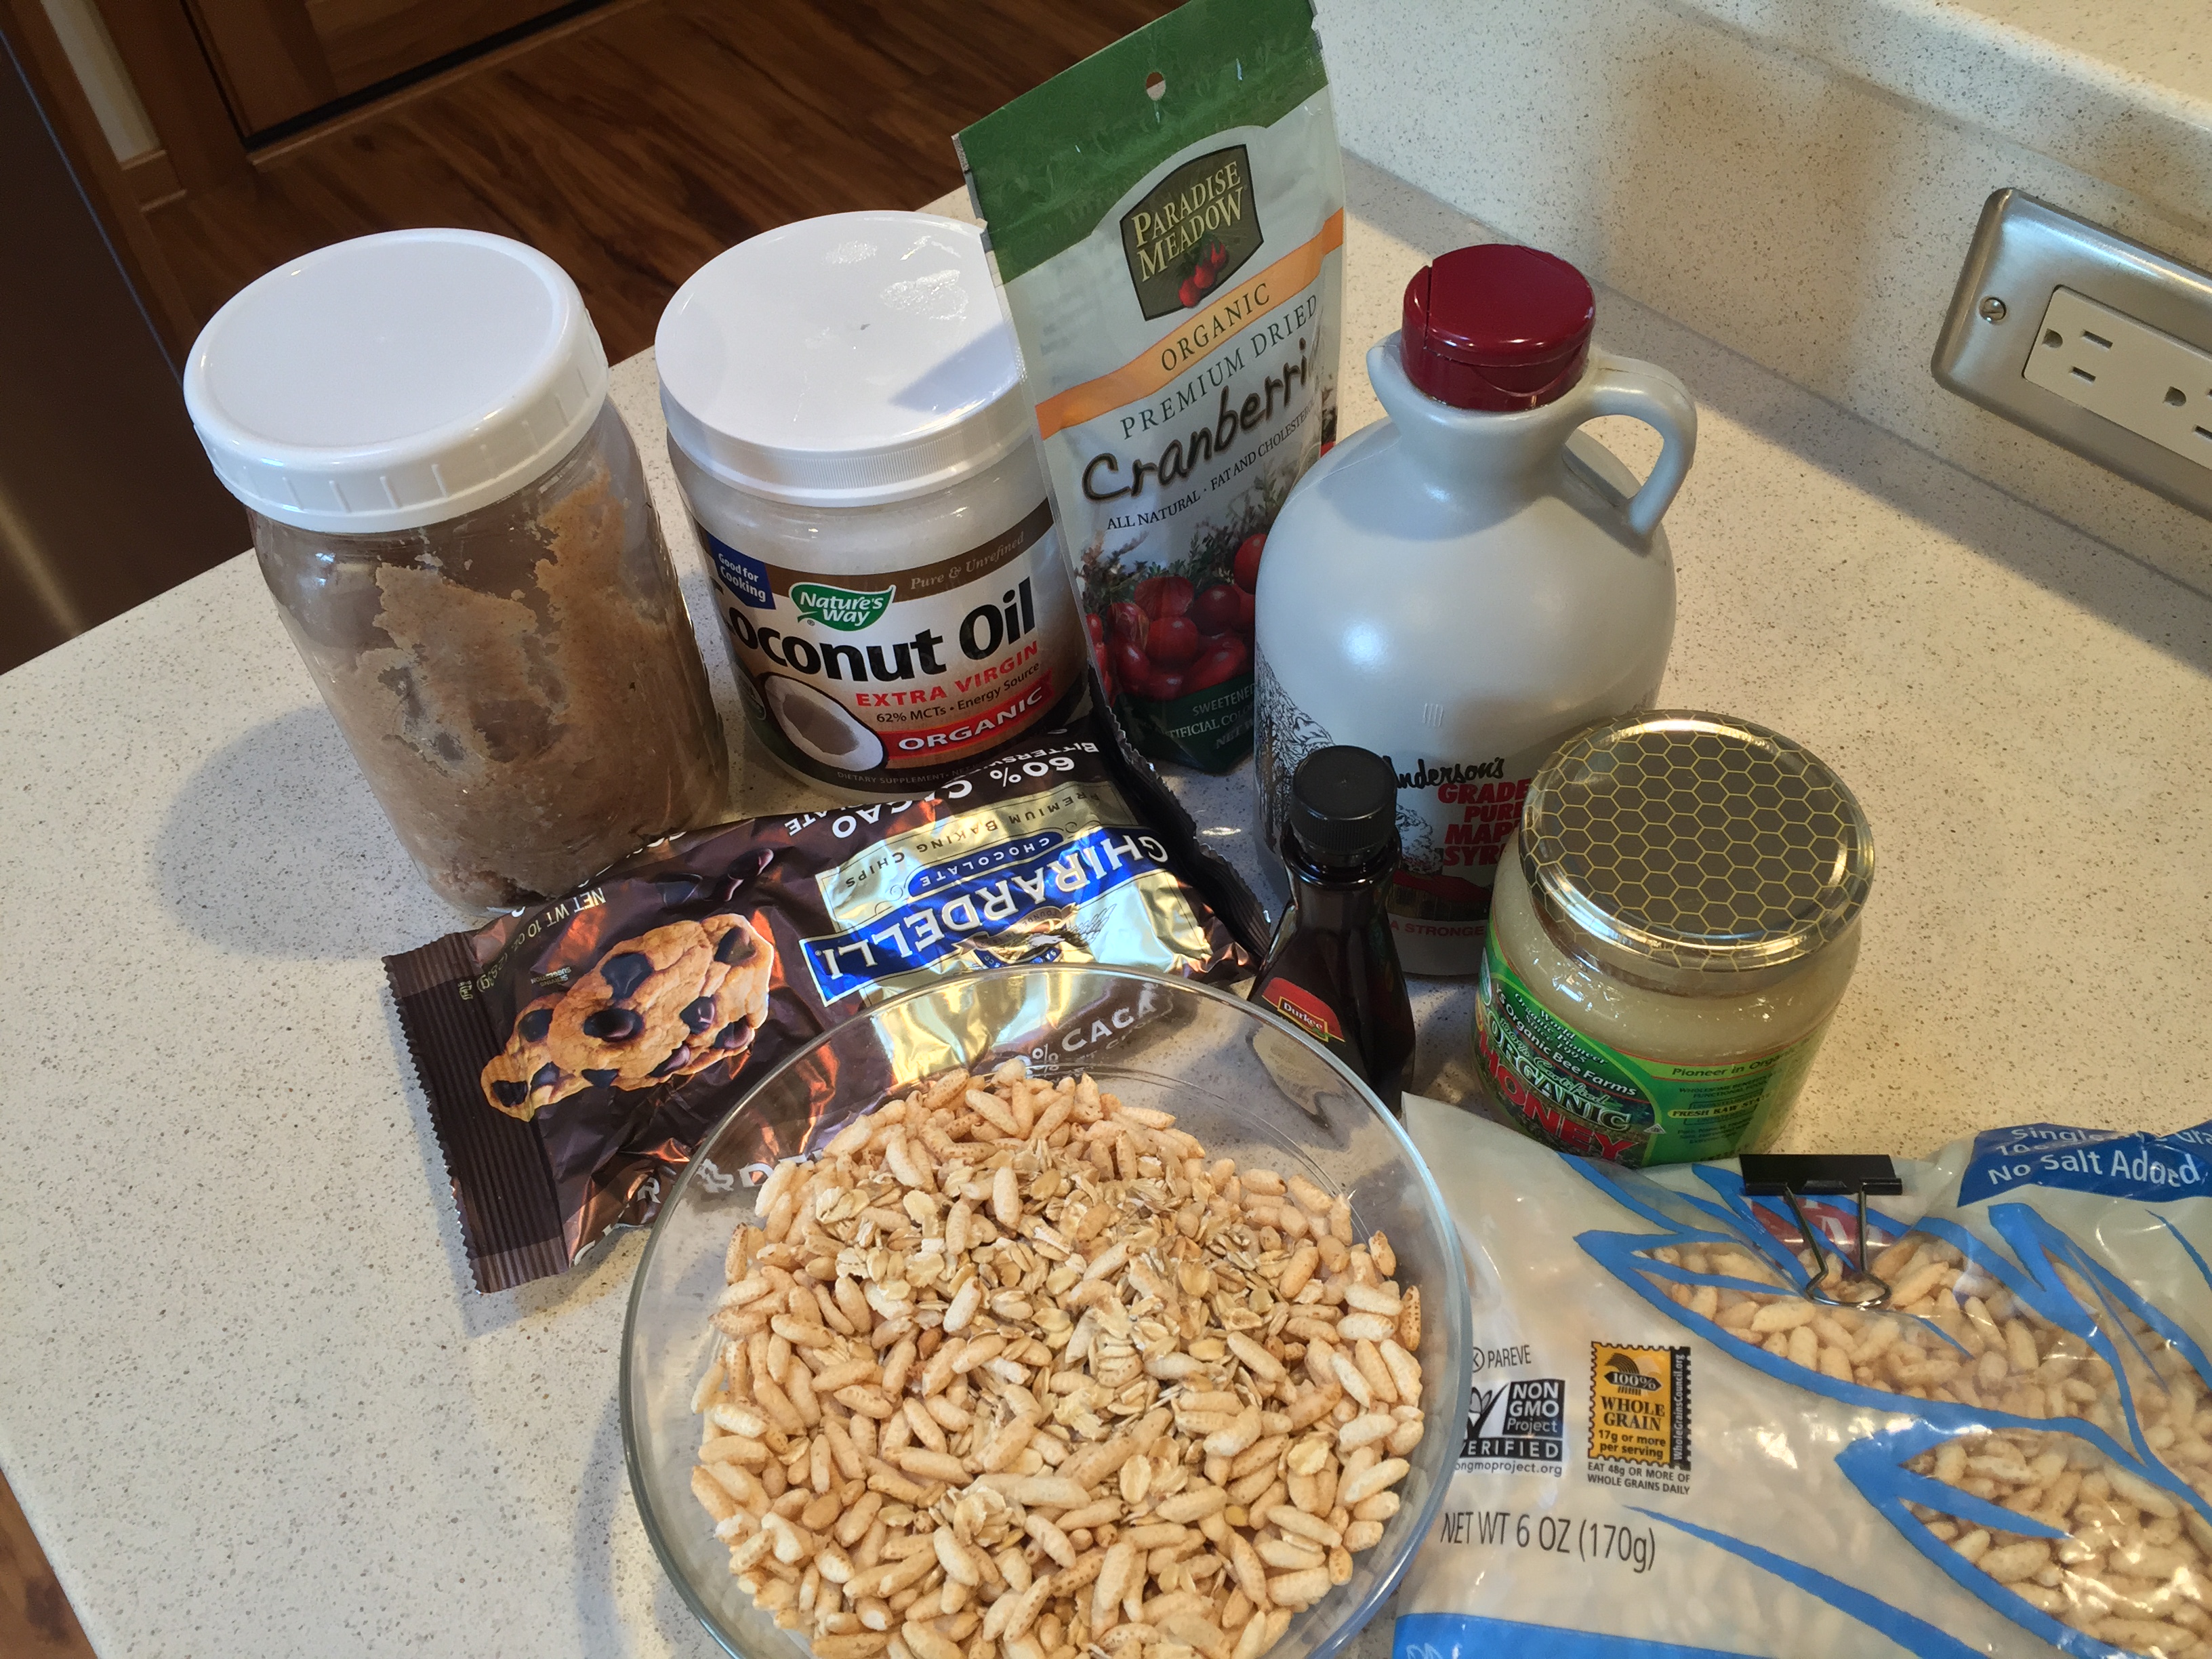
Here are all of the ingredients: Peanut butter(I make my own), coconut oil, cranberries, maple syrup, honey, puffed rice, oats, vanilla and chocolate.

DSC_0003

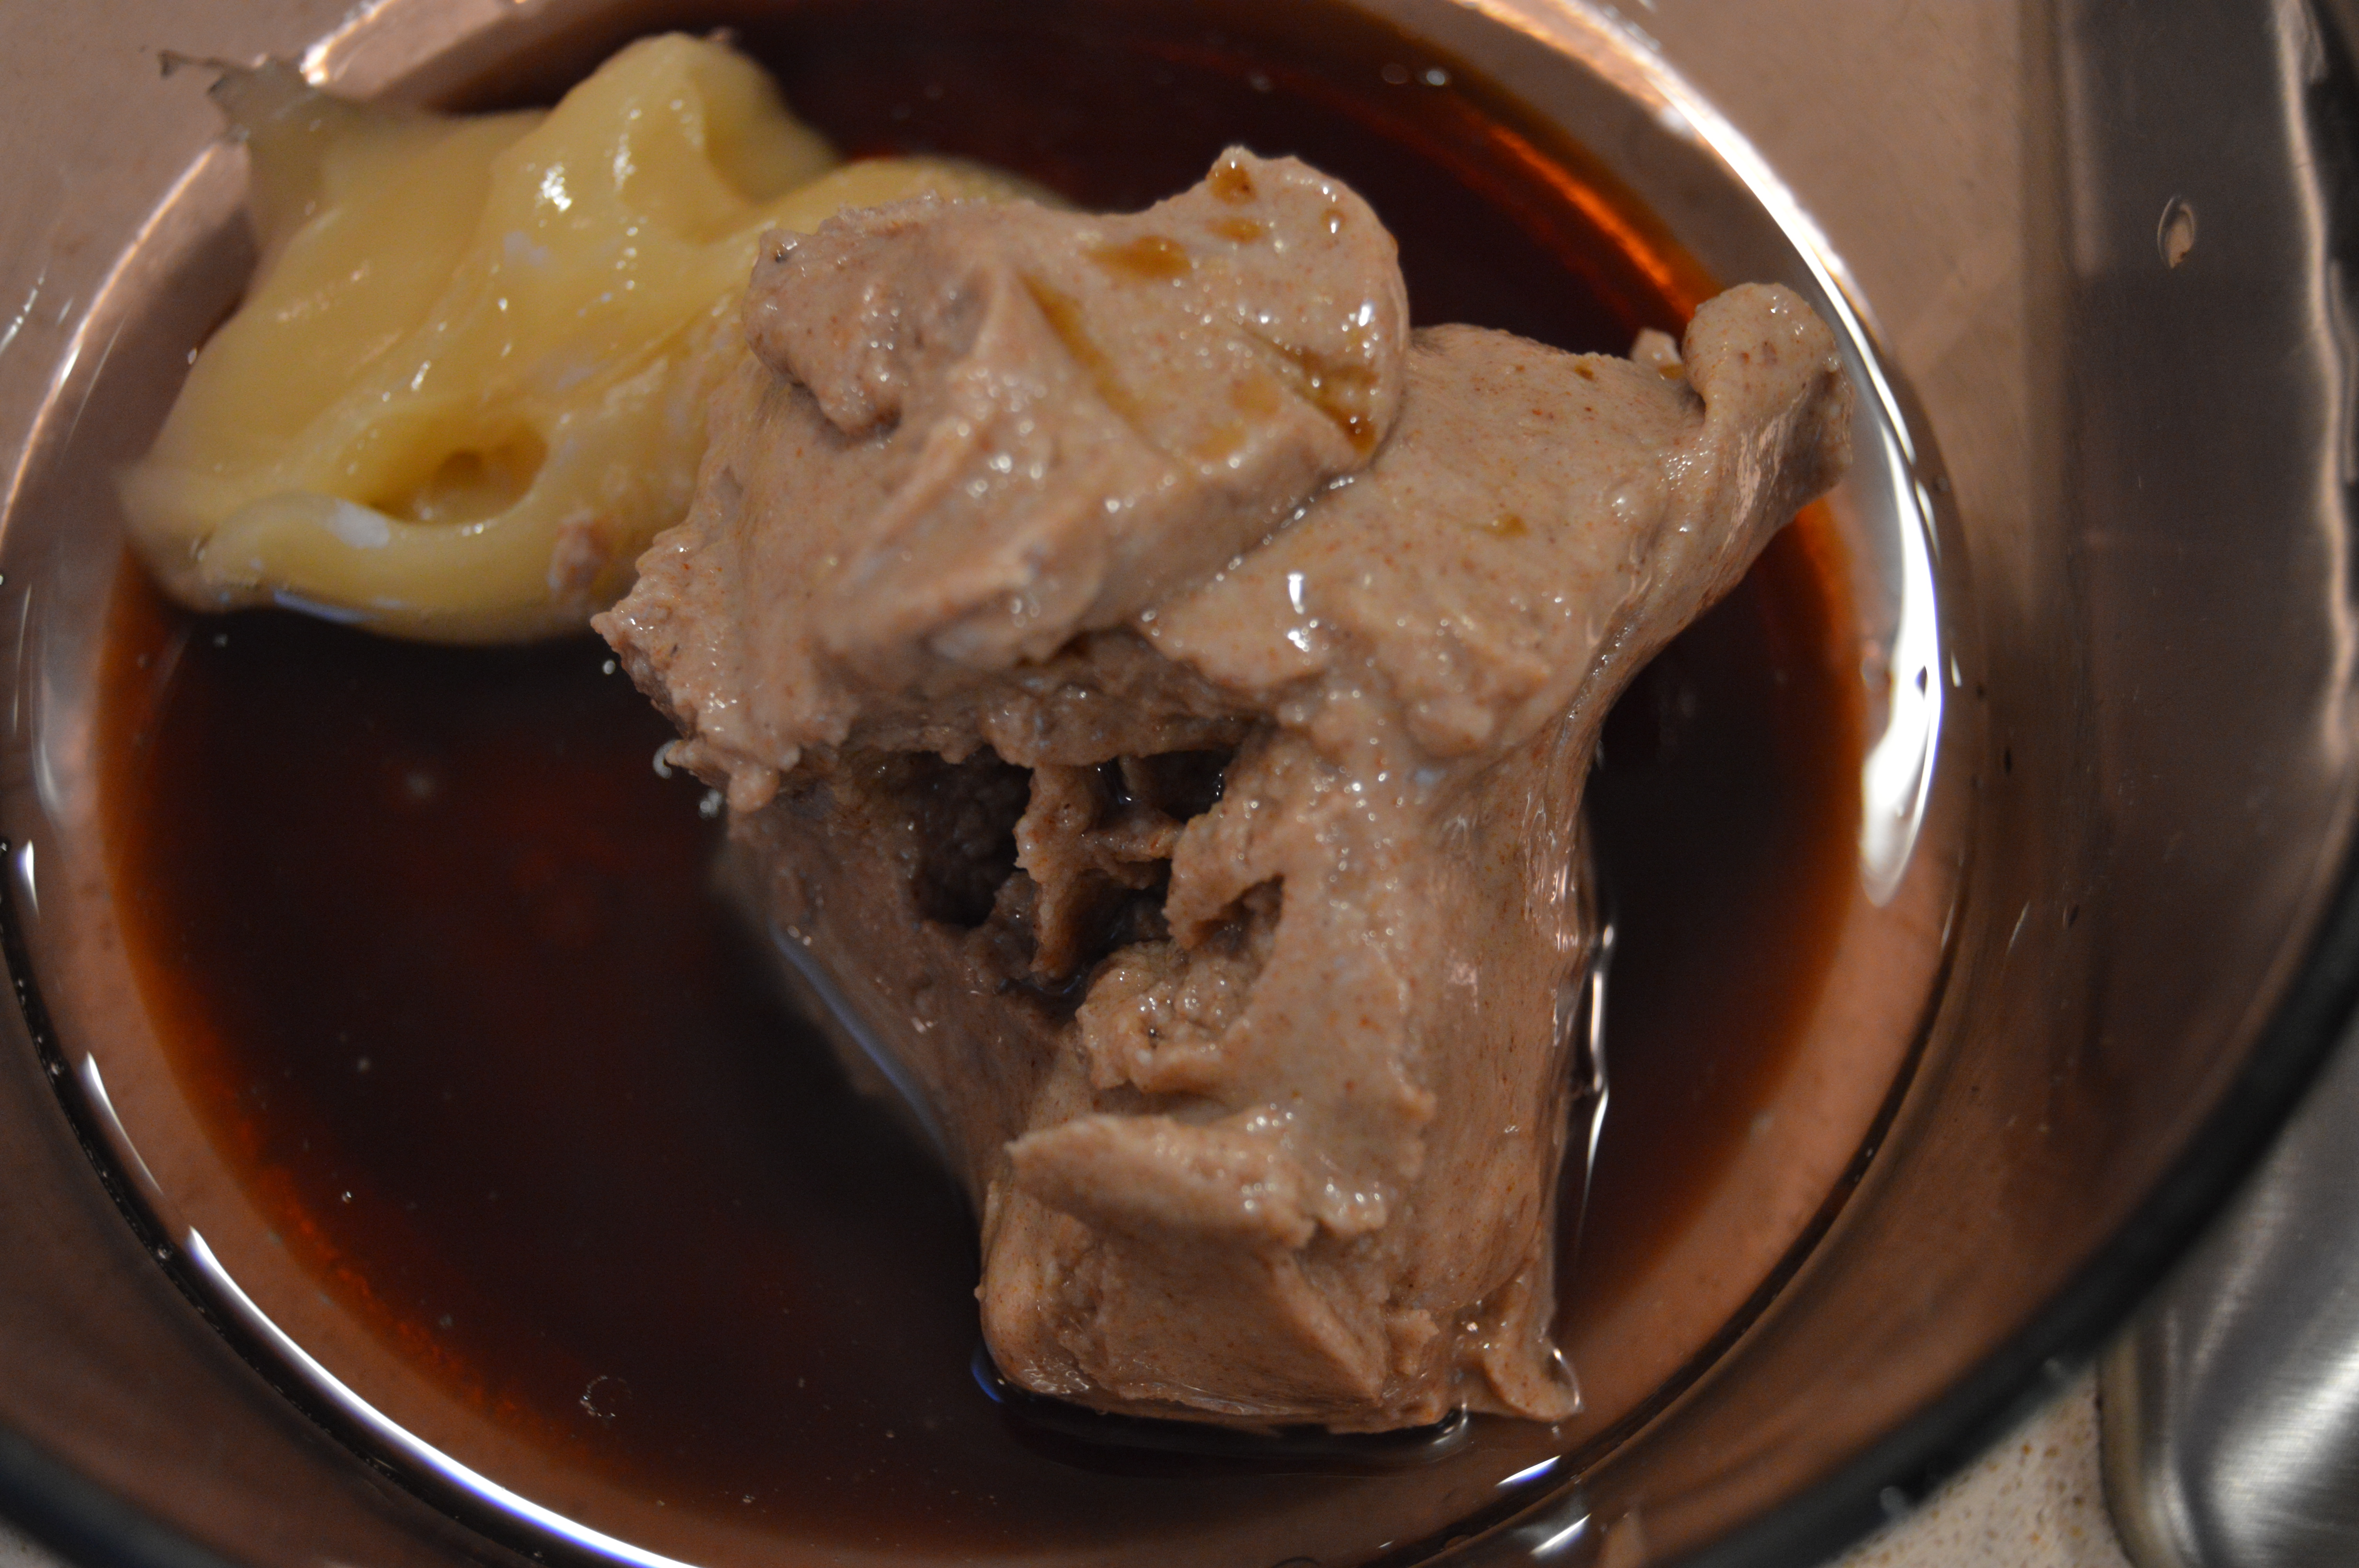
Place the honey, peanut butter, maple syrup, and coconut oil into a microwave safe bowl.  Microwave for a minute or two but watch carefully. Remove from microwave and stir vigorously.

DSC_0007

This is post-microwave and a vigorous stir.

DSC_0008

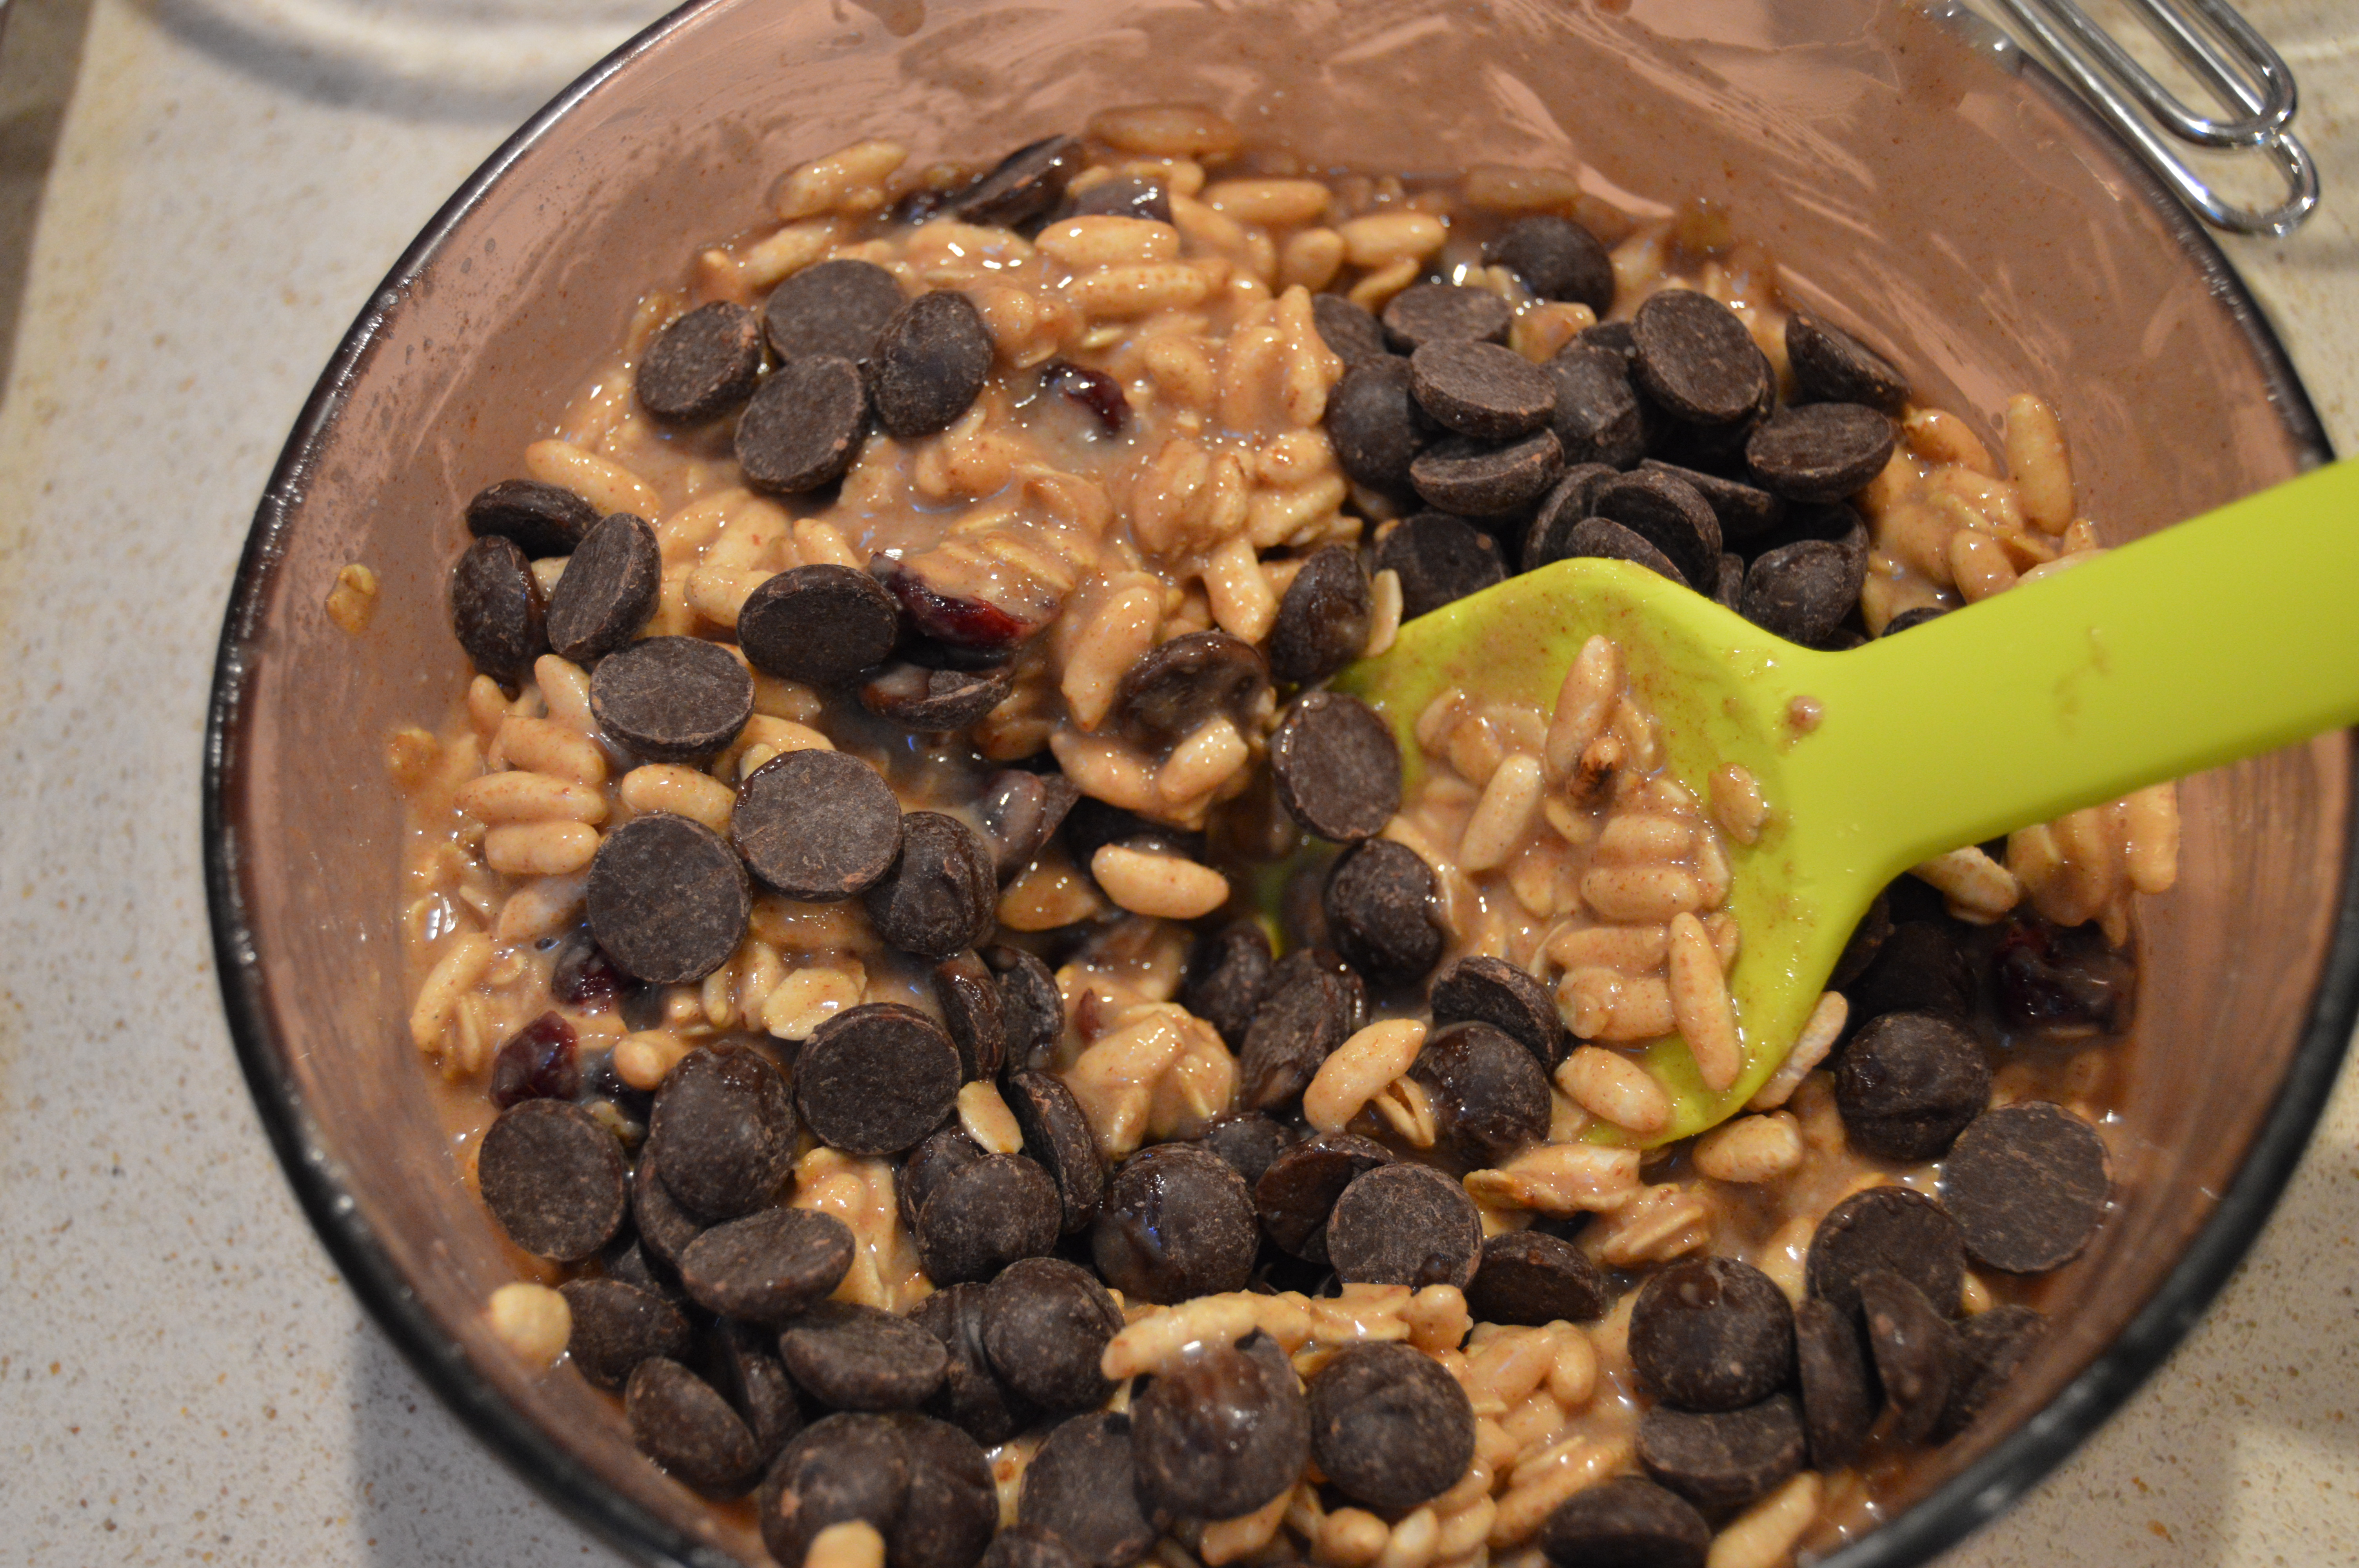
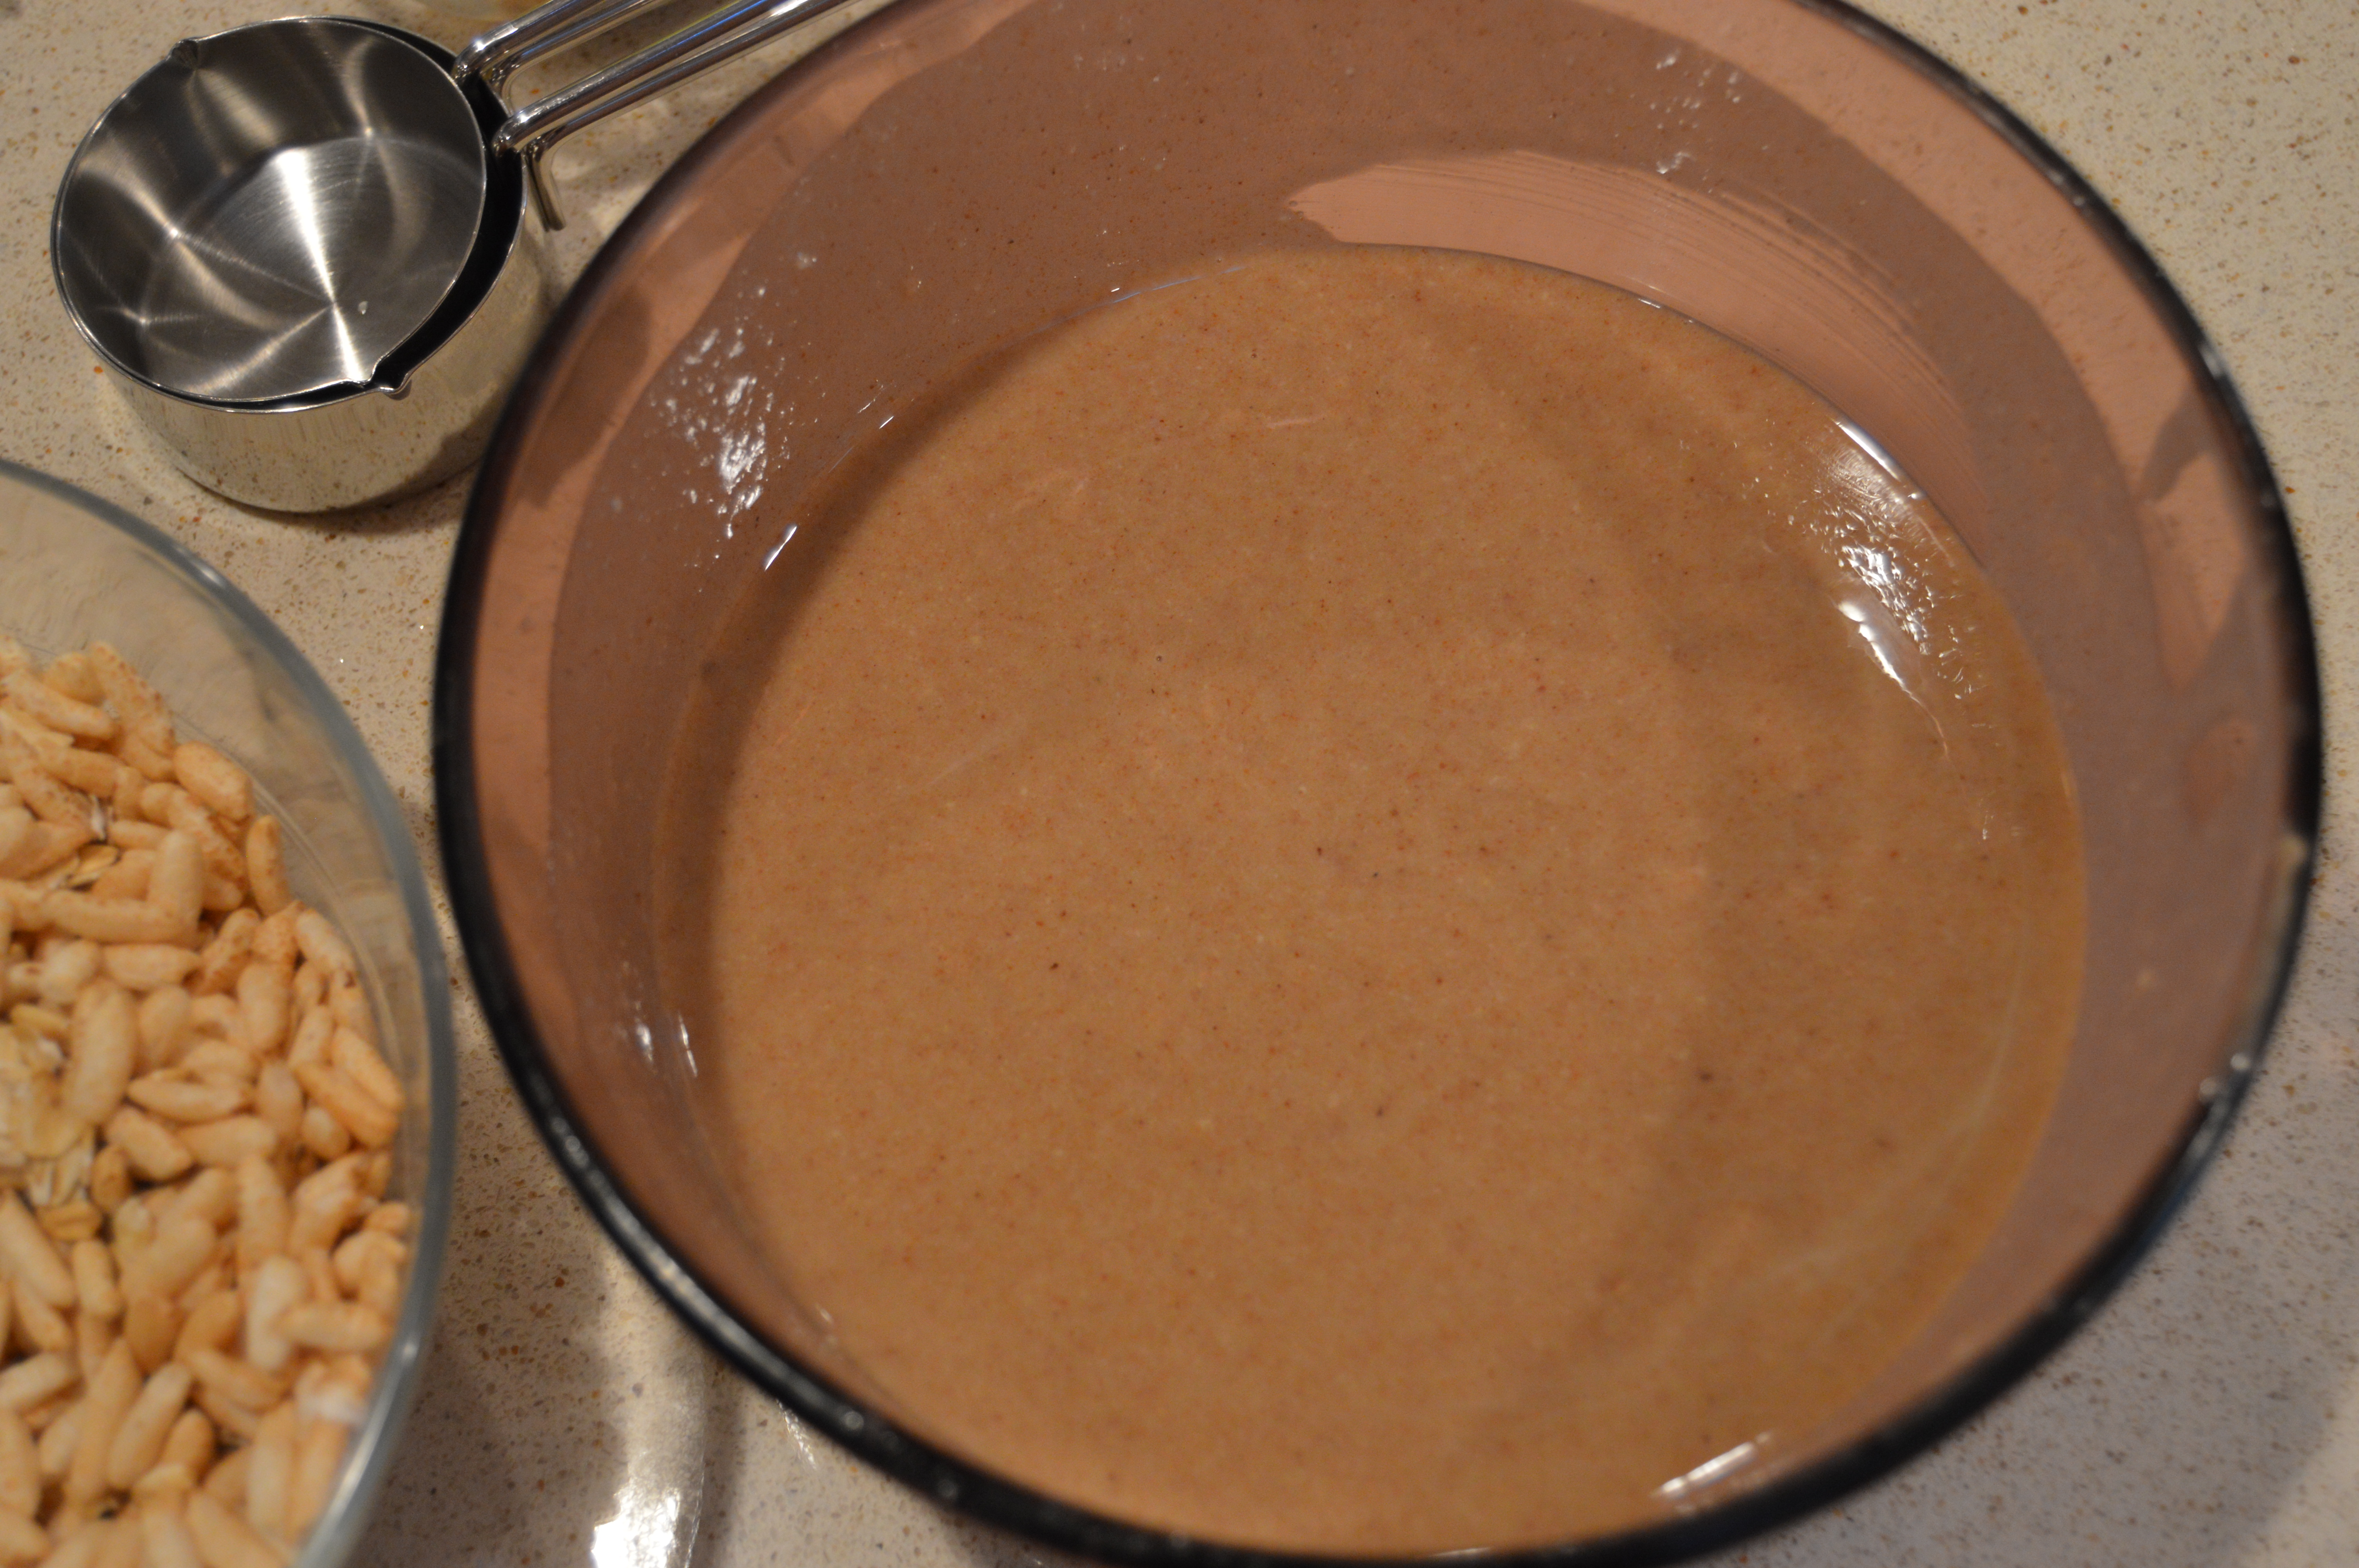
Stir in the oats, puffed rice, cranberries, chocolate and vanilla. The chips should melt from the heat of the peanut butter mixture.

DSC_0010

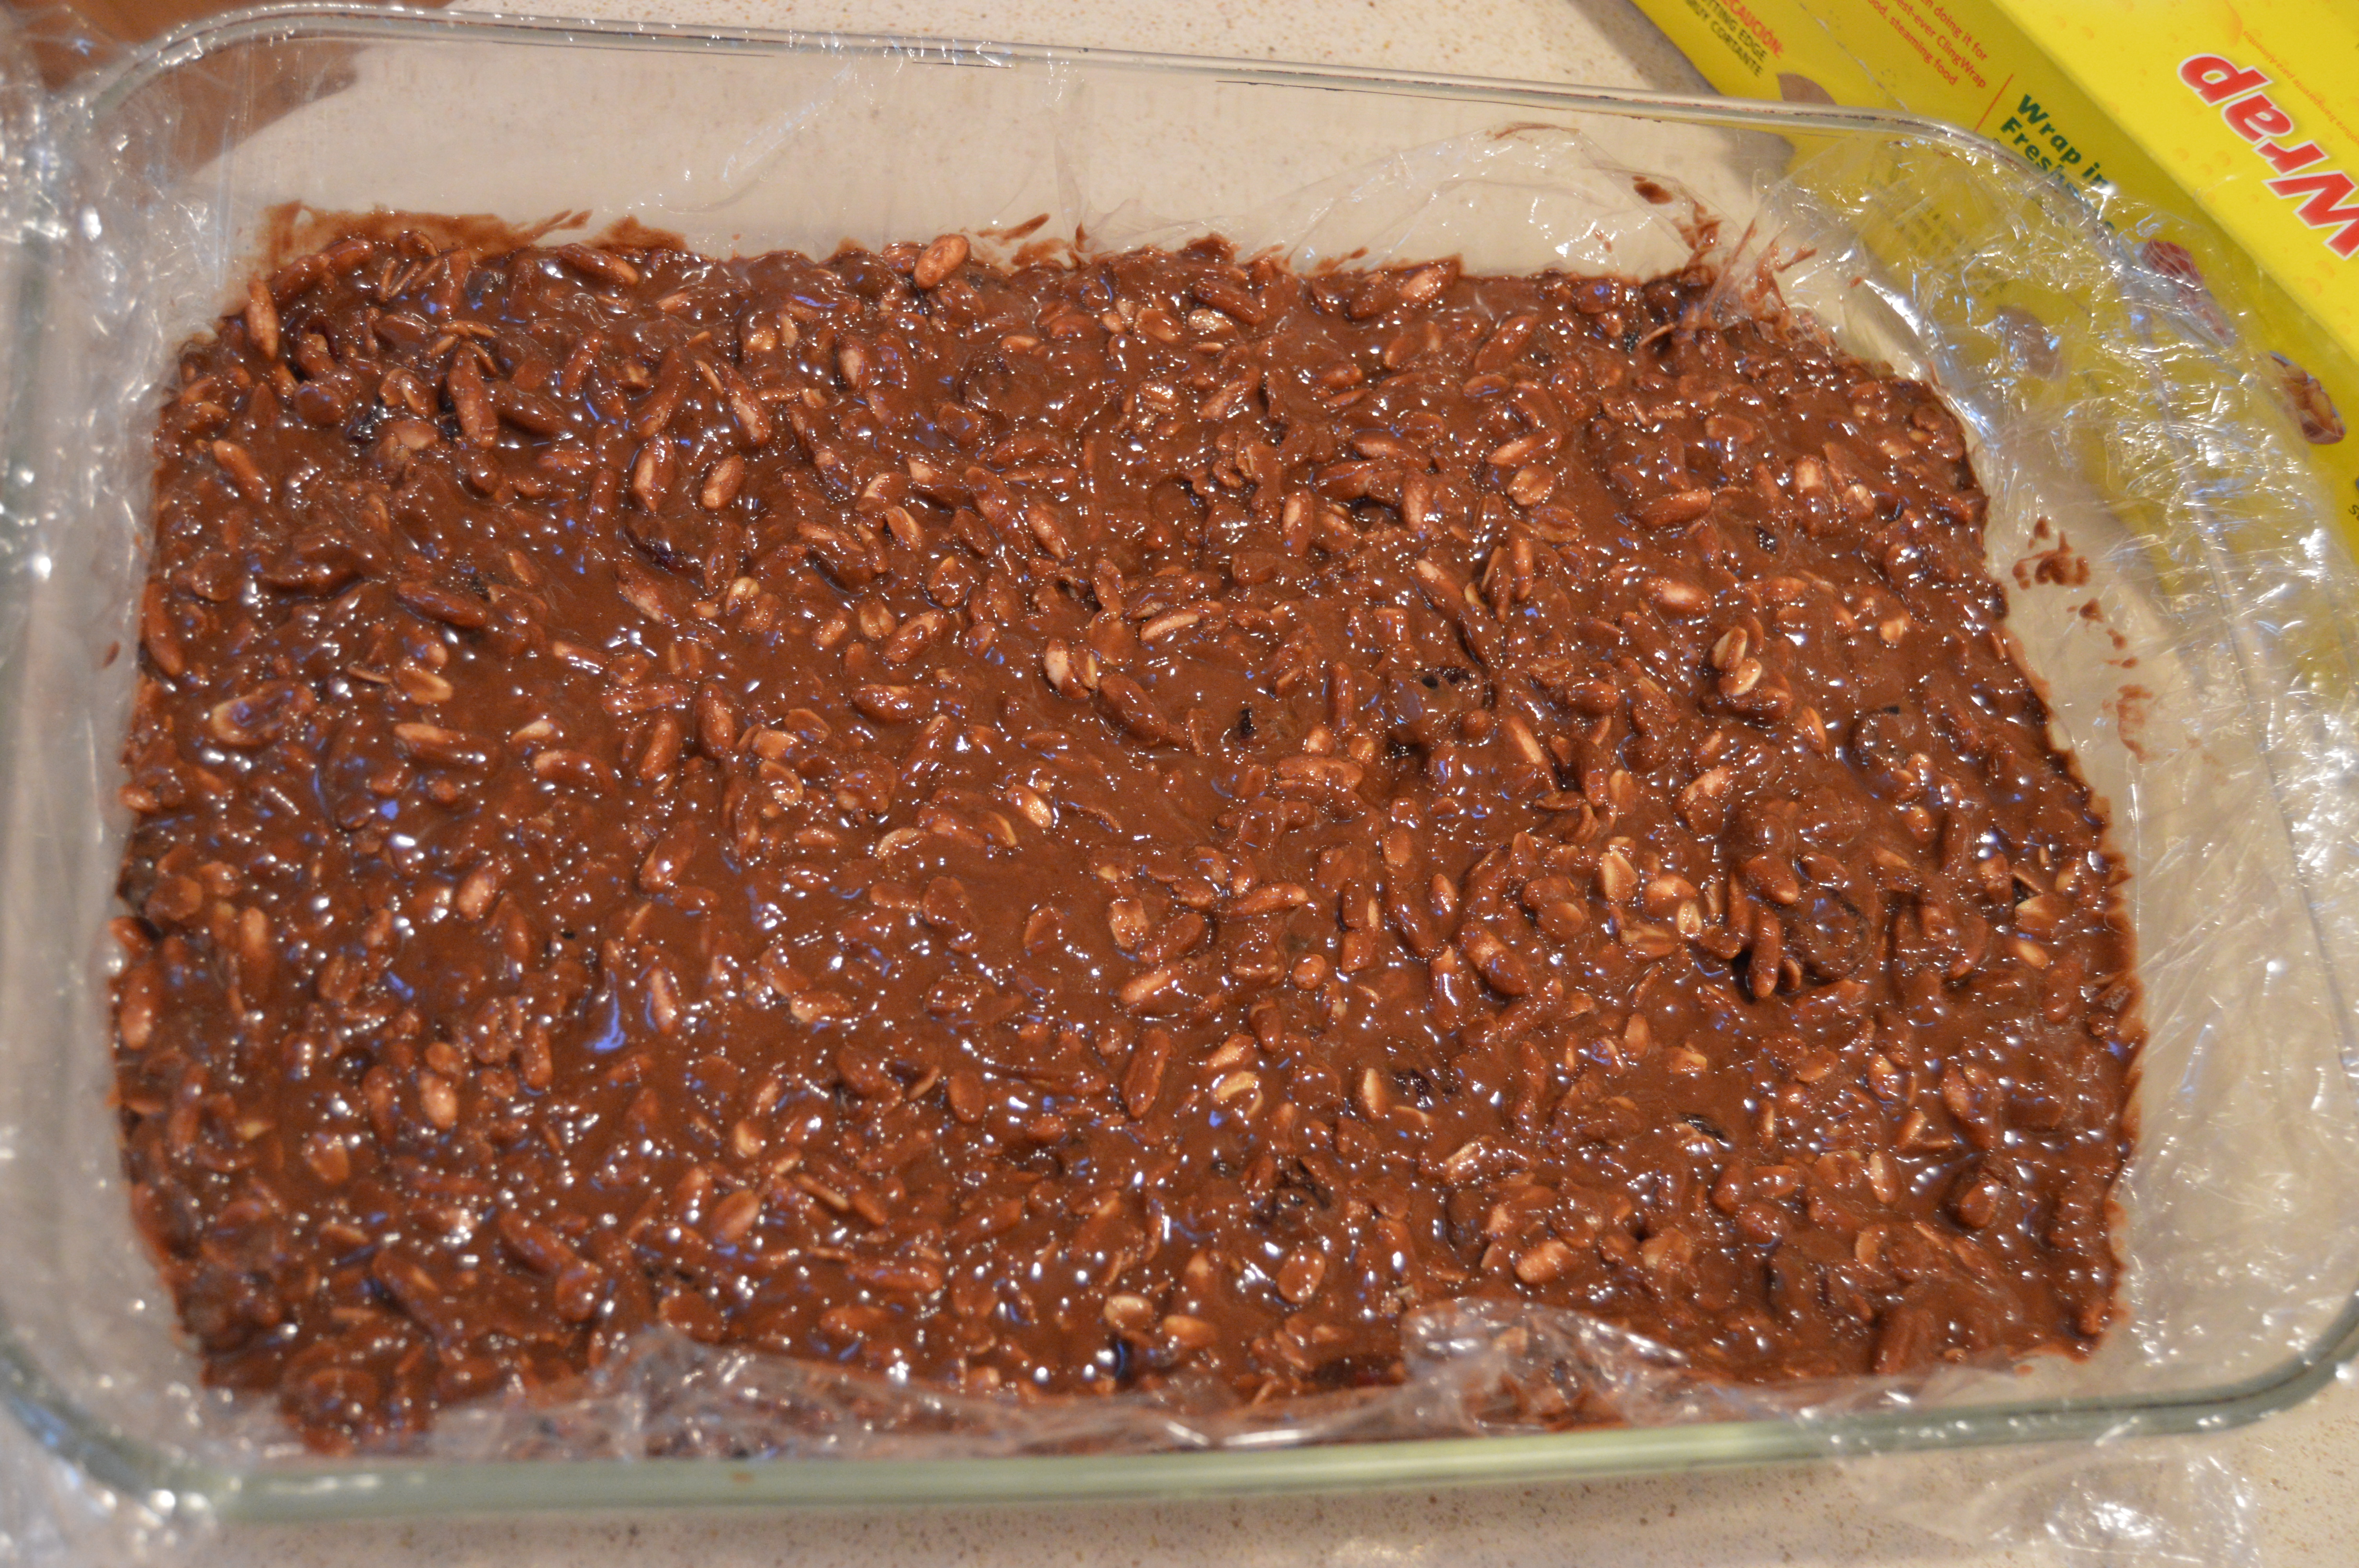
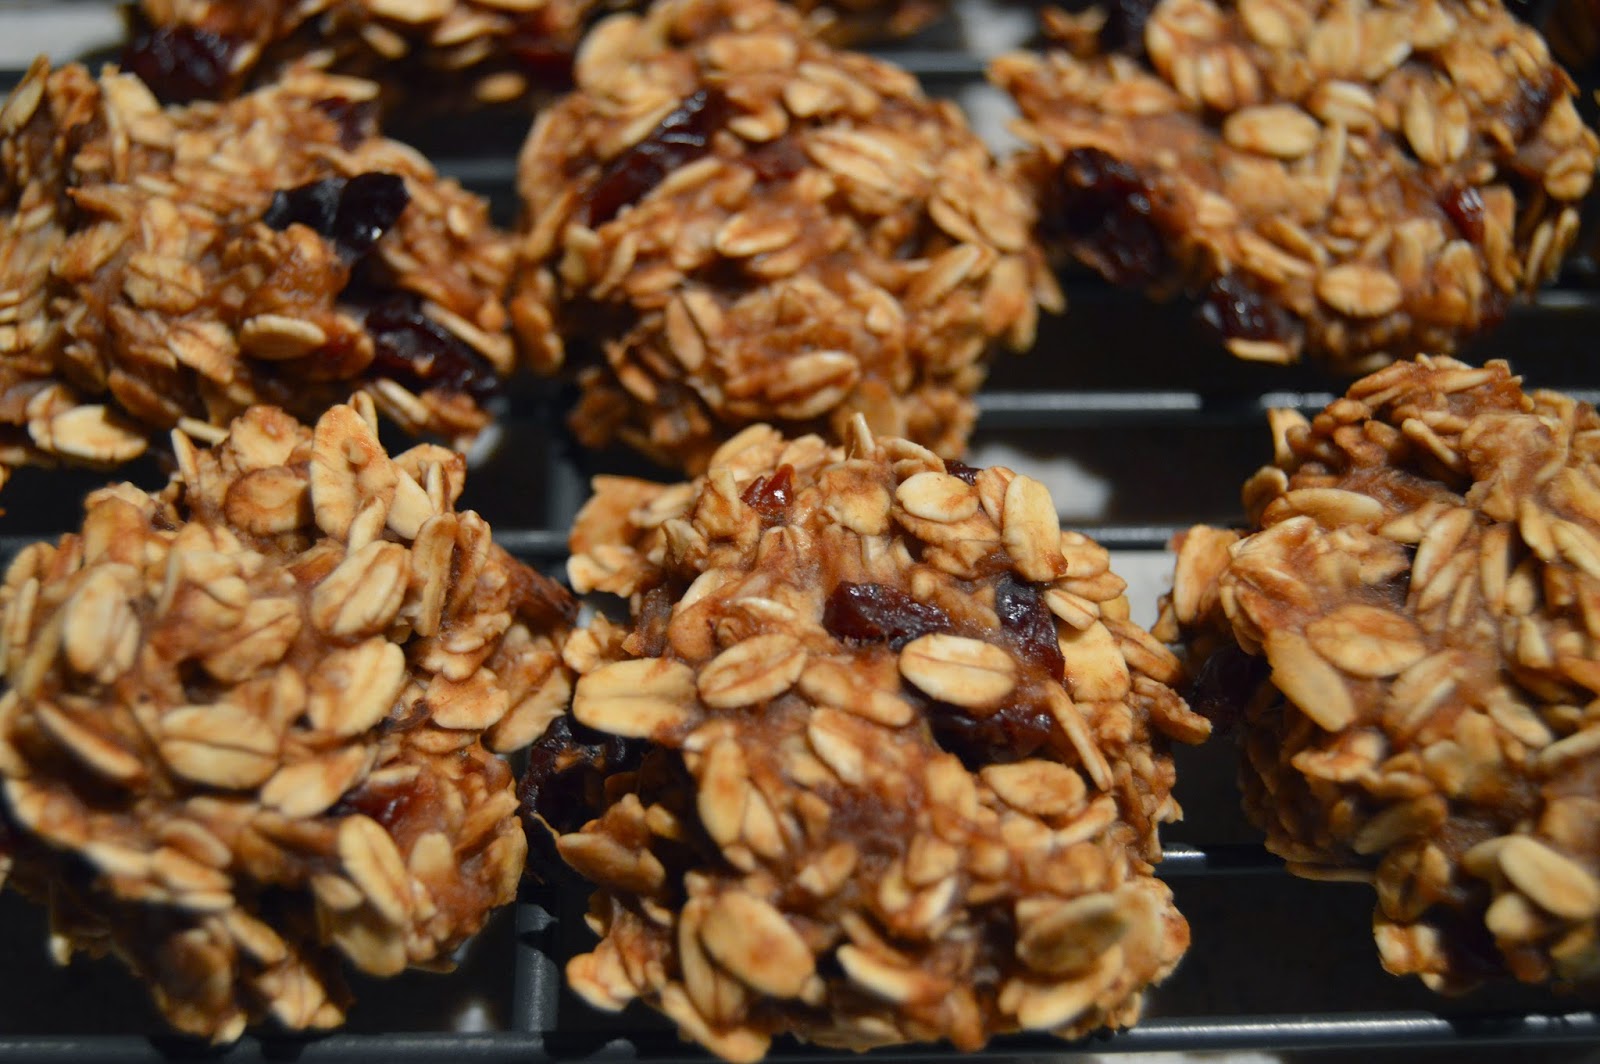
You can either use a 13×9 or 8×8 cake pan; the 8×8 will produce Chunky like bars and the 13×9 will be thinner. Lay plastic wrap in the dish, so you can easily pull them out to cut.  Evenly distribute the chocolate-oat mixture.

DSC_0015


No Bake Peanut Butter and Oat Bars

Ingredients

1 C Peanut Butter

1/4 C Maple Syrup

1/4 C Honey

1/2 C Coconut Oil

1 C Old-Fashioned Oats

1 C Puffed Rice

1/2 C Dried Cranberries or Cherries

1 1/4 C Dark Chocolate Chips

1 Tsp Vanilla Extract

Directions

Combine the peanut butter, maple syrup,  honey and coconut oil into a microwave safe bowl. Microwave on high for 1-2 minutes; monitoring very closely.  Stir chunks out until smooth consistency.

Add the oats, puffed rice, cranberries, chocolate chips and vanilla to the peanut butter mixture and stir until combined.

Spread evenly into a 13×9 or 8×8 pan lined with plastic wrap.

Refrigerate or freeze until hardened. Cut into squares and enjoy this somewhat healthy snack when that sweet tooth just won’t leave you alone.

The Move to the Country

It’s been a long year, but I think I’m back.  But I’m back as a country gal; no longer a city gal.

Rewind to December 2014. I opened the real estate tax bill that usually arrives the first week in December, and I proceeded to contact a real estate agent I knew through having chickens in the city.  Hubby and I scoured houses with larger parcels of land within thirty miles of work. It wasn’t easy looking for houses in winter but we didn’t want to waste a minute. Just about every weekend in December and the first half of January were spent seeing houses. It was a bit frustrating when we kept running into nice house, bad land or bad house, great land.  By bad land, I mean not suitable for livestock or inadequate out-buildings.  The house had to be big enough for our girls to visit and spend the night with their significant others, and it had to be habitable for immediate move-in.  Ok, to be honest, we didn’t look at a house in which the kitchen didn’t need an overhaul, but there had to be space for us to do the overhaul with. I am a bit demanding of my kitchen space since I spend A LOT of time in it.

The other obstacle we ran into, and definitely weren’t expecting, was the livestock rule.  It was a bit shocking how limiting the rural areas were regarding livestock in non-agricultural zoning.  We came from the city which allowed four hens, but we ran into a few areas which had 5 acre minimum before even allowing one chicken. The cities and  towns had  a measurement called units and what was included in the unit varied.  One unit could be ten chickens, two pigs, and one horse or cow. And it was usually a unit for every acre. When our realtor forwarded us the house that would turn out to be the one, we were a little excited about the age of the house and the amount of the land.  But the short time we had been searching taught us it may look great on paper, but it may not be the same house in reality.  ‘Wow,’ was all I could mutter when we pulled into the property.  It was a long, steep driveway, with a ranch-style house built on a hill and surrounded by woods. It was love at first sight! The only negative was the lack of out-buildings.  We  had the pasture but no building to go with it.  But that was it; we were ready and willing  to sign the dotted lines.

Not so fast.  After asking a few questions, we found  out local laws limited the land to only horses and cattle. I wanted poultry and goats; neither were allowed. When I thought we were possibly buying a PUD, I was posed to shut-down any mention of a sales contract. So we involved the seller and the realtor and found out the HOA of a long, long, time ago, wrote up the laws but never recorded them. That was official enough for me. We signed the dotted line January 24th, 2015, with a closing date set for 03/31.

Ummm, we hadn’t put our current primary residence on the market yet and nor were we close to putting on the market.  On your mark, get set and proceed to panic.  I took off some time from work, and I sorted and boxed what was wanted and carted off the rest to Goodwill.  The majority of “stuff” was moved from the second floor and basement to an indoor storage unit.  Our realtor stressed reduction and reduce I did.  I left the main level mostly untouched for the necessity of living day to day until we sold the home. While I reduced, hubby painted and re-caulked every corner.  The first open house was scheduled 02/08, and we were cleaning and organizing minutes before it.  It was a great showing, but there were a few negative comments; one we could rectify quickly and the other was too lofty to do before selling.  So we replaced the vanity and shelving unit in the first floor bathroom(the problem we could rectify quickly). Preparing our house for sale was done in the coldest, and most miserable months of the Midwest. I fretted and worried about the weather discouraging folks to attend our open house or to view the house by appointment.  I work in the mortgage industry and everyone I spoke to assured me selling our house in the winter will be more of an advantage than a disadvantage. Regardless, hubby and I stressed over every aspect of selling our home, but the way we went about it, added greatly to our stress. Whatever we did was successful, because we received an offer on the house mid-February. Oh, and the buyers agreed to a 03/31 closing. I don’t recommend anybody doing it this way.  Putting an offer on another house was a great motivator, but the stress it brings with it just isn’t healthy.

Next entry will be about what happened once we moved.  No time to waste when we had 23 chicks in tow and a garden to plant.


Sneaky Pete’s Vodka Slush

Some very wise employees of a company I previously worked for compiled slush recipes for the holidays. There were seven different recipes posted, but I honed in on Pete’s.  Since the post year is 2004, I can feel confident stating I have been making this slush for Christmas Eve for ten years.  I’m not 100% positive, but I suspect some folks who continue to come to my Christmas Eve Open House continue to come only for Sneaky Pete’s Slush.  It’s just a hunch.
DSC_0048Add the OJ, Cranberry, Vodka, Pineapple juice, and lemonade to a lidded, large bowl .

DSC_0051

All mixed together and ready for a couple of days/weeks in the freezer.

DSC_0055

This is the batch I made last week.  I put three scoops of slush in a glass and then filled with soda.   And another requirement(ask my eldest daughter), you have to drink it with a straw.

DSC_0057

This is a glass of Christmas Eve slush.  You still have time to make some but hurry!!


Sneaky Pete’s Slush


-2  16- ounce cans Orange Juice concentrate

-2 Cups cranberry juice cocktail

-2  12-ounce cans lemonade concentrate

-2 Cups pineapple juice

-1 fifth vodka(or 25 ozs)

-Soda/pop for mixer(50/50, 7-up, or Ginger Ale)

Mix all ingredients except soda and freeze.  Make this several days ahead for the best slush but make sure to freeze for at least 48 hours.  Scoop the slush into a glass and top with the soda.

Oh, hello holidays!!

Let’s Talk Turkey-Post Holiday and My Stuffing Recipe

Now that roasting pans have been put back into storage and the pie plates nestled where light rarely hits, it’s time to review what we could have done to the make the process less hectic and a more “thankful” affair.  Every year I strive to not over-cook the only dish I will not sample, produce  potatoes that are thoroughly cooked, and supply a  veggie dish worthy of coming out of a vegetarian’s kitchen.  Combined with rolls and pies I make myself, and a more newer tradition, making my own bread cubes for stuffing, is there any wonder I am a stressed out cook every Turkey Day?  Ease up, you say? Well, that’s just not how I’m wired.  One year, I will find a way to do it all and do it all well.  And it’s going to be next year.

-One trick I found this year was to prepare the pumpkin pie crusts ahead of time.  I rolled out the crusts, pre-baked them and then froze the pie dish and in a jumbo sized Hefty bag.  That really alleviated a lot of mess stress closer to T-Day.

-Of course I made the rolls ahead of time and froze them.  It was a new recipe and they  were a huge success(recipe link below).  I also made polenta corn-bread the night before T-day.

http://www.mycatholickitchen.com/2014/11/cast-iron-parker-rolls-for-breadbakers.html

-I didn’t do it this year, but I am going to investigate doing mashed potatoes in the slow cooker.  I made scalloped potatoes this year.

-This last one is not new for me but one I think you will want to know more about.  I do the stuffing in the slow cooker.  It goes on first thing T-Day morning, and it makes the house smell like…well…Thanksgiving.


This recipe is the halved version

DSC_0001

Bread cubes, sliced mushrooms, veggie broth, chopped parsley, butter, 1 egg,  onions, celery and poultry spice(the other spices not pictured).

DSC_0007 DSC_0011

The sauteed veggies and then added to the crock pot.

DSC_0047

The stuffing

Crock Pot Stuffing

I pulled this off the internet in 1996 or 1997.  I still have the original print-out with doodles from my youngest on the back of it.  I usually halve this recipe because it comfortably feeds 6-7 folks.

Ingredients

-1 cup unsalted butter

-2 cups chopped onion

-2 cups chopped celery

-1/4 cup parsley spring(I chop up a handful)

-1 12 oz package of mushrooms, sliced

-12-13 cups slightly dry bread crumbs*

-1 teaspoon poultry seasoning

-1 1/2 teaspoon salt

-1 1/2 teaspoon sage

-1 teaspoon thyme

-1/2 teaspoon black pepper

-1/2 teaspoon marjoram

-3 1/2 to 4 1/2 Cups broth(I use veggie)

-2 eggs, well beaten


Directions

1. Melt butter in a skillet. Saute onion, celery, mushrooms, and parsley on medium high heat for 5-7 minutes.

2. Pour sauteed vegetables over bread cubes in a very large bowl. Add seasonings and toss together. Pour in enough broth to moisten., add beaten eggs and mix together well.

3. Pack stuffing lightly into crock pot and cook on high for 45 minutes. Reduce to low and cook for 4 to 8 hours more.


*I make my own bread cubes by making a a loaf of white and wheat, and if they are fresh loaves, slice them and leave the slices to sit overnight.  I then cubed them and put them in the dehydrator for 3-4 hours to get them good and crispy. Painstaking? You bet but it really makes a difference in the stuffing.  You can also do this weeks before the holiday and freeze the slices or cubes.


IMG_0387

Here’s the doodle.  Seeing she’s turning 25 in a few weeks,  this stuffing has been served at Thanksgiving for many years.  It always turns out and is always a big hit.

Don’t Bother Sharing this Recipe

Enough with the vegetables already.  I am ready for something decadent and downright bad for the hips.  Well, the recipe I settled on doesn’t quite fit that description but my curiosity about the crazy Facebook sharing cookie got the better of me.  I know you’ve seen it:

Photo: Sounds delicious AND they are egg-less, dairy-less, flour-less, and with no added sugar! #Healthy

Yep, this is it. I had some over-ripened bananas in the freezer I wanted to use up, so I thawed them and went to work.

I gathered the oats, bananas, vanilla, cinnamon, applesauce, milk, and chopped cherries. I used raw, cow’s milk instead of the almond milk and cherries instead of raisins. I combined all of the ingredients and stirred until well combined.  It was very wet.

No directions for this, so I just dropped teaspoonfuls of mixture onto parchment paper. I baked for 7.5 minutes, changed racks and baked for 9 more.. Hard to know when they are done, but I pulled them out when they became a little golden and left them on the pan for ten minutes or so before switching them to a wire rack.

What do I think of these? Where’s the fat?  The recipe is so worried about adding too much sugar, they forgot about a little fat for binding. Replace the almond milk with almond butter or peanut butter and then you might have a good, good-for-you cookie.  So many great recipes out there for raw cookies, it’s really unnecessary to turn the oven for this type of cookie.

I won’t be sharing this Facebook recipe on my wall.

Whole Wheat Beer & Honey Bread Machine Rolls

Coming back to my blog feels great.  Only the reasons to keep me away this long are: My brother dying of pancreatic cancer, and I have had a killer head/chest cold.

This entry may be interpreted as cheating, and yes, it kind of is.  But sometimes even the DIY queen in the kitchen needs a shortcut. I found this recipe a year ago, and I make a batch every weekend.  I throw the ingredients into the bread maker, and I don’t think about rolls for an hour and a half. Truth be told: I just like opening a beer in the am on a Sunday and drinking the 6ozs of the remaining brew. Oh, and I get a mini panic attack when I don’t have a delicious bun to throw two of my girls’ eggs on.  I toast the bun, slather it with mustard or tapenade, half an avocado and over-easy eggs. The sandwich is open-faced, so I can justify an extra scoop of tapenade or two.

Gather the ingredients: Bread flour, whole wheat flour, instant yeast, beer, water honey, oil, and salt.

Combine 6ozs beer, 1/4 cup water, 1/8 cup honey, two tablespoons of oil(I use canola)and heat for 1 minute in microwave or until 110-115 Fahrenheit. Add salt and add to bread pan.

Add 1 and 1/2 cups of bread and whole wheat flours and two teaspoons of yeast. Start bread machine on roll option.

Take dough out of machine when finished, punch down and knead a few times. I weigh the dough to anticipate the size of the rolls.

Break dough off and form into rolls  I weigh dough to make sure it’s 3-3.25 ozs(I’m making sandwich rolls here). I make 8 for sandwich rolls but for traditional rolls, the yield should be 12. Make sure to grease cake pan or a 13×9 pan.

I put the oven light on for warmth, and I cover with a clean kitchen towel for the final rise. When you are baking with whole wheat flour, it needs the extra heat to rise.

Bake at 350 Fahrenheit for 25 minutes. Remove from pan within a few minutes and place on a wire rack to cool completely. I store the rolls in the fridge and they last about a week.

Here’s a toasted roll with fixings I described above. This makes for a delicious breakfast, lunch or dinner.


Whole Wheat Beer & Honey Bread Machine Rolls

Ingredients: 

1 1/2 cups whole wheat flour
1 1/2 cups bread flour
1 1/2 teaspoons active dry yeast
1/8 cup honey
3/4 teaspoon salt
1/4 cup water
6 ounces beer (flat)
2 tablespoons oil


Directions:

1 Mix honey,salt,water,oil and beer in small mixing bowl , heat in microwave 1 minute, stir until well blended.

2 Place honey mix with remaining ingredients into bread machine according to manufacturers directions.

3 Select dough cycle.

4 When cycle is complete, shape dough into rolls.

5 Place in lightly greased pans. ( I like to use pie pans instead of a baking sheet so rolls are wedged next to each other).

6 Cover rolls with a damp cloth and let rise about 30-40 minute or until doubled in size. When using whole wheat flour I like to set pans on an electric heating pad set on medium. (That makes the whole wheat flour rise faster,If you don’t use the heating pad, not to worry, you might need more rise time.).

7 When rolls have doubled, bake in a preheated 350 degree oven 15-20 min , brush tops with melted butter

Recipe from:
 http://www.food.com/recipe/whole-wheat-beer-honey-bread-machine-rolls-326219

So much to cook and so little time to do it

I’ve gone a little crazy in the kitchen, and I’m not fitting under the labels of cook or baker. Rather, I am more of a creator in the kitchen.  I create fermentations of all kinds, and I make mustard and prepared horseradish. Plus I bake, cook, can, freeze and dehydrate. Maybe this is why my daughter was discussing me at lunch with some of her friends, and they had suggested I started a blog. Well, that’s not a bad idea.  I would love to chat with other foodies and like-minded folk about all my DIY/science projects around the kitchen, and the garden, and my latest passion, raising chickens. My daughter and her twenty-something friends thought I was blog worthy so why not.

I live in a fairly large city in the Midwest, but since my hubby and I own a double city lot, we’ve turned the yard into a food factory: Half the yard is a vegetable garden and another quarter of it into a chicken coop/run.  I’m still working on the hubby to pull-up the remaining grass and plant more food-bearing plants. That’s going to take a little more coercion(what is it with guys and grass?).

Join me in discussions about cooking, kitchen DIY projects, baking, raising chickens in the city, and possibly starting a beehive. I will talk about my vegetarian lifestyle, the frustrations of working with yeast, raw milk, how much I am loving chickens and all of the pitfalls of becoming self-sustaining.