Category Archives: Vegetarian Meals-Lunch or dinner

Let’s Talk Turkey-Post Holiday and My Stuffing Recipe

Now that roasting pans have been put back into storage and the pie plates nestled where light rarely hits, it’s time to review what we could have done to the make the process less hectic and a more “thankful” affair.  Every year I strive to not over-cook the only dish I will not sample, produce  potatoes that are thoroughly cooked, and supply a  veggie dish worthy of coming out of a vegetarian’s kitchen.  Combined with rolls and pies I make myself, and a more newer tradition, making my own bread cubes for stuffing, is there any wonder I am a stressed out cook every Turkey Day?  Ease up, you say? Well, that’s just not how I’m wired.  One year, I will find a way to do it all and do it all well.  And it’s going to be next year.

-One trick I found this year was to prepare the pumpkin pie crusts ahead of time.  I rolled out the crusts, pre-baked them and then froze the pie dish and in a jumbo sized Hefty bag.  That really alleviated a lot of mess stress closer to T-Day.

-Of course I made the rolls ahead of time and froze them.  It was a new recipe and they  were a huge success(recipe link below).  I also made polenta corn-bread the night before T-day.

http://www.mycatholickitchen.com/2014/11/cast-iron-parker-rolls-for-breadbakers.html

-I didn’t do it this year, but I am going to investigate doing mashed potatoes in the slow cooker.  I made scalloped potatoes this year.

-This last one is not new for me but one I think you will want to know more about.  I do the stuffing in the slow cooker.  It goes on first thing T-Day morning, and it makes the house smell like…well…Thanksgiving.


This recipe is the halved version

DSC_0001

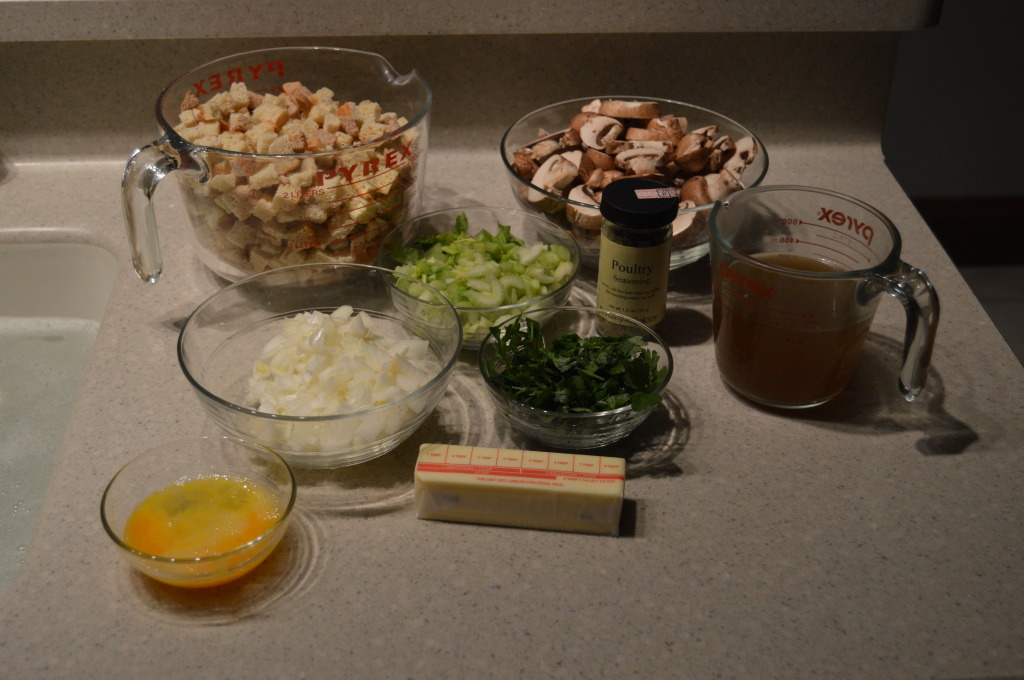
Bread cubes, sliced mushrooms, veggie broth, chopped parsley, butter, 1 egg,  onions, celery and poultry spice(the other spices not pictured).

DSC_0007 DSC_0011

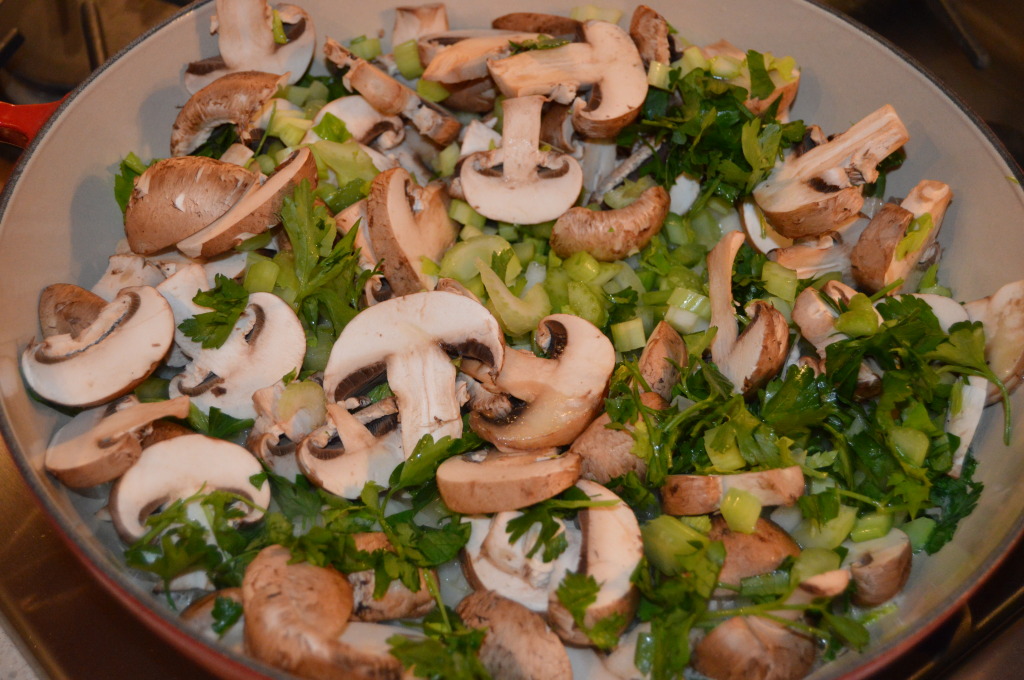
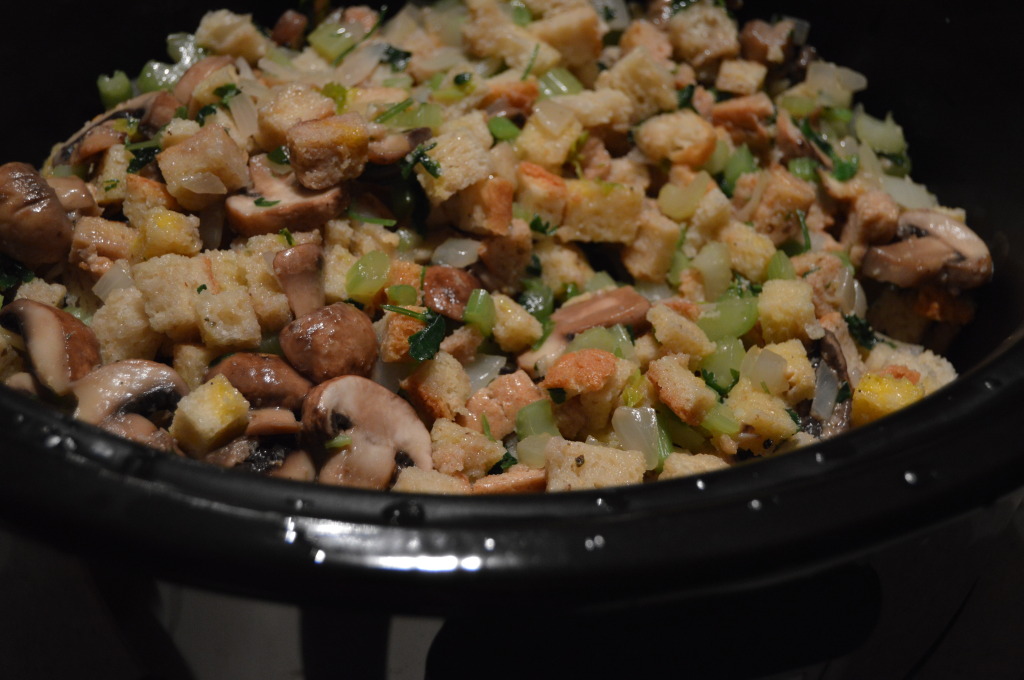
The sauteed veggies and then added to the crock pot.

DSC_0047

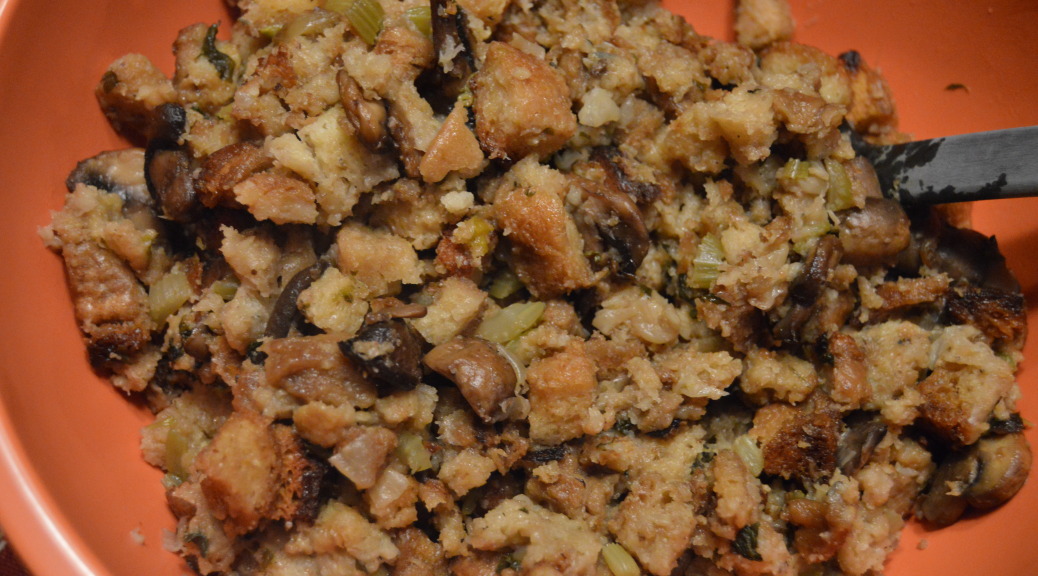
The stuffing

Crock Pot Stuffing

I pulled this off the internet in 1996 or 1997.  I still have the original print-out with doodles from my youngest on the back of it.  I usually halve this recipe because it comfortably feeds 6-7 folks.

Ingredients

-1 cup unsalted butter

-2 cups chopped onion

-2 cups chopped celery

-1/4 cup parsley spring(I chop up a handful)

-1 12 oz package of mushrooms, sliced

-12-13 cups slightly dry bread crumbs*

-1 teaspoon poultry seasoning

-1 1/2 teaspoon salt

-1 1/2 teaspoon sage

-1 teaspoon thyme

-1/2 teaspoon black pepper

-1/2 teaspoon marjoram

-3 1/2 to 4 1/2 Cups broth(I use veggie)

-2 eggs, well beaten


Directions

1. Melt butter in a skillet. Saute onion, celery, mushrooms, and parsley on medium high heat for 5-7 minutes.

2. Pour sauteed vegetables over bread cubes in a very large bowl. Add seasonings and toss together. Pour in enough broth to moisten., add beaten eggs and mix together well.

3. Pack stuffing lightly into crock pot and cook on high for 45 minutes. Reduce to low and cook for 4 to 8 hours more.


*I make my own bread cubes by making a a loaf of white and wheat, and if they are fresh loaves, slice them and leave the slices to sit overnight.  I then cubed them and put them in the dehydrator for 3-4 hours to get them good and crispy. Painstaking? You bet but it really makes a difference in the stuffing.  You can also do this weeks before the holiday and freeze the slices or cubes.


IMG_0387

Here’s the doodle.  Seeing she’s turning 25 in a few weeks,  this stuffing has been served at Thanksgiving for many years.  It always turns out and is always a big hit.
Crustless Ratatouille Pie

It’s Sunday, and I have veggies in dire need of being used in one recipe or another–quickly. If they don’t get used today, the chances of me having enough motivation to whip something up during the week is very slim.  It’s gotta be today.

Hubby grilled up some eggplants from the garden this morning, and since I hadn’t made my signature eggplant dish yet, today looked like a good day to do that. I’ve been making this dish  for many years(the date on the Prevention page is 1999)with whatever type of eggplant we decided to grow that year. The dish comes together fairly quickly, and I get to use up a pound of eggplant and a couple of tomatoes.  And the fact that it’s tasty and only 172 calories/serving may be a few more reasons why I throw this dish together more than once every summer.  I had to make a few adjustments today since I did not have ricotta cheese or the type of yogurt it calls for.  This is an old recipe so the Greek yogurt consistency is probably not what the recipe intended. I used a cup of my homemade, Greek yogurt with a half of cup of raw milk buttermilk. I know, I know, but I am trying to use ingredients I have on hand.

You need an onion, a red or yellow bell pepper, two tomatoes and two cloves of garlic.  If you are using fresh eggplant, cut in chunks, salt and drain the water from the eggplant for 30-45 minutes. I grilled the eggplant until the meat collapsed and that took enough of the moisture out without the salt. I have a little jar of Penzeys Tuscan Sunset(salt-free), and I used that in place of the marjoram.

Two teaspoon olive oil, saute the onion for three minutes and then add the pepper and the garlic.

Because my eggplant was grilled, I added the eggplant later with the tomatoes and seasoning.

Throw a cup of ricotta cheese, yogurt, 3 egg whites, 1/4 cup of flour(replace this with a non-gluten product if you prefer gluten free),1/2 teaspoon baking powder, and 1/4 cup grated Parmesan cheese. Spray a pie plate lightly with no-stick spray and throw half of the cooled,sauteed vegetables onto the plate followed by half of the ricotta cheese mixture; add the rest of the veggies and the ricotta cheese mixture. Bake at 350 degrees for 45 minutes or until the middle is done.

What’s for lunch? Ratatouille Pie!  Will you join me?
Ratatouille Pie
Prevention, August 1999

Serve this crustless quiche warm or at room temperature

Ingredients
-2 tsp olive oil
-1 large onion, finely chopped
-1 medium eggplant(1 lb). Cut into one inch cubes, salted, and drained.
-1 sweet yellow or red pepper, coarsely chopped
-2 cloves garlic, finely chopped 
-1/4 teaspoon Pepper
-3/4 teaspoon salt
-2 medium tomatoes
-1/2 teaspoon marjoram or oregano
-1 cup reduced-fat ricotta cheese
-1/2 cup low-fat plain yogurt
-3 egg whites
-1/4 cup all purpose flour
-1/2 teaspoon baking powder
-1/4 cup grated parmesan cheese
Directions
1. Preheat oven to 350 degrees. Lightly coat a 10-inch pie plate with cooking spray
2. Heat oil in a large nonstick skillet over medium heat. Add onions; saute 3 minutes. Add eggplant, yellow or red pepper, garlic, pepper and salt. Cook, stirring often, for 5 minutes or until eggplant is softened. Stir in tomatoes and marjoram and cook for 2 minutes. Let cool for 10 minutes. 
3. In a blender,  process ricotta, yogurt, egg whites, flour, baking powder, Parmesan cheese and remaining 1/4 teaspoon of salt until smooth.
4. Spoon half of the vegetables into the pie plate. Poor the cheese mixture over the vegetables and top with the remaining vegetables. 
5. Bake 35-45 minutes or until a toothpick inserted into the center comes out clean. Let stand 15 minutes until cutting. 
Serves 6.
Here is the recipe I have been using since 1999.  It’s oiled stained, dog eared, and downright in bad shape.  This makes it a recipe worth trying.

Summer Veggies…in a Jar?

If winters are harsh and brutal here in Wisconsin than the summers are a delicious slice of heaven. When the fruits and vegetables begin to show up at the farmer’s market and my garden, I get very excited, and at the same time, a little overwhelmed.  So many vegetables…which do I choose, what do I make? I try not to go too crazy and stick with ingredients for recipes I know I will make. If you know me, I’m an intense cook on the weekends and not-so-much of one on the weekdays: What doesn’t get done this weekend will have to wait until the next.  This isn’t the best philosophy, but with all of the OT at work and my exercise schedule at night, it doesn’t leave a whole lot of time for weekday cooking marathons. Remembering my “weekend only” habit helps me from over-buying. This weekend at the farmer’s market I just purchased the essentials for a good, early summer salad. Boy, I was not disappointed!

Have you been noticing salads in a mason jar.  I’ve been spotting it on Pinterest and the internet, but I didn’t get the purpose. I looked into it more closely, and it’s actually kind of neat for taking a salad to work. You put the dressing on the bottom, layer the harder vegetables from the bottom to the lettuce on top(I used a quart jar–it was plenty big enough). It makes for a “neat” salad experience; especially when you eat lunch at your desk.  You dump the jar into a bowl or onto a plate and you are all set to munch.

The first is dressing, carrots, cucumbers, roasted beets, avocado, asparagus, lettuce, kale and sprouts. 
That’s a salad in a jar
May I mention here, how easy it is to make your own salad dressing. I don’t buy salad dressings, and I haven’t for quite a while. I take 1/4 cup pickle or olive juice, another 1/4 cup apple cider vinegar, a dash of olive oil, a tablespoon of mustard, and a sprinkle of Bragg’s Sea Kelp seasoning, and I shake it up. Or add whatever you want in whatever quantities but be creative and healthy. 

Quick, Homemade Marinara, Roasted Veggies and Farro

I love marinara sauce.  My pasta, pizza, and eggplant parmesan usually have more sauce than anything else. When I received the news how good lycopene is for us and how it’s nutritionally better when the tomatoes are cooked, I became an even bigger marinara fan; lay it on and lay it on thick!

When we started growing tomatoes in the garden, I had the great idea of making my own pasta sauce. I painstakingly peeled, seeded and cooked-down the tomatoes. I thought it was going to be heavenly, but it was not.  Compared to the jars of pasta I was pulling off of the grocery store shelf, it was bland and tasteless. I didn’t make my own sauce for years after that episode but eventually I realized my disappointing sauce lacked the tablespoons of sugar and salt the commercial jars contained. Fast forward a “few” years, and here I am in my “abhorrence of anything salty” stage, and my DIY kitchen movement, and I wasn’t even making my own marinara. I rectified that with a recipe of marinara made with canned tomatoes in a slow cooker. It was darn good and a helluva a lot better than what I could buy in the store.  To be honest, the DIY came about from needing more control of what goes into my food.  Most everything made outside of my kitchen is too salty, too over-cooked(veggies)and just not as good as what I can make. The marinara is another example of this. I seek out the tastiest, healthiest, organic canned tomatoes along with other organic ingredients, and I have pasta sauce or pizza sauce quickly available either by whipping up a batch or pulling extras out of the freezer. With a good marinara in your fridge or freezer, you’ll have an array of options for dinner or lunch.

Chop large: 3 carrots and 1 large onion. Peel 6 cloves of garlic. 1 can 28 ozs of crushed tomatoes and 1.5 Tbls of olive oil. Throw the carrots, onions and garlic into the food processor and pulse until finely minced. Add oil to pressure cooker and heat on medium heat
Add the minced vegetables. Saute for four minutes. Add in the crushed tomatoes, mix and put on the pressure cooker lid.  Once it reaches pressure, cook for 45 minutes. 


Seriously, all it took was 15-20 minutes to prep and another 45 minutes to cook. Doesn’t that look good?

Marinara Sauce

I pulled this out of  the Vegetarian Times, January/February 2013 issue. This is the marinara used in the microwaved Eggplant Parmesan recipe from the Mod Squad Cooking Lab. I made a double batch so do not use the photos as a guide.

Ingredients:
1 large yellow onion, cut into large dice(2 cups)
3 medium carrots, cut into medium dice(1 cup)
6 garlic cloves, peeled
1.5 Tbls of olive oil
1 28-oz can crushed tomatoes, such as San Marzano or other high quality tomatoes

Directions:
1) Place onion, carrots, and garlic in bowl of food processor; pulse until finely minced.
2) Heat oil in pressure cooker over medium heat. Add minced vegetable mixture, and saute 4 minutes or until translucent.
3) Stir in crushed tomatoes, close pressure cooker, and bring to 15 psi over medium-high heat. Cook sauce 45 minutes in pressure cooker.
4) Depressurize cooker, and season sauce with salt, pepper, and additional olive oil(optional).

Roasted Vegetables

Position the oven racks top and bottom and heat the oven to 400 degrees F.

Chop vegetables of choice like-sized and coat with olive oil and whatever other seasoning you prefer.
Place veggies on a jelly-roll pan, lined with aluminum foil and spayed with olive oil. Do not crowd and keep harder veggies on one pan and softer veggies on another.

Roast veggies for 10 minutes then switch racks and shake the pans a little. roast for another 7 to 10 minutes until preferred doneness.

Farro

A grain loved by Italians and often found in many Tuscan dishes. The texture is firm, nutty and very different.

1 cup dry Farro/medium
4 quarts water

Bring water to a boil and add the Farro.  Boil for 15-20 minutes.  This is the pasta cooking method and works very well with this grain.

Marinara and roasted veggies on a bed of Farro. 

I Brought Hummus!

It’s what I offer to bring when I don’t want to worry if there will be any vegetarian offerings.  And, may I add, a lack of vegetarian options happens quite often here in WI.  I often take the chance of my healthy but delicious hummus having only but one or two spoonfuls taken out while the sour cream with bacon dip dish  is licked clean. Oh well,  so is the life of a vegetarian stuck in the land of brats.

I may take a large amount of my hummus back home, but the other guests have no idea what they missed.  I make a spicy black bean hummus that tastes so good with a good quality tortilla chip, but it looks a little nasty. Or my favorite is black eyed pea hummus that is so creamy and rich, I eat it by the spoonfuls. One of the many reasons I love hummus is because of it’s versatility: add any legume with tahini and you have a different hummus.

Why does my hummus taste so much better(yes, this is subjective) than the store-bought or your nearest deli?  Well, I am about to disclose my hummus making secrets to you.  So if you are a veg-head like me, or you are watching the calories you consume even at a party, follow my lead.  Surround the hummus with quality pita chips, chunks of pita bread, or vegetables, and you have yourself a delicious mini-meal in case your healthy or vegetarian/vegan options aren’t looking too promising.

I make hummus from organic dried beans(1 cup dry equals 2 1/2 Cups cooked).  It’s cost effective, and I control the sodium. Save yourself some time and soak the beans overnight or for eight hours. I soak them in filtered water in a large mixing bowl(don’t forget the beans expand) and the picture above are the beans post-soak. For convenience or time constraints, use canned but remember to rinse well.

This is where the pressure cooker comes in handy.  Chickpeas that would normally take an hour to hour and a half simmering on the stove-top, get done in fourteen minutes with a pressure cooker. Once you do a natural release, strain the beans, but be sure to save a cup of the cooking liquid. Set aside beans and liquid to cool.

Okay, you can’t use my pictures as a guide–I made a double recipe of hummus.  I always freeze the other recipe just in case I need hummus in a pinch.  Pull out the food processor and chop a clove of garlic.

Add the rest of the ingredients: 2.5 Cups chickpeas, 4 ozs roasted red peppers, 1.5 Tbls Tahini(ground sesame seeds), three Tbls lemon juice, 1 clove of garlic, 1/2 tsp ground cumin, 1/2 tsp cayenne pepper, 1/4 tsp salt.  Process for a minute, and here is where my secret comes in, slowly add a Tbls or two or three of the cooking liquid. Process until desired consistency and move the hummus to the fridge. While the hummus is chillin, work on the pita chips.

Buy a pack of good pita bread; this is whole wheat pita. Cut into eighths and separate the thin and thicker sides of the bread.

Spray a lined cookie sheet with olive oil and sprinkle with salt.  Lay the bread down in a single layer and spray and salt the top.  Add a few twists of ground pepper here.  Bake at 400 F for 6-8 minutes. Watch them closely–they burn fast.  Leave them on the cookie sheets until cool and crisp. Bake the thin sides first and the thicker in the next batch.  The thicker sides will need  a minute more.

Spicy Roasted Red Pepper Hummus

Ingredients

 1  Cup dry chickpeas, rinsed and soaked overnight. Or a 15 oz can of chickpeas(well-drained)
 1 4 oz jar of roasted peppers
 3 tablespoons lemon juice
 1 1/2 tablespoons tahini
 1 clove garlic
 1/2 teaspoon ground cumin
 1/2 teaspoon cayenne pepper
 1/4 teaspoon salt

Instructions

1.Add the soaked chickpeas to the pressure cooker with 8-10 Cups of water. Pressure cook for 12-14 minutes with a natural release.
2.In an electric blender or food processor, puree the chickpeas, red peppers, lemon juice, tahini, garlic, cumin, cayenne, and salt. Process, using long pulses, until the mixture is fairly smooth, and slightly fluffy. Make sure to scrape the mixture off the sides of the food processor or blender in between pulses. Transfer to a serving bowl and refrigerate for at least 1 hour. (The hummus can be made up to 3 days ahead and refrigerated. Return to room temperature before serving.)

Pita Chips

INGREDIENTS:

4-8 pita bread pockets
olive oil spray
salt 

pepper

DIRECTIONS:
1. Preheat oven to 400 degrees F (200 degrees C).
2. Cut each pita bread into 8 triangles. Place triangles on lined cookie sheet.
3.Spray pan and sprinkle with salt. Add bread to the pan and spray with olive oil. Sprinkle more salt and pepper on top.
4. Bake in the preheated oven for about 7 minutes, or until lightly browned and crispy. Watch carefully, as they tend to burn easily!

I brought hummus!

Getting to know a Pressure Cooker

My daughter asked me one day if I would help her friend out and tell her what a pressure cooker(PC) is and does.  Apparently she had received a PC as a wedding shower gift, and she was not familiar with it.  And to be honest, other women I have talked to are afraid of using them. Maybe it’s the horrible stories of the pressure cookers exploding and badly burning the poor cook who innocently put it on the burner just minutes ago, or maybe it just looks intimidating.  I just purchased my first PC around 5-6 years ago. I consulted the Test Kitchen’s recommendations, and they recommended a Fagor Duo-8 quart, stainless steel model, and while it may sound large, you definitely want a larger capacity.  You can only fill it 50% full.

So, how does this contraption work?  Let’s use chickpeas as an example: I soak the dried beans for 8-12 hours and then boil them for an hour. With a PC, it’s 9-14 minutes(this does not include bringing the water to boil or natural release).  It shaves an incredible amount of time off your cooking.  When I ate poultry, I would buy turkey breasts, throw them in the pressure cooker with tomato juice for ten minutes, and I had turkey breast lunch-meat for the week.  Simply put, the lid you lock into place with a PC, allows water to reach above the normal boiling point of 212°F and reach 250°F. Food cooked in a PC maintains it’s flavor and moistness. Your food tastes better, and it takes less time to make it, it’s a gotta-have kitchen gadget.


Vegetable Broth made in the PC

Here is the collection of vegetables I’m using for my broth. There’s carrots, red onion, celery, parsnips, potato, and parsley. Five cups of veggies or whatever is ready for broth.  Be sure to clean vegetables thoroughly and then put the vegetables in the PC with a Tbls. of olive oil.  Brown the veggies for 5-6 minutes at medium-high, stirring often.

 Pour in eight cups of filtered water, lock your lid, and turn the heat to high. You have to keep a watchful eye on the PC, watching for the little button, or the technical name, pressure indicator to pop-up.  That means max pressure achieved, so you turn down the heat to a simmer and cook for the recommended time.  In the case of this vegetable broth recipe, we are cooking it for ten minutes. Don’t be afraid of the steam escaping and sounding like a loud whistle, it means it’s cooking.

After the ten minutes of cooking, turn off the heat and let(the steam)release naturally. This may take a bit of time, but it’s my preferred method. Carefully strain the broth over cheese-cloth, squeezing the vegetables with tongs to try to release all of the liquid.

As you can see it yields eight cups of broth.

I let the broth cool completely, and divide the eight cups into four freezer-safe containers.

I gave a little lesson to my daughter’s friend about PC’s, but I thought I was being most helpful, when I gave her a PC cookbook.  My PC bibles are both by, Lorna Sass, Cooking Under Pressure and Great Vegetarian Cooking Under Pressure.

I hope I’ve assuaged any fears you have about this wonderful kitchen addition.  The toughest part of a PC is locking the lid.  Other than that challenge, I love it and use it often.

Fresh Tofu?

I had read about barrels of fresh tofu in a deli…somewhere.  I hadn’t been lucky enough to stumble over one in any deli I had happened upon.  Lamenting I did not have access to the delicious blocks of fresh tofu, which this was only imagined since I had never had anything but store-bought, I was determined to end this dilemma. If this fictional deli with the unknown name was not opening in a neighborhood near me, I will make my own!! The motivation to do this DIY project was once again, influenced by, America’s Test Kitchen. I must have read the directions a dozen times while I waited for the dried soybeans and nigari to arrive. This was definitely a new frontier for me. I did not grow up in a house where my Mother made tofu on the weekends, nor had I worked in an Asian restaurant and had witnessed it being made. No, no, I had nothing to compare it to and no history to draw from.  I was excited to think I could do this at home and have fresh blocks of tofu.  This is where I confess:  It isn’t easy or quick but the results are pretty tasty.

Tools and ingredients: Molds, nigari(a type of salt) and soy beans.  Not pictured but also needed: Cheese-cloth or food- grade muslin. The mold on the left is the plastic container with holes punched out of the bottom and other is a mold I recently purchased.

Start out by soaking 8 ozs beans for 12-18 hours. The beans here have been soaked for 18 hours.

Take 1 cup beans, 3 cups water and process in blender.  Repeat this twice and pour into Dutch oven.

Bring beans and water to a boil over medium-high heat, stirring often.  Once boiling, reduce heat and cook 10 more minutes until slightly thickened.

Prepare a colander with triple layer of food-grade muslin or cheesecloth and place the colander over a bowl or pot. Pour the soy liquid into the muslin.  The cloth will catch the soy curds and the bowl beneath the colander should be smooth, soy milk. Gather up the ends of the muslin and squeeze out the excess liquid.  Put the curds aside for another use(I feed it to chickens, but I am guessing there are other uses). Pour the liquid back into a clean dutch oven and bring back to a boil on medium-high heat. Remove from heat and add a 1/4 Cup of the diluted nigari while stirring. Let rest for two minutes, covered.  Uncover dutch oven and add remaining nigari. Wait 20 minutes, undisturbed.

Gently scoop out the curd and place in a cheese-cloth lined mold.

Cover curds with extra cheese-cloth and weight it with a two-lb anything. Keep the weight on until desired firmness.

The finished product.  It ended up in a curry stew.

Taken from America’s Test Kitchen DIY

Tofu
8 ounces(1 1/4 cups)dried soybeans, picked over and rinsed
9 1/2 cups water, plus extra for soaking beans
2 teaspoons liquid nigari

1. Place beans in large bowl or container and add enough water to cover by 2 inches. Soak until beans are pale yellow and split apart when rubbed between fingertips, 12 to 18 hours.

2. Drain and rinse beans(you should have about 3 cups beans). Working in batches, process 1 cup soaked soybeans and 3 cups water in blender until mostly smooth, about 3 minutes. Transfer mixture to Dutch oven and repeat twice more with remaining 2 cups soybeans and 6 cups water.

3. Line colander with butter muslin or triple layer of cheesecloth and set over large bowl. Bring soy milk mixture to boil over medium-high heat, stirring frequently with rubber spatula to prevent scorching and boiling over. Reduce heat to medium-low and simmer, stirring frequently, until slightly thickened, about 10 minutes.

4. Pour soybean mixture into prepared colander to strain. Being careful of hot soy milk, pull edges of muslin together to form pouch, and twist edges of muslin together. Using tongs, firmly squeeze soybean pulp to extract as much liquid as possible. You should have about 8 cups of soy milk; discard soybean pulp or reserve for other use. Transfer soy milk back to clean Dutch oven and bring to boil over medium-high heat, stirring occasionally to prevent scorching. Remove pot from heat. Combine remaining 1/2 cup water and nigari in measuring cup.

5. Begin stirring soy milk in fast, figure-eight motion with rubber spatula. fast, about 6 stirs. While still stirring, add 1/4 cup prepared nigari mixture. Stop stirring and wait until soy milk stops moving. Cover pot and let sit undisturbed for 2 minutes. Uncover, sprinkle remaining 1/4 cup nigari mixture on surface of milk, and gently stir using figure-eight motion, about 6 stirs. Cover pot and let sit undisturbed until curds form and why is pooling on top and around sides of pot, about 20 minutes.

6. Line tofu mold with butter muslin or triple layer of cheesecloth and place in colander set over large bowl or sink. Using skimmer or large slotted spoon, gently transfer soy milk curds to prepared mold, trying not to break up too much of their natural structure. Cover top of curds with excess muslin and place top of press in place. Weight with 2-pound weight. Press tofu until desired firmness is reached: 20 minutes for soft; 30 minutes for medium; 40 to 50 minutes for firm. Gently remove tofu from mold and place in pie plate or baking dish. Fill with cold water to cover and let sit until tofu is slightly firmer, about 10 minutes. Tofu can be refrigerated in airtight container filled with water for up to 1 week; change water daily.

Notes:  I had a tough time finding liquid nigari, so I bought flakes. Here is a link to Nigari. I add two teaspoons flakes to the 1/2 cup of water and stir until dissolved..

These are the beans I ordered, Bob’s Red Mill Organic Soy Beans; one bag will make 3 squares of tofu.

Don’t worry if you don’t have a mold, I fashioned one a plastic container with holes punched out of the bottom.