All posts by Luv2cookinWI

The love for preparing good, healthy food has been a long road, indeed. My mother made a great example by refusing to deep-fry anything and to make sure there were both a fresh and a cooked vegetable served with every meal. She was an incredible cook who made her own yogurt and demanded fresh when the promise advertised fresh. Yes, my vegetarian "roots" and the need to know what goes into everything I eat, started with my mother but I have taken it so much further. I am all about finding ways to re-produce common items in the kitchen and making them not only better but also healthier. My DIY craziness has made trips to the grocery store more affordable and trips to the doctor's office more favorable.

Me an’ my sprouts

So many health scares surrounding these healthful powerhouses. Don’t be afraid: every vegetable we consume raw always holds a risk of salmonella or E coli. Sprouts have a leg-up on this due to the seeds soaking in water.  I’ve been making my own sprouts on and off for the last ten years, and I can confidently say, the sprouts have never been a source of illness for me. I use organic seeds, filtered water, and I religiously water and drain two or three times a day.  Use your nose: If it doesn’t smell right, throw it away. Another level of safety I’ve adopted is, once the seeds have germinated and grown, I harvest the sprouts and soak them in filtered water for five minutes.  This cleans and eliminates the seed casing which can make the sprout bitter. This last step makes for tastier sprouts too.

Since I started off this entry with the bad let’s move on to the good.  Sprouts are nutritious vegetables packed with B, C, E and A vitamins(up to 15 times the original content).  They are easier to digest and offer natural enzymes we don’t often get with their mature cousins.  Don’t think of them just for salad–they add an extra layer of crunch to hot food as well as cold. Throw them in soups, smoothies, sandwiches or just munch on them.  You don’t need special equipment to grow them; a jar with a muslin or cheesecloth cover will do the trick.  You need need seeds and water and a little dedication-that’s it.  I prefer a sprout starter, and to prove it, I’m on my third one, the Victorio VKP1014 4-Tray Kitchen Seed Sprouter. You water the first tray and the water runs down holes to the outer perimeter of the first tray to all of the trays below. The only caveat is you have to tip the trays a little to remove excess water.  A great idea I read was to tip all of the trays like the leaning tower of pisa. They drain and receive a little air at the same time.  

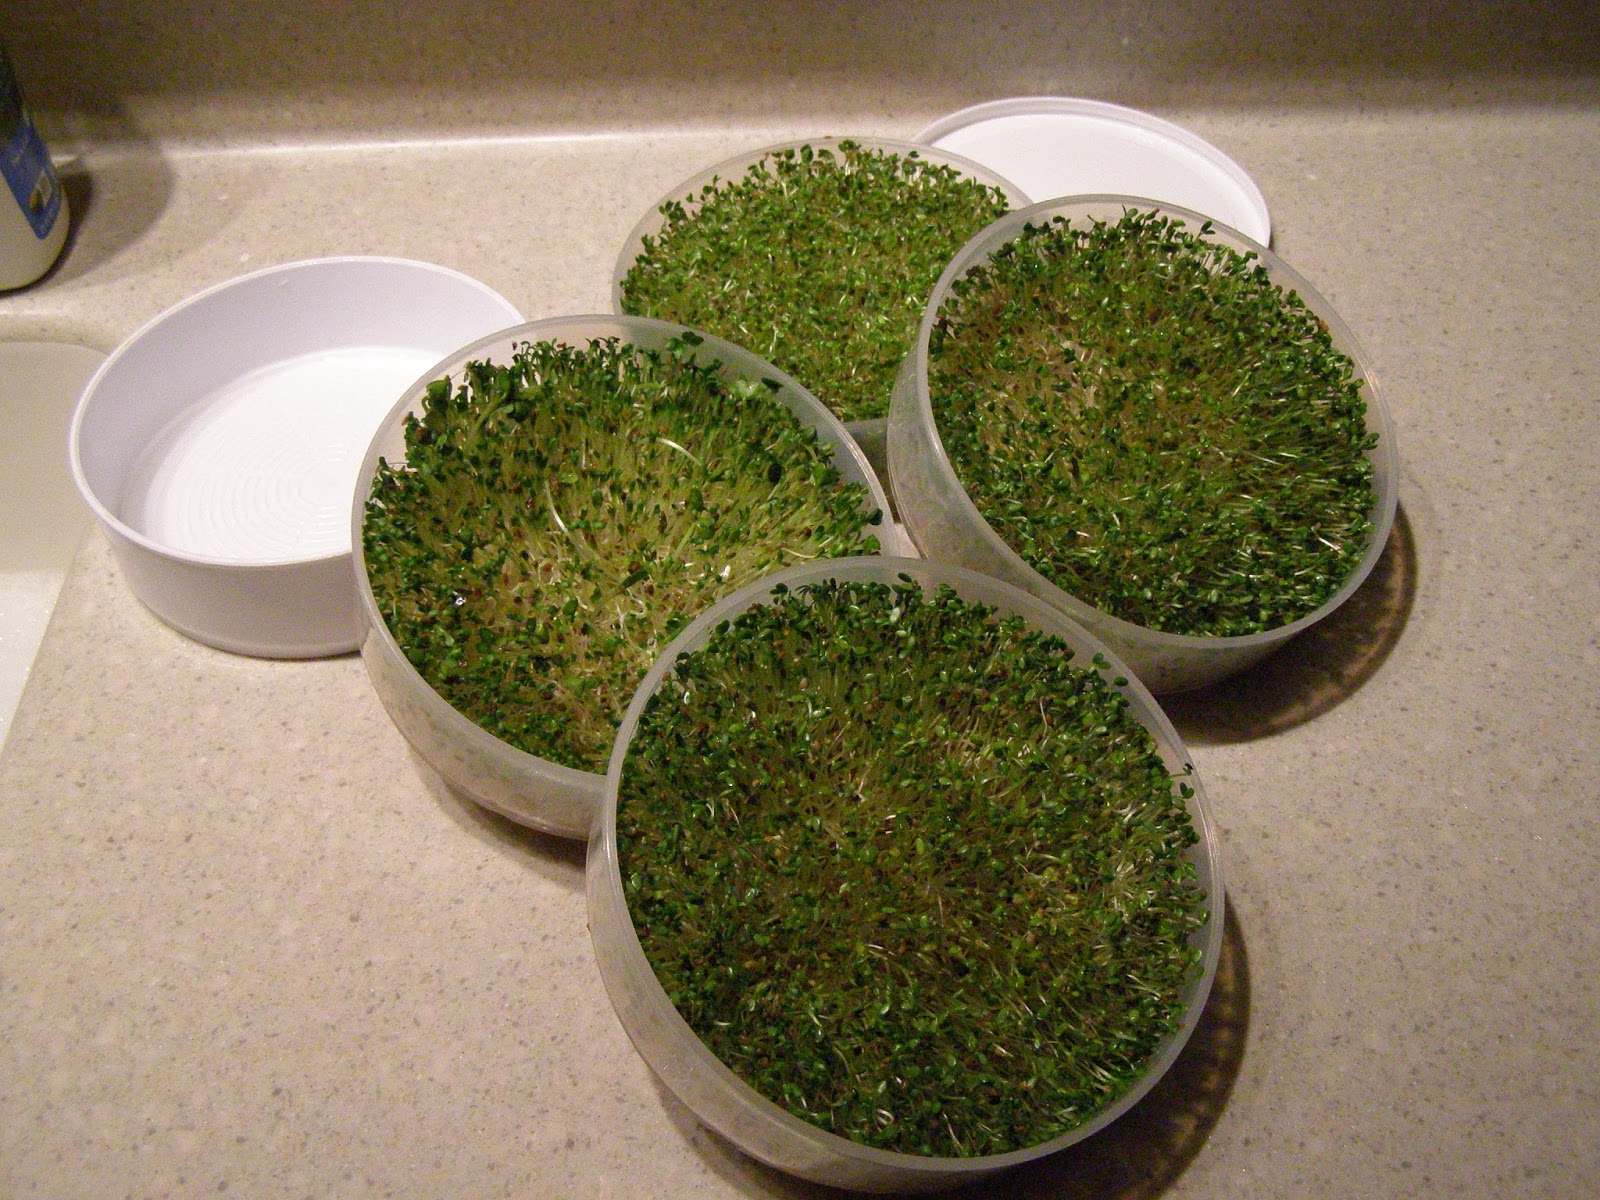
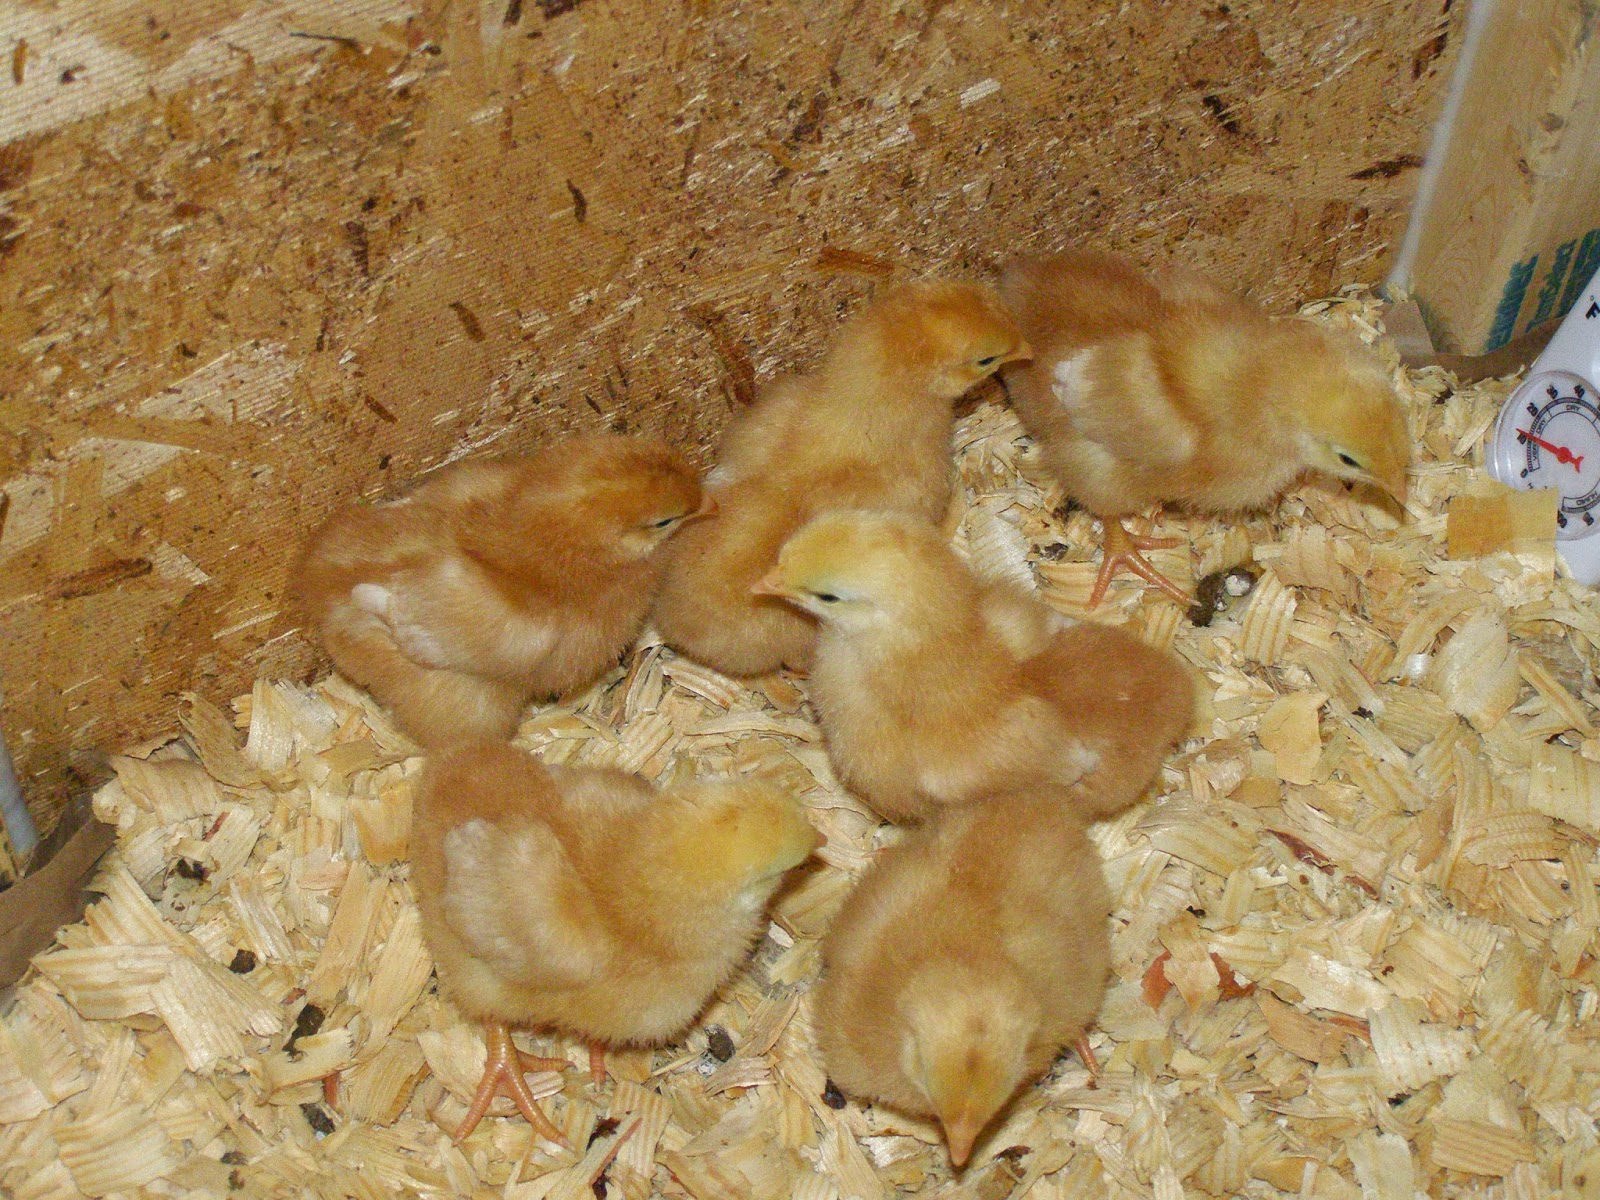
How pretty are those green sprouts! I did here what I swear never to do; I didn’t space out the growing-time.  I recommend doing a tray every other day or so.  It takes about 5-7 days for the sprouts to get this mature so plan ahead.  If you alternate days for starting seeds, you won’t end up with a large harvest like this.  Good thing the chickens like sprouts.

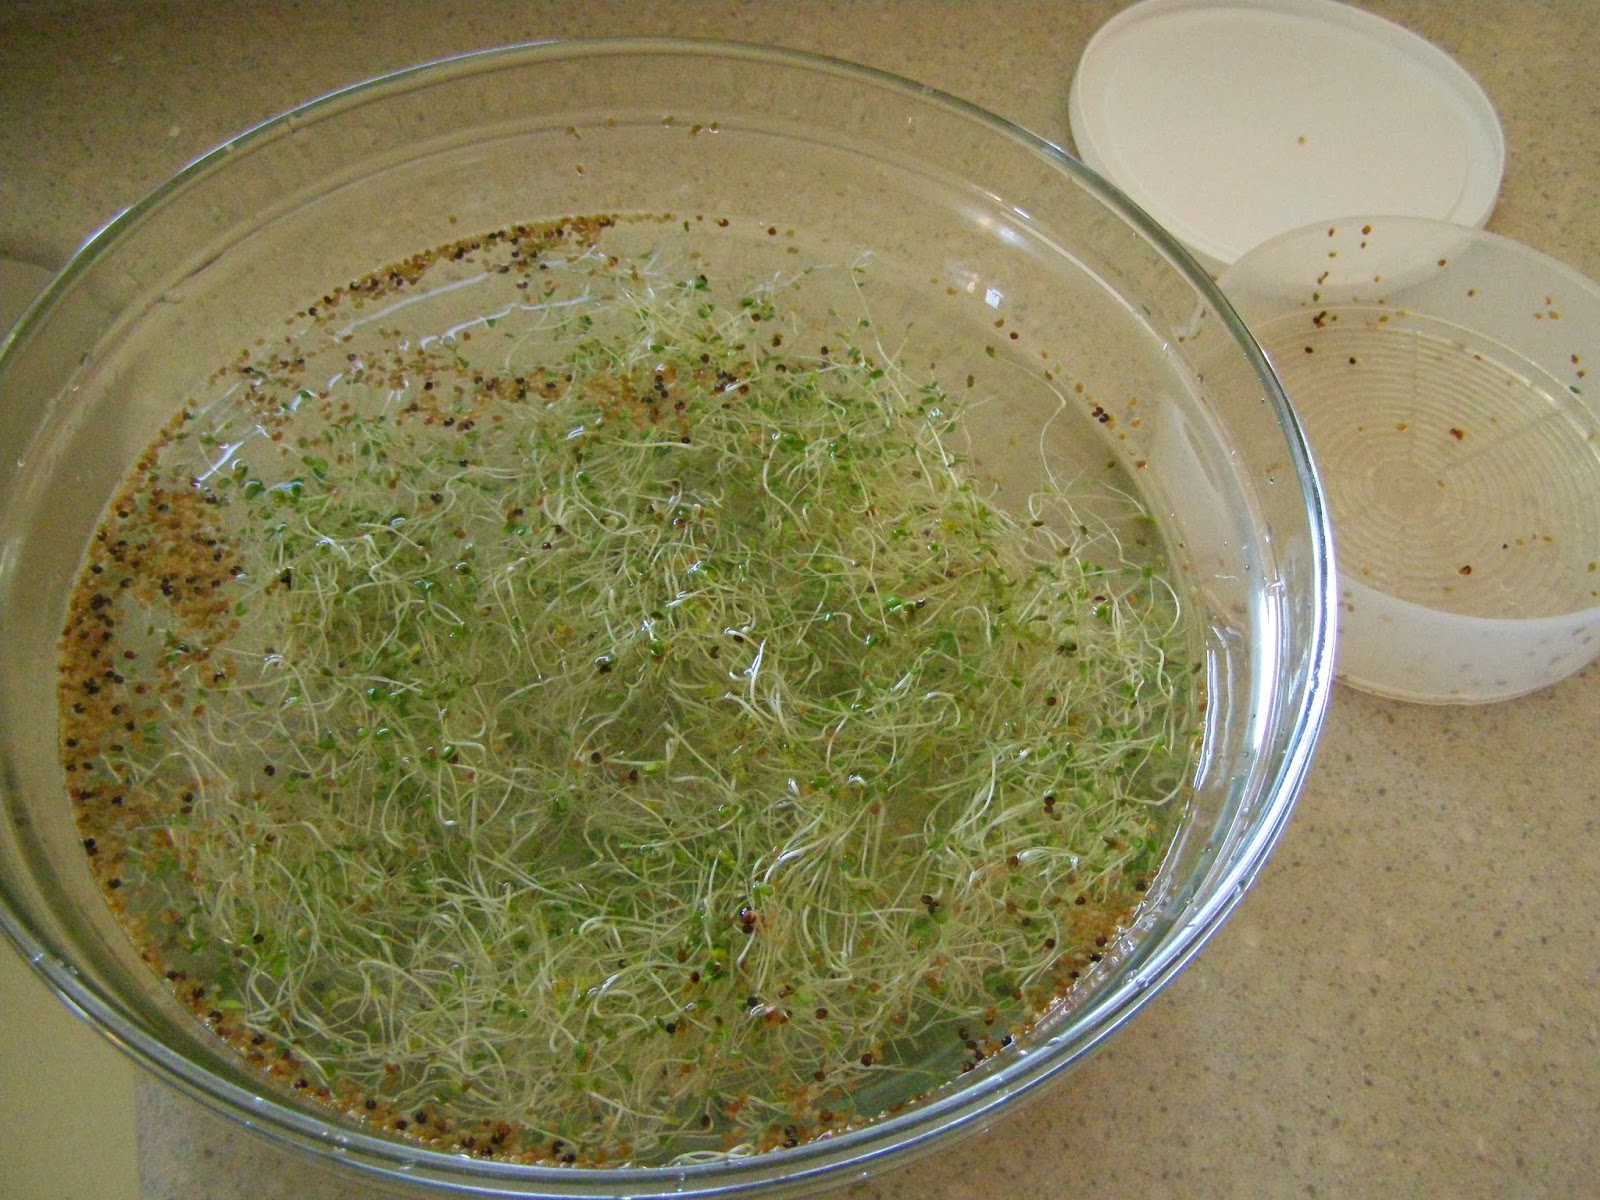
I’m cleaning the sprouts and separating them from the seed.  Just throw them in the water and swish around a bit.  The casings will stay behind in the water.  Dry the sprouts the best you can before storage and clean the trays with soap and water before starting a new crop. 


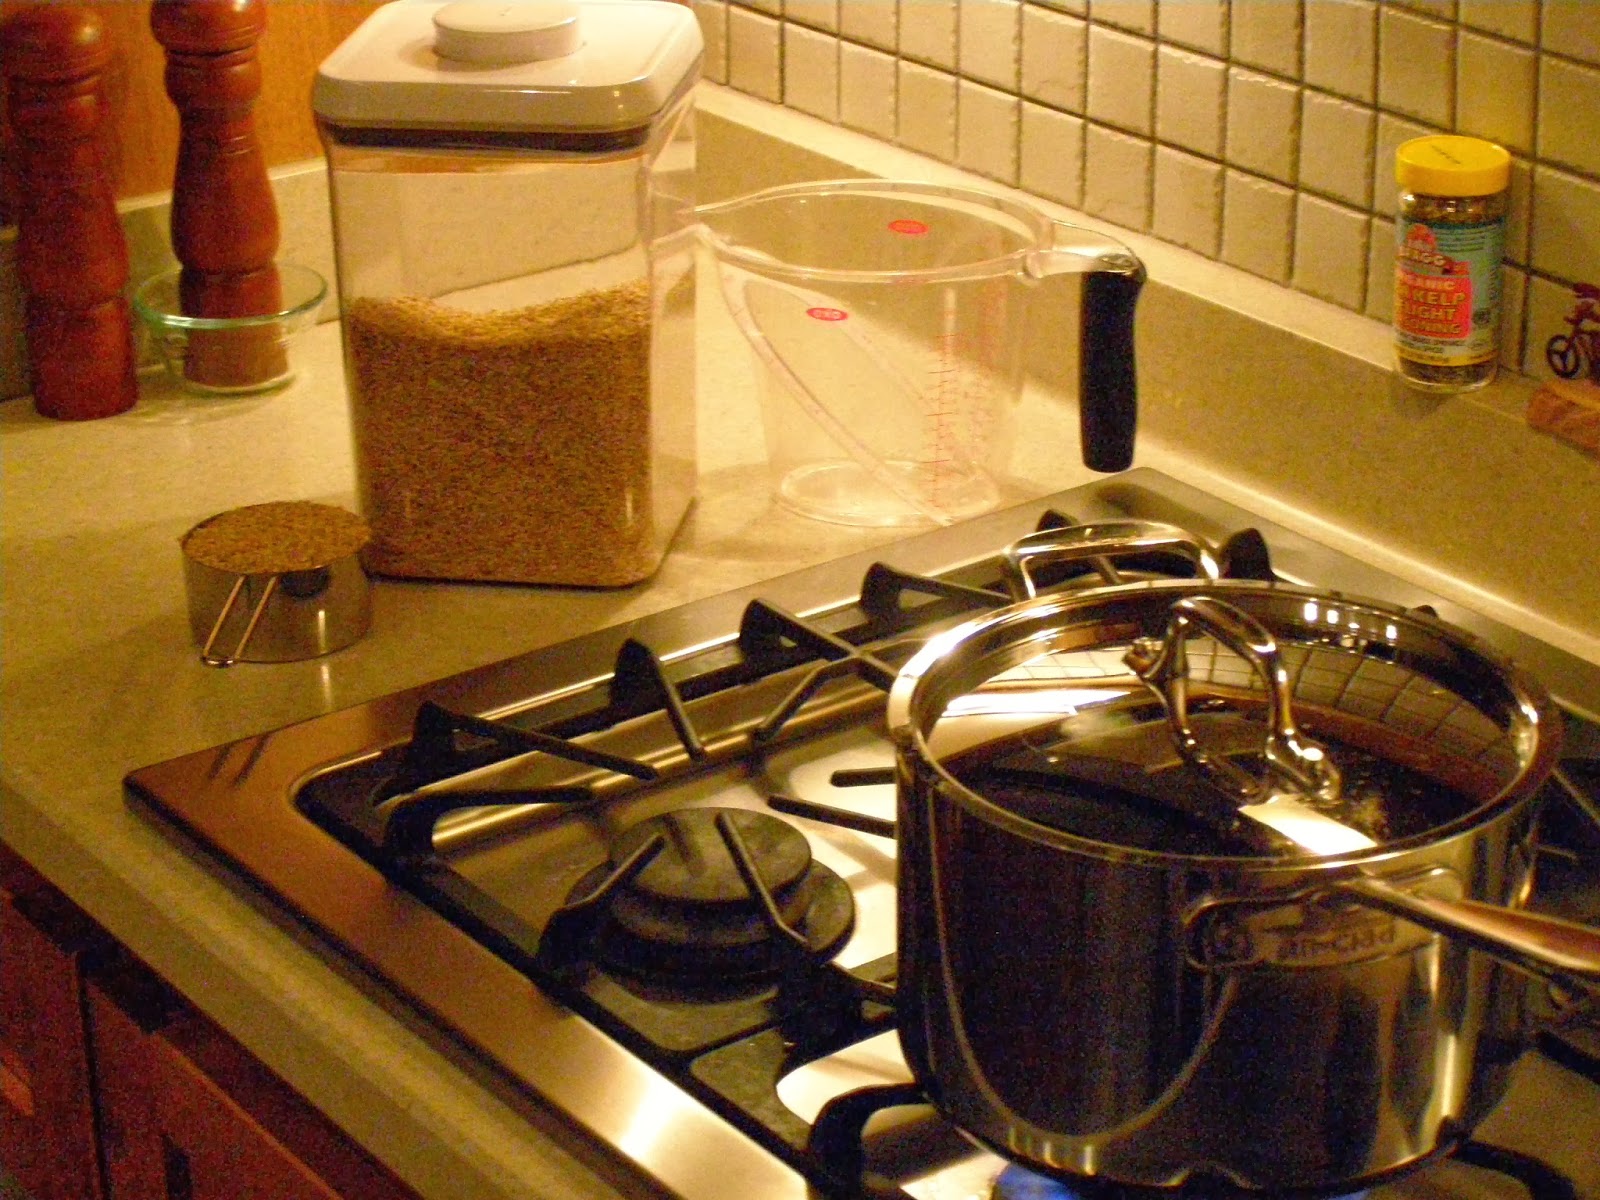
I’ve harvested all four trays and now I’m starting over.  I have one tray of chick peas and another of a salad blend. The bigger seeds you will add 2-3 tablespoons and just a teaspoon or so of the small seeds. Don’t crowd the tray with seeds.  I’ve purchased organic seeds from Amazon and another good source is The Sprout House.  I found them just recently, and I was impressed with their sample packs and the quick shipping.

To start the growing process, just add water.  They recommend soaking the seeds for quicker germination, but I skip this step. I add water to the first tray and it leaks down to the rest until the water is deposited in the bottom tray.  The bottom is hole-free and is for collecting of water only–no growing sprouts in this.  Be sure and alternate the position of your trays. The next time I water, I will move the salad blend to the top and the chick peas to the bottom.  The bottom seed tray always seems to retain the most water so it’s important to alternate them.  Water them at least twice a day, and you will have sprouts in 5-7 days.  Pretty easy, wouldn’t you say?  Excuse me while I dig-in to my hefty sprout harvest and throw some on the black bean burger I am having for dinner tonight.

For the love of yogurt

In the 70’s, my very progressive and health conscious mother, made her own yogurt. She would serve it as dessert in little dishes with fresh fruit.  I did not like it. And I was not happy my mother was serving this cooked milk thing and masquerading it as a dessert.  The yogurt we purchased in the stores in the 70’s and beyond was the furthest thing from healthy; from the artificial colors and fruit flavoring and the gelatinous mess the market tried to pass off as yogurt did not endear me to the food anymore than my mother’s creation.  I didn’t eat yogurt for years until the last decade or so.

I’m not sure how I graduated from buying organic yogurt from my co-op to making my own, but thanks to Amazon’s order history, I started making it six years ago. So, since May of 2009, I have made countless batches of delicious, organic yogurt. While it’s tart compared to what Americans are used to, you can counteract that by adding granola, fresh strawberries and sprinkles of dark chocolate. Now it’s tasty enough to make even me a yogurt fan.

Here are a few items you will need to make your own yogurt: milk, yogurt culture, a glass jar and a source for  low heat(95° to 115°).  This is the minimal you will need.  To make my recipe, you will also need organic, powdered milk, vanilla bean(optional), and a thermometer.

Let’s talk about the most important ingredient, milk. I was under the belief raw milk would make the best yogurt. While it does make great tasting yogurt, it’s awfully runny.  I was really baffled when I cultured my first gallon of raw milk, and it turned out to look more like kefir than yogurt.  I did an exhaustive research on the internet and learned raw milk behaves like this; it doesn’t want to solidify without a thickening agent like gelatin. Hello, I’m a vegetarian, any other ideas? I experimented with this and that, and I learned quickly my methods for making yogurt from pasteurized milk worked on the raw milk as well.  Raw milk just yields a thinner consistency. That’s alright, I can get past this: Greek yogurt anybody?  I could not understand why the yogurt was so thin for this full-fat milk.  I learned from the wonderful internet, pasteurization damages the proteins in the milk so the culturing is more effective and produces a thicker yogurt. Before I started getting raw milk, I was using an organic 2% ultra-pasteurized milk.  It worked great for texture, and if you aren’t interested in raw milk, it made a pretty tasty yogurt too albeit tart.

The second necessary item is the culture.  You don’t necessarily have to buy a package of starter for your first batch.  You can always use a half a cup from your favorite yogurt.  I have never done this for fear of the unknown.  A failed batch of yogurt can be a costly affair when you are talking about organic milk and organic powdered milk, so I try to make it as fail-safe as possible. I like Yogourmet Freeze-Dried Yogurt Starter.  I use a new culture packet for every quart of yogurt.  Cultures for Health has several different cultures and one packet will make up to two quarts of yogurt.

Making Yogurt

This photo shows what you need to make your yogurt. Two quarts of milk, yogurt culture, powdered milk, whisk, and a thermometer.

My two yogurt makers: the first has seven-6 oz jars for yogurt and the other makes large batches in a water bath.  Between the two–I loved my Euro-Cuisine YM100 Automatic Yogurt Maker.  I rarely had a bad batch in the Euro-Cuisine, and I loved the pre-measured jars.  I would just throw them in the dishwasher for clean-up. I can tell you this, the small the amount of yogurt the more likely for success. Feel free to start out making a quart with the first couple of batches.

I have heated the milk in the microwave to 110° to 112°.  You do not want it much hotter or cooler.  We want to make it starter friendly. Here I have heated up the milk and now I am adding the powdered milk  Five to six tablespoons for two quarts of milk. This is a quicker method for yogurt because the powdered milk allows me to skip bringing the milk to high heat and then cooling to the 110°. I have not the time nor the patience to deal with that; besides, I do not want to “cook” the raw milk and kill all that is good about it. I whisk the powdered milk until all the lumps are gone, and flick some vanilla bean seeds into it(not shown). Very gently add the starter and stir.
Since I started getting the raw milk, I’ve been making larger quantities of yogurt.  Here I have about 160 ozs.of milk, and I am culturing it in my dehydrator. With it being such a large quantity, I set it at 105 F for 24 hours. If I am using one of my culturing appliances, I set it for twelve hours plus. Directions say you should have yogurt within 4 hours, but I want to make sure my yogurt is set. Whatever you choose for the heat, it needs to be consistent and free from drafts.

Here is the yogurt after culturing undisturbed for 24 hours and then refrigerated for 12 hours. The yogurt must be chilled after it is through culturing.  It is not a complete process until it is thoroughly cooled.  You can consume the yogurt here, or if you want a more solid consistency, continue to the steps below.

Making Greek Yogurt

Remember when I told you the raw milk produced runny yogurt? I combat that with making Greek yogurt. I take the chilled yogurt and scoop it into this container, Cuisipro Donvier Yogurt Cheese Maker, or any container for straining.  You can also use cheesecloth or a very fine sieve. After you find a container to strain it, place it in the fridge for 4-6 more hours.  It really depends on how you like it.  I like my yogurt to contain some whey, so I don’t leave it strain too long.

Pictured here is most of the yogurt I made(minus 12 ounces I’ve already eaten).  The first time I strained the yogurt like this, I was aghast at the waste. You take out the whey and the volume of yogurt is drastically reduced.  Oh, so this is why Greek yogurt costs so much more.  To the right of the yogurt is some of the whey but not even close to all of the whey I collected.  I use it in bread recipes and water my plants and sprouts.  It’s a great source of protein, so I try not to waste it.  To give you an idea of how much yogurt I yielded after culturing 160 ozs. of milk, I had about a total of 72 ozs. of yogurt post straining. Trust me, none of this yogurt will go to waste.

Here is the finished product with granola and dark chocolate chips.

Maybe if my mother had dressed up her yogurt like this, I would have loved yogurt a long time ago.

Smitten with Cookbooks of Old

Beth, a co-worker of mine, is a woman who sees the beauty in the most simplistic items of everyday life. She and her sister frequent estate sales and find those hidden treasures buried in hoarder-like mountains of…stuff. I made some dessert bars for someone’s birthday and as a thank you for another co-worker.  Beth enthusiastically gushed about how good the bars were and how I “do” it.  She started telling me about all of the old cookbooks she has collected, but she only reads them; paralyzed from doing the actual cooking or baking. Beth promised me she would bring in some of her finds.  Good to her word, she brought me a large bag, busting at the seams, of old cookbooks dating back to 1907. I couldn’t wait to dig in and peruse these old treasures. I gently opened each cookbook, and turned the pages so carefully as to not add a tear or a rip. Inside are poems, personal notes, names of individuals I never knew and recipes so short and succinct, I could quickly read through each and every recipe. Some pages are speckled and stained with butter, oil or chocolate, or little notes, “not good-too heavy.”  All of this makes them all the more special(note to self: When I smear my recipe with sticky fingers, it will add personality to the recipe/cookbook).  After perusing the old cookbooks looking for a good recipe I could try, I notice why recipes are such short entries: No baking directions. Gulp, this leaves a large-margin for error. Here is an example from The Daniel Webster Flour Cookbook:

Mock Cherry Pie

One cup of cranberries cut open , half a cup of raisins cut fine, one cup of sugar, small cup of water(?), one tablespoon of Daniel Webster flour, one teaspoon of vanilla. Bits of butter may be added. Bake with two crusts.

Err, where’s the rest of the recipe?  I looked at the page before and after to see if there was a master recipe somewhere. Nope. If you didn’t have a mother who included you in her baking chores, your first couple of pies were epic fails.

I chuckle at some of the titles and notes with my 21st century-bias:  The Settlement Cookbook, Mrs. Simon Kander, second printing 1946, lists on the cover, “The way to a man’s heart.”  Oh, is that why I cook? Another book was titled, Food Preparation Meal Serving and Housewifery, Authorized by Board of School Directors; Milwaukee Public Schools. Housewifery isn’t recognized by spell check–thank goodness.

I especially love the literary references and poems in some of the cookbooks. This poem is from the Book of Recipes, Ladies’ Aid Society of The First English Ev. Lutheran Church of Detroit, MI, 1920. The author, Meredith.

We may live without poetry, music and art;
We may live without conscience , and live without heart;
We may live without friends, and live without books;
But civilized man cannot live without cooks.

He may live without books–what is knowledge but grieving?
He may live without hope–what is hope but deceiving?
He may live without love–what is passion but pining?
But where is the man that can live without dining?

Thank you, Meredith.

This recipe is taken out of The Daniel Webster Flour Cookbook, copyright 1907…sort of. It’s actually a recipe written in  the cookbook by it’s owner, Virginia Louise Schaefer.

Pour boiling water over prunes(10 ozs of prunes)and let sit till plump(2-8 hours). When you drain the prunes, do not forget to collect some of the liquid for the frosting. 

Drain the prunes and chop.

Mix the butter, sugar and prunes

Add the dry ingredients.

This is after the milk addition–crazy moist, and I didn’t think it would ever bake through. I thought by spreading it out in a 8×8 pan would quicken the baking time as well as increasing the temperature to 350 F. Not so much–it still took an hour. 
Looks good. I waited until just a bit of batter showed on my toothpick before I took it out of the oven.


Prune Cake
This prune cake (is)somewhat like a fruitcake in texture; it has a finely blended flavor, and is moist enough to keep well.

Cake Ingredients
1/2 cup shortening(I used a stick of unsalted butter instead)
1 cup sugar
1 cup chopped, cooked prunes(Pour boiling water over prunes and let sit for 2 hours or more)
2 cups sifted, cake flour(I did not sift)
1 tsp baking soda
1/4 tsp salt
1 tsp cinnamon
1/2 tsp cloves
1/2 tsp nutmeg
2 1/4 cups milk
1 tsp vanilla

Frosting Ingredients
3 tbls butter(Two tbls)
1/4 cup prune juice(I used the liquid from the plumping prunes)
1 tsp vanilla
1/2 tsp lemon extract(a squirt of a lemon)
2 tbls chopped prunes
1/2 cup chopped nuts
4 cups sifted confection sugar(I used two cups)

Cake Instructions
Cream shortening and sugar thoroughly; stir in prunes. Mix and sift dry ingredients and add to previous mixture. Slowly add milk and vanilla. Beat for two minutes.  Pour into shallow loaf pan(I used a 8×8 pan instead), greased and lined with wax paper.  Bake at 325 for 1 1/4 hours(I baked for 60 minutes at 350).

Frosting Instructions
Blend first four ingredients and add the prunes and nuts; slowly add the confection sugar until the frosting is smooth. Spread on cake when cooled.

Ok, this is my first recipe from the old cookbooks, but it will not be my last.  Beth has loaned these old cookbooks to me for as long as I need, and I plan on reviving a recipe or two off the old pages.

Getting to know a Pressure Cooker

My daughter asked me one day if I would help her friend out and tell her what a pressure cooker(PC) is and does.  Apparently she had received a PC as a wedding shower gift, and she was not familiar with it.  And to be honest, other women I have talked to are afraid of using them. Maybe it’s the horrible stories of the pressure cookers exploding and badly burning the poor cook who innocently put it on the burner just minutes ago, or maybe it just looks intimidating.  I just purchased my first PC around 5-6 years ago. I consulted the Test Kitchen’s recommendations, and they recommended a Fagor Duo-8 quart, stainless steel model, and while it may sound large, you definitely want a larger capacity.  You can only fill it 50% full.

So, how does this contraption work?  Let’s use chickpeas as an example: I soak the dried beans for 8-12 hours and then boil them for an hour. With a PC, it’s 9-14 minutes(this does not include bringing the water to boil or natural release).  It shaves an incredible amount of time off your cooking.  When I ate poultry, I would buy turkey breasts, throw them in the pressure cooker with tomato juice for ten minutes, and I had turkey breast lunch-meat for the week.  Simply put, the lid you lock into place with a PC, allows water to reach above the normal boiling point of 212°F and reach 250°F. Food cooked in a PC maintains it’s flavor and moistness. Your food tastes better, and it takes less time to make it, it’s a gotta-have kitchen gadget.


Vegetable Broth made in the PC

Here is the collection of vegetables I’m using for my broth. There’s carrots, red onion, celery, parsnips, potato, and parsley. Five cups of veggies or whatever is ready for broth.  Be sure to clean vegetables thoroughly and then put the vegetables in the PC with a Tbls. of olive oil.  Brown the veggies for 5-6 minutes at medium-high, stirring often.

 Pour in eight cups of filtered water, lock your lid, and turn the heat to high. You have to keep a watchful eye on the PC, watching for the little button, or the technical name, pressure indicator to pop-up.  That means max pressure achieved, so you turn down the heat to a simmer and cook for the recommended time.  In the case of this vegetable broth recipe, we are cooking it for ten minutes. Don’t be afraid of the steam escaping and sounding like a loud whistle, it means it’s cooking.

After the ten minutes of cooking, turn off the heat and let(the steam)release naturally. This may take a bit of time, but it’s my preferred method. Carefully strain the broth over cheese-cloth, squeezing the vegetables with tongs to try to release all of the liquid.

As you can see it yields eight cups of broth.

I let the broth cool completely, and divide the eight cups into four freezer-safe containers.

I gave a little lesson to my daughter’s friend about PC’s, but I thought I was being most helpful, when I gave her a PC cookbook.  My PC bibles are both by, Lorna Sass, Cooking Under Pressure and Great Vegetarian Cooking Under Pressure.

I hope I’ve assuaged any fears you have about this wonderful kitchen addition.  The toughest part of a PC is locking the lid.  Other than that challenge, I love it and use it often.

Our quest for four, feathered friends(part 2)

So we had our red sex link chicks in a brooder box, but all too quickly grew from chicks to pullets. They were outgrowing the brooder box, so it was time to make a decision on the coop. We looked for coops online, but we couldn’t find an affordable coop that looked like it could withstand Siberian-like winters.  As I mentioned in an earlier blog, everything I read leaned towards building your own, but I could tell the hubby wasn’t very excited about constructing a coop. So to make it a bit more enticing, I allowed him to pick out the plans. We searched endlessly but finally agreed on the “The Daisy.”  The plan originated from, Clean Coops and the cost was $35.00 to download.  It was $35.00 well spent since my hubby is not a woodworker or a tinkerer(and I’m more comfortable in the kitchen).  I printed out all 41 pages and handed the “stack” to him. Oh dear, what did I get him into?

We knew there was no time to waste; we had to get started on that coop in a hurry.  But the weather wasn’t cooperating–where’s spring?  It was a cold and rainy spring so hubby started the frame-work in the garage.

He was able to construct this in two hours. The equipment needed is minimal: power saw and drill, a level, tape measure, t-square, and hammer.
On the first decent spring day, we carried out the framing into the yard. Here he has added the plywood floor and the beginning of the first nesting box.
Looking more like a coop here. The other three walls were framed-in before placement of the front wall and the frame of the roof.  You can see the coop is elevated onto timbers, but we found out later, the height made for difficult egg collection. 
Roof is raised.
Rest of the walls go up and here is the finished nesting box. Inside the box there are dividers forming three equal nests with a hinged lid. We made sure we had quick and easy access to eggs in the am. Differing from the plans, we made only one active nesting box and made the other a storage area. Remember, this coop was designed for 8-12 hens; we are allowed four. 
We kind of jump to the finished coop but here it is(it was a busy spring). . I refer to the coop as the Taj Mahal of coops! It’s equipped with two screened windows, two roosts, a heated water dish, a fan and a convective heater. Notice the sand box on the left; for the girls to take dust-baths.  We purchased an old dog kennel from Craigslist for $250.00 for the chicken run. Between the enclosed foundation of the coop and the run, the chickens have 100 square feet of their own. We keep them in the enclosure while we are gone, and then let them out to roam the fenced-in yard when we are home.  We’ve clipped their wings only once, and had to adjust the fence in certain spots to prevent them from flying over the fence and into the neighbor’s yard.  
My adorable girls. 
Like I said earlier, it was NOT a nice spring.  He was working on that coop in 38 degree weather, so it took longer than it should have; He started building the end of March and finished in early May.  He touched-up and made adjustments here and there until the winter.  I’m not sure I’d recommend doing it this way, but I have to be honest, the quick-growing hens were definitely great motivation. 
The start-up costs for these gals is on the high-end, $650.00 for the coop and run and that doesn’t include extras like the heater, and the heated water bowls(two of them-one inside the coop and one for outside). My hubby used odds and ends from the garage like extra shingles and paint so that helped keep costs in check.  But to be honest, we don’t have these girls only for the eggs. I had read how delightful these girls can be for pets, and I was intrigued. We have had the girls for 10 months, and we have become big chicken enthusiasts.  They each have such a distinct personality, and whoever said chickens are dumb, didn’t know chickens very well.  They are smart and interesting birds with always a lot to say. There’s a youtube clip of a gal going on about how chickens are the gateway farm animal.  Oh, how ridiculous.  
Next blog entry: Raising goats in the city. Not really. 

Our quest for four, feathered friends

It began around this time last year: the want of the sound of little feet scurrying around the house and the joyful sounds baby…chicks make.  I talked the toughest party into it(my hubby) now I have to talk my neighbors into it.  The backyard chicken law just went into effect on 07/28/2011, so this ordinance is relatively new. I read through all of the requirements necessary to obtain a permit for a mere four chickens, and I was discouraged. The list was long, and I wasn’t confident we could comply.  The space was the first concern: It had to be 25 feet from any habitable structure(eeked by-barely, and we have a double lot). And then there was approval from any neighbor who abuts our property.  I needed to contact and get the blessings from SIX of our neighbors. This was a huge challenge since it was January, and three out of the six I had waved to but never had spoken to. Oh, and did I mention, one of the neighbors was a renter?  I contacted all in person and delivered the form they needed to sign for the city, an informational pamphlet and a personal letter(below).

We received a lot of questions and a few of the neighbors were pretty excited. With the aid of my wonderful husband and a tenacity rarely seen in me, we finally collected all of the signatures by mid February.  My chicks were pre-ordered by February 13th and the permit issued March 1st. I may have put the chicken before the egg just a little bit. We picked up the girls March 15th!

So darn cute at a few days old.

If you are thinking about adopting a few chickens, here are a few things to consider.

Decide whether to build a coop and a run or to buy a kit off of the internet. We looked at all the coops available, and we decided we needed to build ours. The coops we could buy looked unstable and not frozen tundra ready. And after reading several comments on the internet, by the time you put-together an expensive kit, you may as well have built your own.  Get plans!!!  Building a chicken coop is nothing like a dog house; chicken coops are “special.”  For example, the coop plans we purchased had a box underneath the roost to catch the droppings(and occasional eggs). It looks like a big tool box you just lift out and dump. Cool, little features like that can make chicken maintenance a breeze. We ordered our plans from: http://www.backyardchickens.com/

Do you have somewhere to keep the chicks warm and safe?  They need a brooder box with a light to keep them safe and warm until they are ready for the coop. We kept them upstairs and away from any inquisitive felines with a 16 cubic feet  brooder box made of plywood. It took a few hours to make and held the chicks for nearly eight weeks. Plan on securing the top of the box with rabbit fencing or something like it to keep the girls from flying up and out. They start testing their wings pretty quickly. Be prepared for dust from shavings(no cedar use pine) and an occasional accident from the girls.

Here are the girls perched on the brooder box. They are about five weeks here.
Do your research on the breed.  Some are bred for quick maturity, high-production and others for their friendly dispositions.  We opted for the former with red sex-link(guaranteed to be all hens), and we are not disappointed.  The girls started laying in July and are still laying an egg each a day.  I haven’t bought eggs in six months.  You can order chicks from the internet but the minimum order is prohibitive.  Some require 15 or more. I could only have four, so we ended up purchasing our chicks from a feed and tractor store in an outlying area. They required we buy six, so I gave two of them away to a friend. 
Remember what mature chickens do: In between laying eggs and looking adorable, they will hunt and peck and scratch your yard.  We like to let them out of their run when they can be supervised(we have a hawk who regularly visits the yard), and they tear-up a lot looking for bugs. On the other hand, our grass has never looked greener from all of their “deposits.”  We’ve been composting their poo all winter long and that’s going to be dumped into our vegetable garden come spring. You wouldn’t think four chickens would have a lot to give but they do.
We received some dubious reaction when we said we were getting chickens as pets, but they have turned out to have pecked their way into our hearts. Corny but true.
Next post will be about cost and the fun involved with building a coop in early spring.

Tapenade: A taste of the Mediterranean in the Midwest

I don’t know when or where I discovered this delicious spread or what motivated me to make it, but I can’t seem to keep it around the house lately. I go through food stages, but I think this one is healthy enough to keep in the regular food-prep rotation. It has lots of good fats(mono-unsaturated)due to the olives, anchovies and olive oil, and it adds many layers of flavor to whatever I add it to. I use it in place of anything I spread mayonnaise on, or I top my eggs or pasta with it.

While olives, capers and anchovies(if using) are salty, and I don’t like salt, Cook’s Illustrated(no, I do not work for them, but I would like to) to the rescue again. A recipe, in the November and December issue, had a method for reducing the saltiness with the surprising addition of pine nuts.  The recipe calls for un-roasted pine nuts but guess what I had in the freezer?  And let me warn you about the price of organic pine nuts; gulp, expect to pay $20.00/lb. Thankfully we only need a 1/3 of a Cup. Traditionally the tapenade has high-quality olives, capers and anchovies.  I adjusted the Cook’s recipe and left out the anchovies in order to make it vegetarian but feel free to add them back in–it’s good with them in. I also either leave the olive oil out completely or just add in a tablespoon.  Experiment and tweak to taste

I recently made olive tapenade for a food day at work.  I topped some of my Lavash Crackers(check earlier blog)with the tapenade and some with my homemade mozzarella(future blog entry), and I was surprised by how many people were not familiar with this flavorful, French spread.  Well, I am here to introduce this Mediterranean taste-bud treat to you. This is a very bold flavor and you better like olives, but promise me, you’ll try it.  We all need a taste of  Southern France at various times in our lives, and I need it now to get through this bone-chillin’ Midwest deep-freeze. And who knows, maybe this will become your new comfort food too.

Take a 1/3 Cup pine nuts, un-roasted and grind to a paste.

Add the rest of  the ingredients to the food processor: kalamata olives, salt-cured black olives, capers, 2 anchovy fillets(not pictured), Dijon mustard and garlic.

Pulse 15 times until finely chopped.

After resting in the fridge for 18 hours, I can barely wait the full 18 hours, but here it is spread on bagel chips. It tastes better than it looks–really.

Black Olive Tapenade

Makes about 1 1/2 cups

The tapenade must be refrigerated for at least 18 hours before serving. It’s important to use untoasted pine nuts in this recipe so that they provide creaminess but little flavor of their own. We prefer the rich flavor of kalamata olives, but any high-quality brine-cured black olive, such as niçoise, Sicilian, or Greek, can be substituted. Do not substitute brine-cured olives for the salt-cured olives. Serve the tapenade as a spread with sliced crusty bread or as a dip with raw vegetables.

Ingredients

Instructions:

In food processor fitted with metal blade, process pine nuts until reduced to paste that clings to walls and avoids blade, about 20 seconds. Scrape down bowl to redistribute paste and process until paste again clings to walls and avoids blade, about 5 seconds. Repeat scraping and processing once more (pine nuts should form mostly smooth, tahini-like paste).

2. Scrape down bowl to redistribute paste and add olives, capers, anchovies, mustard, and garlic. Pulse until finely chopped, about 15 pulses, scraping down bowl halfway through pulsing. Transfer mixture to medium bowl and stir in oil until well combined.

3. Transfer to container, cover, and refrigerate for at least 18 hours or up to 2 weeks. Bring to room temperature and stir thoroughly before serving.

*Recipe copied from the Cook’s Illustrated website: https://www.cooksillustrated.com/recipes/7413-black-olive-tapenade

Fresh Tofu?

I had read about barrels of fresh tofu in a deli…somewhere.  I hadn’t been lucky enough to stumble over one in any deli I had happened upon.  Lamenting I did not have access to the delicious blocks of fresh tofu, which this was only imagined since I had never had anything but store-bought, I was determined to end this dilemma. If this fictional deli with the unknown name was not opening in a neighborhood near me, I will make my own!! The motivation to do this DIY project was once again, influenced by, America’s Test Kitchen. I must have read the directions a dozen times while I waited for the dried soybeans and nigari to arrive. This was definitely a new frontier for me. I did not grow up in a house where my Mother made tofu on the weekends, nor had I worked in an Asian restaurant and had witnessed it being made. No, no, I had nothing to compare it to and no history to draw from.  I was excited to think I could do this at home and have fresh blocks of tofu.  This is where I confess:  It isn’t easy or quick but the results are pretty tasty.

Tools and ingredients: Molds, nigari(a type of salt) and soy beans.  Not pictured but also needed: Cheese-cloth or food- grade muslin. The mold on the left is the plastic container with holes punched out of the bottom and other is a mold I recently purchased.

Start out by soaking 8 ozs beans for 12-18 hours. The beans here have been soaked for 18 hours.

Take 1 cup beans, 3 cups water and process in blender.  Repeat this twice and pour into Dutch oven.

Bring beans and water to a boil over medium-high heat, stirring often.  Once boiling, reduce heat and cook 10 more minutes until slightly thickened.

Prepare a colander with triple layer of food-grade muslin or cheesecloth and place the colander over a bowl or pot. Pour the soy liquid into the muslin.  The cloth will catch the soy curds and the bowl beneath the colander should be smooth, soy milk. Gather up the ends of the muslin and squeeze out the excess liquid.  Put the curds aside for another use(I feed it to chickens, but I am guessing there are other uses). Pour the liquid back into a clean dutch oven and bring back to a boil on medium-high heat. Remove from heat and add a 1/4 Cup of the diluted nigari while stirring. Let rest for two minutes, covered.  Uncover dutch oven and add remaining nigari. Wait 20 minutes, undisturbed.

Gently scoop out the curd and place in a cheese-cloth lined mold.

Cover curds with extra cheese-cloth and weight it with a two-lb anything. Keep the weight on until desired firmness.

The finished product.  It ended up in a curry stew.

Taken from America’s Test Kitchen DIY

Tofu
8 ounces(1 1/4 cups)dried soybeans, picked over and rinsed
9 1/2 cups water, plus extra for soaking beans
2 teaspoons liquid nigari

1. Place beans in large bowl or container and add enough water to cover by 2 inches. Soak until beans are pale yellow and split apart when rubbed between fingertips, 12 to 18 hours.

2. Drain and rinse beans(you should have about 3 cups beans). Working in batches, process 1 cup soaked soybeans and 3 cups water in blender until mostly smooth, about 3 minutes. Transfer mixture to Dutch oven and repeat twice more with remaining 2 cups soybeans and 6 cups water.

3. Line colander with butter muslin or triple layer of cheesecloth and set over large bowl. Bring soy milk mixture to boil over medium-high heat, stirring frequently with rubber spatula to prevent scorching and boiling over. Reduce heat to medium-low and simmer, stirring frequently, until slightly thickened, about 10 minutes.

4. Pour soybean mixture into prepared colander to strain. Being careful of hot soy milk, pull edges of muslin together to form pouch, and twist edges of muslin together. Using tongs, firmly squeeze soybean pulp to extract as much liquid as possible. You should have about 8 cups of soy milk; discard soybean pulp or reserve for other use. Transfer soy milk back to clean Dutch oven and bring to boil over medium-high heat, stirring occasionally to prevent scorching. Remove pot from heat. Combine remaining 1/2 cup water and nigari in measuring cup.

5. Begin stirring soy milk in fast, figure-eight motion with rubber spatula. fast, about 6 stirs. While still stirring, add 1/4 cup prepared nigari mixture. Stop stirring and wait until soy milk stops moving. Cover pot and let sit undisturbed for 2 minutes. Uncover, sprinkle remaining 1/4 cup nigari mixture on surface of milk, and gently stir using figure-eight motion, about 6 stirs. Cover pot and let sit undisturbed until curds form and why is pooling on top and around sides of pot, about 20 minutes.

6. Line tofu mold with butter muslin or triple layer of cheesecloth and place in colander set over large bowl or sink. Using skimmer or large slotted spoon, gently transfer soy milk curds to prepared mold, trying not to break up too much of their natural structure. Cover top of curds with excess muslin and place top of press in place. Weight with 2-pound weight. Press tofu until desired firmness is reached: 20 minutes for soft; 30 minutes for medium; 40 to 50 minutes for firm. Gently remove tofu from mold and place in pie plate or baking dish. Fill with cold water to cover and let sit until tofu is slightly firmer, about 10 minutes. Tofu can be refrigerated in airtight container filled with water for up to 1 week; change water daily.

Notes:  I had a tough time finding liquid nigari, so I bought flakes. Here is a link to Nigari. I add two teaspoons flakes to the 1/2 cup of water and stir until dissolved..

These are the beans I ordered, Bob’s Red Mill Organic Soy Beans; one bag will make 3 squares of tofu.

Don’t worry if you don’t have a mold, I fashioned one a plastic container with holes punched out of the bottom.

Breakfast in a hurry

Mornings are always a bit frenetic at my house.  I sleep-in until the very last minute and the husband can never leave soon enough(we commute together most days).  This combination makes for stressful mornings, so I do whatever I can to make the am more of a “grab and run.”  I started making a large portion of steel cut oats some time ago.  It preserves well and makes for a satisfying breakfast.

A double batch lasts five days between my husband and myself. I add eight cups of water to a pot and bring the water to boil. Once boiling, I add two cups of steel cut oats. Stir once and then wait until it comes back to a boil. Once it does, lower the heat to a simmer or a soft boil and stir occasionally.
Cook for twenty minutes or so(it’ll be thick but still runny).Take if off the heat and let sit until cool. 

Stir the water into the oats and pour it into a container where you can slice it into sections and refrigerate.

Ok, now you have breakfast for every morning of the week.  Scoop about a half a cup into a bowl or microwaveable container, add a little milk and heat in a microwave(30 seconds to a minute). Stir and add your goodies.  Mine will be a sliced banana, mixed, raw nuts and a sprinkle of dark chocolate. It’s a pretty delicious way to start my day, and I’m full for four hours plus. 

Note: I buy my organic, steel cut oats from my local co-op.  A 5 lb bag is around $9.00, and Amazon sells Bob’s Red Mill for about $18.77 for 6 lbs. Bob’s Red Mill Steel Cut Oats 

Let’s get crackin’

I remember reading about these crackers from one of the books my husband blames my DIY bug(obsession) on. We were taking an extended weekend for our annual fill of Shakespeare and staying in a small, rustic cabin in the southwestern part of WI. Did I mention it was small?  The “loft” ceiling was very low and we must have averaged 6-8 knocks on the head in just the first hour we were there.  I think I muttered something about being concussed before the weekend even started. To combat a sore noggin, I dug into my newly purchased ebook, America’s Test Kitchen-DIY

Make crackers?  The thought never occurred to me until I opened the Test Kitchen’s wonderful book.  The recipe was for Lavash crackers, and when I cracked a piece off coming out of the oven, I was hooked. When I make a foundation item like mustard, bread, or cheese, I weigh the labor against the final product. Was the hassle worth the end-result?  My husband, who turns every situation into a mathematical word- problem, measures it by price.  I don’t think price tells the whole picture, so I tend not to use that as a measurement. Making crackers is a bit more labor intensive for something I can buy for a couple of bucks in the store, but after making them, I am not sure I can buy something this good.

Add semolina, whole wheat, all purpose flour and salt to a stand mixer.

Add warm water and evoo and knead for 7 to 9 minutes

Knead dough by hand and divide into four balls. I weighed the ball after kneading and made sure I divided the dough into four equal pieces.
Spray evoo on the dough and wrap in plastic wrap. Let rest for one hour.
Invert a jelly roll pan, put something underneath to keep it from sliding, and roll out the dough.  Using a fork, indent every two inches.
Brush the egg, and spread the sesame seeds, sea salt and pepper. Gently press into the dough. 
Ummm, delicious crackers I couldn’t keep my fingers from out of. 
This recipe is taken from, America’s Test Kitchen-DIY:
Lavash Crackers(Makes about 1 pound)
11/2 cups semolina flour
3/4 cups whole wheat flour
3/4 cups all-purpose flour
3/4 teaspoon salt
1 cup warm water
1/3 cup extra-virgin olive oil, plus extra for brushing
1 large egg
2 tablespoons sesame seeds
2 tablespoons flake sea salt
1 teaspoon coarsely ground pepper
1. Using stand mixer fitted with dough hook, mix flours and salt on low speed. Gradually add water and oil and knead until smooth and elastic, 7-9 minutes. Turn dough out onto lightly floured counter and knead by hand to form smooth, round ball. Divide dough into 4-equal pieces, brush with oil, and cover with plastic wrap. Let rest at room temperature for 1 hour.
2. Adjust oven rack to upper-middle and lower-middle positions and heat oven to 425 degrees. Lightly coat two 18 by 13-inch inverted(or rimless) baking sheets with vegetable oil spray.
3. Press 1 piece of dough(keep remaining dough covered with plastic), into small rectangle, then transfer to one of prepared sheets. Using rolling pin and hands, roll and stretch dough evenly to edges of sheet. Using fork, poke holes in dough at 2-inch intervals. Repeat with second piece of dough on second prepared sheet.
4. Brush rolled-out dough with beaten egg, sprinkle with sesame seeds, sea salt and pepper, then gently press seasonings into dough. Bake crackers until deeply golden brown, 15 to 18 minutes, switching and rotating sheets halfway through baking. Transfer crackers to wire rack and let cool completely. Repeat rolling, seasoning, and baking with remaining 2 pieces of dough, making sure baking sheets are completely cool before rolling out dough.
5. Break cooled lavash crackers into large pieces. Lavash can be stored at room temperature in airtight container for up to 2 weeks. 
Make these for your next party and you won’t need dip.